I have a lovely new desk and I am way more proud of it than I ought to be

This is a story of a teensy-weensy victory that has really put me in a good mood. I am way more proud of this than I ought to be because it’s really a very minor accomplishment that anybody with a small drill and the ability to read instructions can do, but these days even tiny little moments like these in which things all come together in a fulfilling way are very rare for me.

I always thought I had rather modest requirements for a computer desk, but it looks as though I was wrong. Ordinarily I’ve got the left side of my computer desk up against a wall with one computer partially underneath the left side of the desk, more or less up against the wall. Because of this setup, I always sit at the right side of the desk. That’s why I like to have the keyboard tray on the right side of my desk. Either that, or a keyboard tray that extends from one side of the desk all the way to the other side.

I had to replace my desk since it was ruined during Sandy. I thought it would be easy to find a desk with a keyboard tray on the right but it was surprisingly difficult. I found a few but none of them had any shelves or drawers or any other sort of storage space. I prefer a desk with either a couple of shelves or drawers to store cables and adapters and miscellaneous things like that.

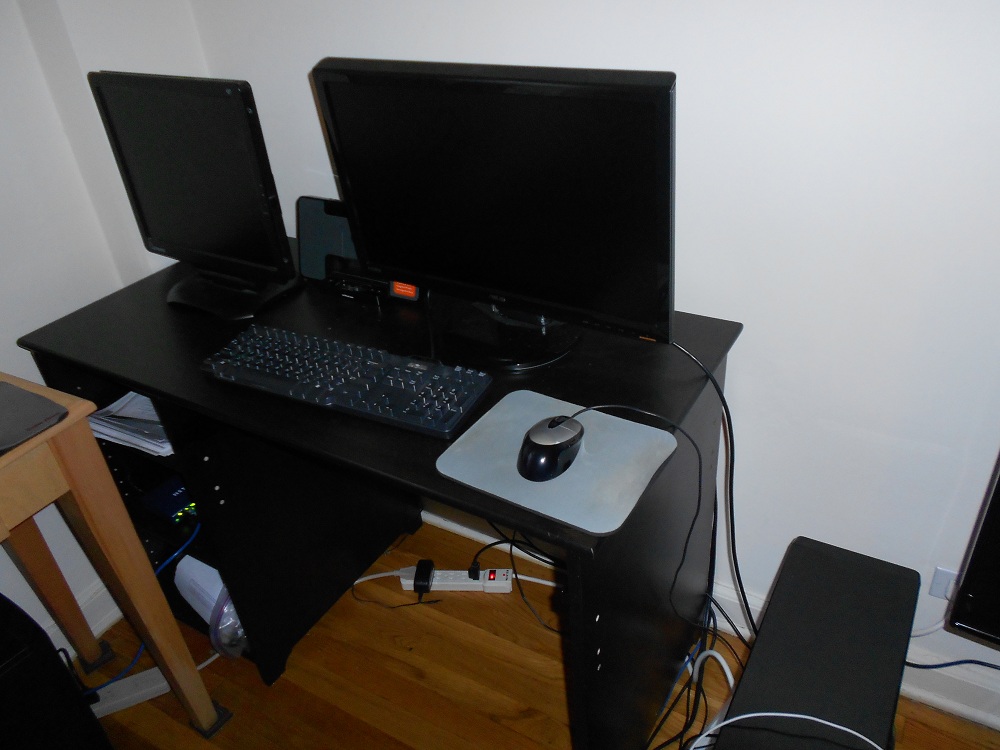
I finally had the bright idea of buying a desk with storage features that I liked and then adding a keyboard tray myself. This was bold on my part, because I’m not someone you could ever call “handy”. I decided on the $99 IKEA Vallvik. It has shelves that you can choose to put either on the left or the right. It’s also just about the perfect width for a keyboard tray and it’s made of solid pine instead of that honeycomb stuff some IKEA products are made of, so I was pretty certain that the screws would hold in place well enough. Here’s the desk before I began my little project:
vallvik01

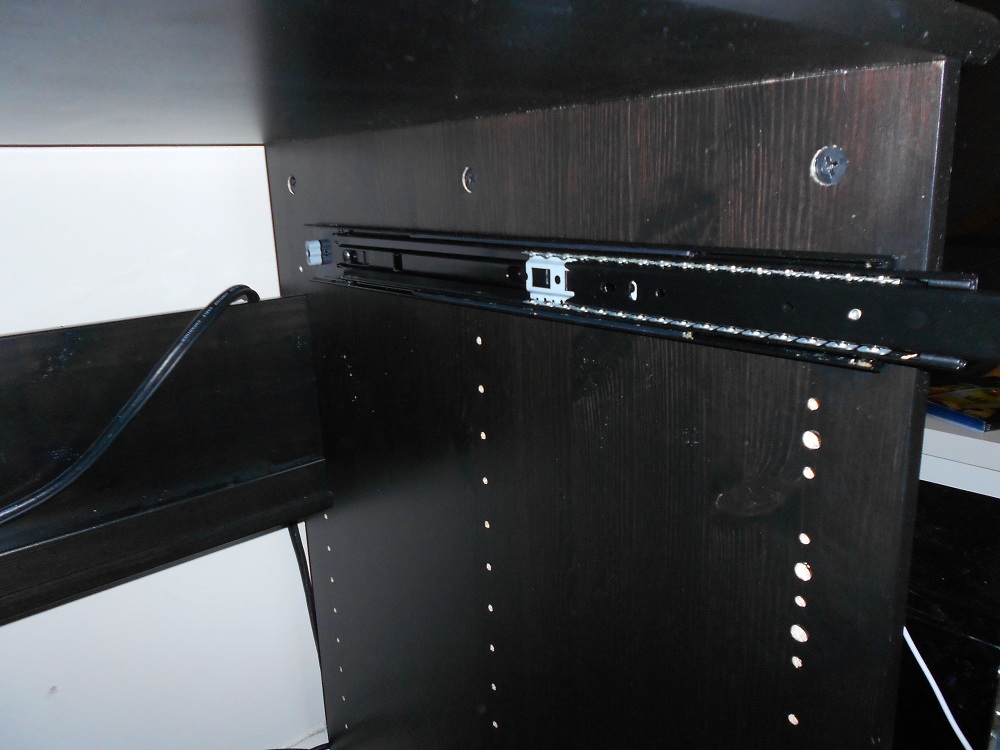
I had a look online at some ready-made keyboard trays but I didn’t like the idea that they wouldn’t run the full length between the shelves at the left and the right side of the desk. I wanted my keyboard tray to span that entire space. So I bought a set of 18-inch side-mount drawer slides (Fulterer 5000) and mounted them under the desk. I thought it was neat that these drawer slides come in different colors. I bought the black ones to match the desk.

If you're smart, you'll get a friend to help you install these.

If you’re smart, you’ll get a friend to help you install these.

I was super lazy and didn’t even remove the stuff from my desk while installing these. That didn’t turn out to be a problem, though it sure was difficult installing them alone. I ended up stacking a bunch of books on the floor to hold the slides up while I drilled some holes to screw the slides in. If I had somebody to hold the slides for me I would have finished in much less time and I wouldn’t have bumped my head on the underside of the desk nearly as many times as I did. The best way to do this would have actually been to disassemble the desk and lay the two side pieces in which the drawer slides get installed flat on a table.

The next step was to measure the distance my keyboard tray would need to be. According to the instructions for the drawer slides:

Check that the side clearance between drawer and cabinet side
is at least 12.7mm (1/2in.) on each side. Maximum allowable
clearance is 13.5mm (17/32 in.)

The distance from one side of the desk to the opposite was 28 inches. 28 inches minus two halves of an inch is 27 inches. So I got a board 27 inches long. The other two dimensions don’t matter too much as long as the board is not so wide that it doesn’t fit under the desk and not so thick that it looks silly.

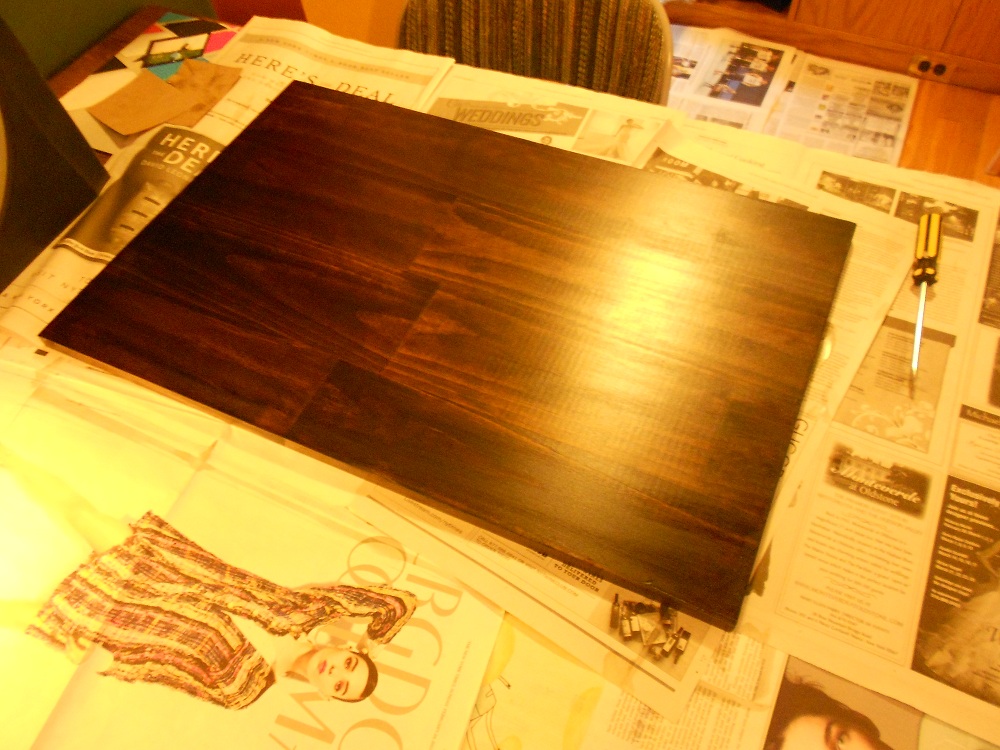
So I got a board 27x18x1 inches. It was unfinished pine so it was a very light color, similar to the color of the table in the far left side of the first picture on this page. It would have looked lousy if I installed it as-is. So I got “Minwax Dark Walnut 2716” wood stain and a polyurethane finish. I followed the directions on the can and did 2 coats of the stain, allowing 4 hours drying time between each, followed by 2 coats of the finish, letting it dry 24 hours between each coat of finish. Now my board is a work of art.

vallvik03

All in all, it took 4 days of on-and-off staining, finishing, and drying before the board was ready for installation. I probably would have been just fine without waiting the full 24 hours for each coat of finish, but I wasn’t in any hurry so I was happy to wait.

Again, it would have been much easier to have somebody hold either the board or the slide while attaching the “drawer profile” pieces, but I managed to get it done myself with only a few minor splinters. Thank goodness I sanded that thing so well beforehand or else I might have bled to death.
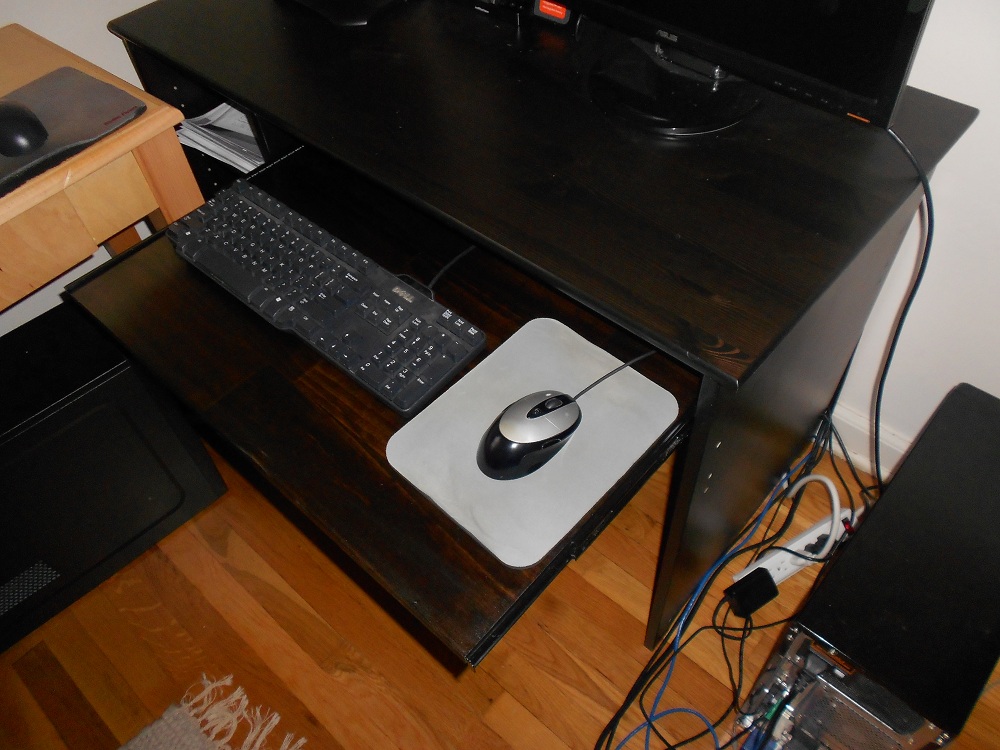
The final result.

The final result.


You can see when I use the flash on the camera that the color doesn't match quite perfectly, but it's not noticeable under normal light conditions.

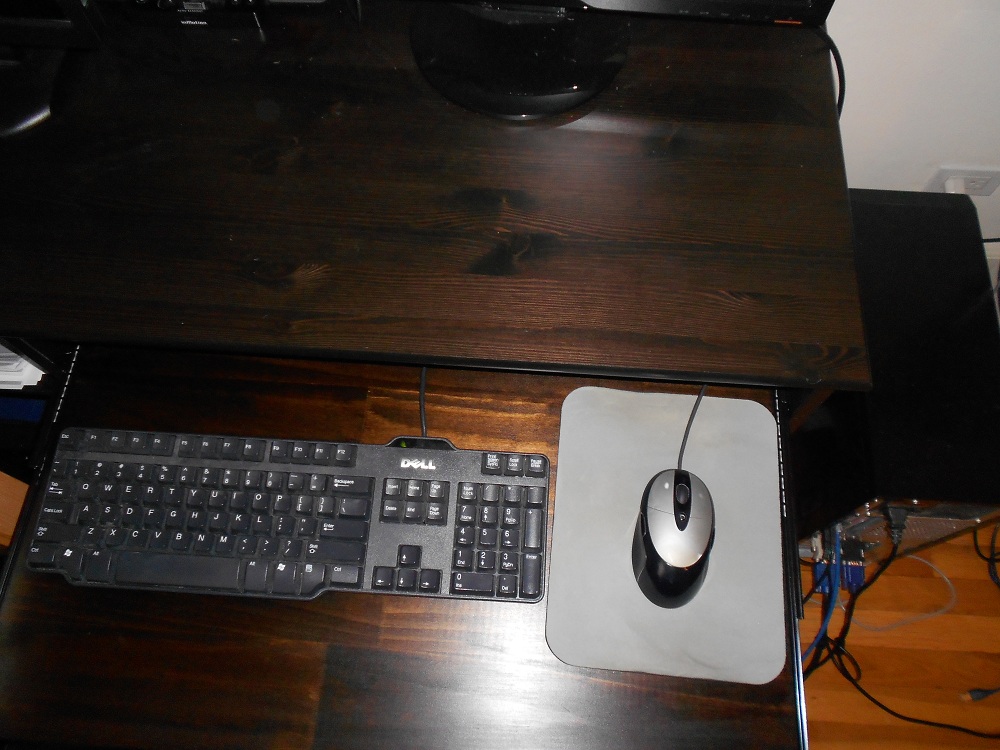
You can see when I use the flash on the camera that the color doesn’t match quite perfectly, but it’s barely noticeable under normal light conditions.

I really do wonder if I’m blacklisted by the USPS

Today I had the 5th consecutive parcel I’ve attempted to have delivered go straight to the post office instead of to my home address. None of them have had signature confirmation. They’ve all been either priority mail or parcel post. Most had DC. There was one that didn’t. Either the USPS has blacklisted my address or they’ve put a new carrier on my route who is consistently doing his job terribly wrong.

It really adds insult to injury when, in addition to having to travel every single day to pick up junk mail and letters, you also have to travel to the post office to pick up parcels. There’s no reason to pay extra for signature confirmation if the recipient has to travel to the post office in person and show I.D. in order to get a parcel that doesn’t even have DC on it.

Maybe I’ll stop defending the USPS now. In the past 2 months they’ve destroyed one parcel, sent 3 to the wrong city, and decided to send these 5 parcels to the post office for pickup when they should have been delivered by a carrier.

Extracting Wii save files from a BootMii NAND dump

My water-damaged Wii. Believe it or not, this image has a happy ending.

My water-damaged Wii. Believe it or not, this image has a happy ending.

So other than all my furniture and my apartment itself one of the various items that was destroyed in Hurricane Sandy was my Wii. Replacing the hardware is easy since a Wii is only about 60 to 70 USD these days and will presumably just continue to drop in price since the Wii U came out. The thing that’s impossible to replace is the save data. That’s why I wanted to see if there was some way of recovering my save data and copying it to my replacement Wii.

My Wii console, AV cables, and power brick were destroyed. My controllers and WiiMotes were in a box on a high shelf so they were fine. This includes a Gamecube controller, which I found out was necessary for this process.

My place was not safe to enter for months and still isn’t. That doesn’t mean that I didn’t have a chance to retrieve some stuff though. I took the Wii, placed it in some bubble wrap, and put it in a box that went straight to a storage facility along with everything else that was in the apartment.

It was just about a week ago that I had my first opportunity to see if it had been damaged. I disassembled it to check and found that it was absolutely covered in rust on the inside. I went ahead and tried cleaning it up a bit with cotton swabs and some alcohol and actually succeeded in getting it to boot. Unfortunately, I didn’t have a WiiMote with me at the time so I turned it off. That was the last time it ever boot normally.

Every time I tried to boot it afterwards it would show the green LED, the blue LED on the front panel would flash once, and the fan would spin up, but there would be no audio or video on the TV screen and no WiiMote would sync to it. The TV did detect a signal but the screen would just stay black.

Fortunately, I had Priiloader installed on it. I held the reset and power buttons at the same time to boot to Priiloader. I inserted an SD card prepared with Bootmii and used the option in Priiloader to launch Bootmii as IOS (since I hadn’t been able to install it as boot2 when I first got the Wii). I needed to use the Gamecube controller for this since no WiiMote would sync.

Once in Bootmii I made a NAND backup. It was from this backup that I was able to extract my saves. I used ShowMiiWads to extract the files from the nand.bin. I was then pointed in the right direction by this thread on WiiBrew. In the “title” directory of the extracted NAND dump there’s another directory called “00010000” with a bunch of directories inside containing the saves for each game. I copied all of these directories into a folder called “savegames” on the root of my SD card.

Once copied, I added “00010000” to the beginning of the name of each folder that I copied to the “savegames” folder. Then I moved the files inside the “data” and “content” folders into their respective parent directories.

For example: SDroot://savegames/00010000534e5445/

Inside the “00010000534e5445” folder are the actual save files such as “save.dat” and “banner.bin”. I’m not sure if the “title.tmd” files from the “content” folders are necessary, but I put them in there anyway. This whole process of dragging and dropping was a bit of a pain in the neck because I had saves for something like 30 different games.

I then used Save Game Manager GX from this link on the Wii to install the save files from the SD card to the Wii. It took many attempts because I kept having to try different versions of the program since I kept getting one error or another. This is the one that worked for me. Of course, you do have to already have a save game on the Wii for each save you want to restore. So I just started up each game and made a save before trying to restore my saves from the old Wii.

Ultimately I was able to restore somewhere in the area of 200 gameplay hours worth of save data to my replacement Wii from the old one. It did take me a few hours of research and trial and error to figure out how to accomplish this, but I think it was worth it, especially considering that there’s nothing much to do around here while I wait for the co-op board to get off their asses and hire someone to do repair work. They won’t let us hire our own people. Pfttt…

For the record, I think the problem with the water-damaged Wii is that, though the motherboard itself is fine, either the Bluetooth module, the WiFi module, or both were damaged by the water. The DVD drive may also be bad. I read that a Wii will boot properly without a DVD drive, but it will refuse to boot if either the Bluetooth or WiFi module is damaged or missing. This means the system could actually be fixed if I replaced those two boards but I don’t think it’s worth it now that I have a replacement Wii and my save games so I’ll probably just see if I can sell it on eBay. The reason Priiloader worked, I suppose, is that it must load before the Wii checks to see if the BT or WiFi modules are damaged.

I wasted my entire stupid day troubleshooting this stupid Arris modem

So I’m living elsewhere temporarily while my apartment is being demolished. I’ll be here until it’s rebuilt. Who knows when that’ll be. But that’s not the point. The point is that I have Time Warner Cable here and I’ve had the chance to use Road Runner for an extended period of time now. I’ve used Road Runner at friends’ homes several times in the past and had opportunities to do speed tests and the like, but I’ve never had the chance to use it on my own terms, with my own computers and home network equipment. I’m very upset at somebody — I know not whom — about a grievous oversight in the instruction manual for the DOCSIS 3.0 modem/router TWC gave me. The trouble is that I don’t know who to blame. It’s an Arris TG862G. Frankly, I had never even heard of Arris before they gave me this thing. The installer, who mentioned, by the way, that he has FiOS at home, said that the device is both a modem and a router, but that TWC doesn’t let customers change the SSID or the passphrase on the network, so if a customer wants to change that information, he or she must use his or her own router. I didn’t really care, since I do have my own router and I figured I’d just have to live with a suboptimal home network split on two different subnets (192.168.0.xxx on the Arris router and 192.168.1.xxx on my router). I didn’t think I was able to have TWC put the Arris in bridge mode since the TWC connection is on the account of the owner of the place in which I’m living (though nobody else will be using the connection). I figured I’d either do the 2 subnet thing or I’d simply use my own router as a switch and actually use the Arris router as a router. I figured I’d decide once I logged into the web configuration pages on the Arris and saw what features it had. If they compared favorably with my own router I’d just go ahead and use the Arris and use my own router as a switch (I have a real 24-port switch, but it, along with most of my stuff, is in storage until the apartment is fixed)

Anyway, the reason I’m angry is because either Arris wrote bad instructions or TWC made a slightly modified firmware for the Arris modem with an annoying feature. The manual says you can access the web GUI at 192.168.0.1, which of course is similar to most routers. I connected my computer directly to the Arris via Ethernet cable with nothing else connected to the modem but the coax cable and the AC adapter. I set my computer to get an IP address automatically to rule out the possibility that some pre-existing configuration on my computer was causing problems. I typed in the address, waited… and it timed out. After trying all sorts of other combinations (10.0.0.1, 192.168.1.1, 192.168.1.100, 192.168.0.100, etc…) I finally figured out today (2 days of web searching later) that you can only access the web configuration GUI if you unplug the coaxial cable from the Arris modem first. If you have the coaxial cable plugged in and you try to access 192.168.0.1, it’ll just time out. The fact that this isn’t mentioned in the manual is a major oversight which caused me a huge pain in the neck. All I wanted to do was access the port forwarding settings page, which should be the simplest thing in the world but because I lacked this simple bit of information I had to go on a wild goose chase of searching through forums and support pages, none of which actually mentioned this. Hopefully posting this information will save somebody a bit of time configuring his or her Arris cable modem/router in the future. I just wish I knew whether it’s Arris that made this feature or if it was an adjustment that TWC does to the units they send to customers. I know that Comcast uses this same modem for some of their customers, so I’d be interested in learning if they also suffer from this “feature”.

P.S. The connection tests about 35Mbps/5Mbps to test sites in the NY/NJ area.

I’ll be offline for some weeks

This is the only water-related picture I have handy at the moment.

my apartment is flooded by Hurricane Sandy. Most of my hard drives are undamaged because I managed to move them to high shelves, but a few were submerged. Anyway, the damage means the place is not presently safe to live in, though it’s just as well since all the furniture was ruined. Once the place is fixed and I get some furniture I’ll be back online.