I bought this console with no information about it other than a picture. When it arrived and I saw this I knew saving the console was worth my time. God, I love eBay.
So Halloween just passed and I’ve graverobbed together a nice GW3DS compatible 3DS XL for myself out of two broken consoles. I had first bought a console with a broken hinge, thinking I might fix it. However, I quickly realized that, if I could play my cards right, I might save a bit of money and a whole lot of time by combining two broken consoles together to make one functional console, instead of buying replacement parts separately. The other reason I chose to go this route is that replacement 3DS XL parts are few and far between. There are no Chinese companies that I’m aware of that make replacement housing parts yet, and the only time that official Nintendo replacement housing comes up for sale is when somebody is parting out their own console, which is not an everyday occurrence even on eBay. There are some companies that make aftermarket replacement LCD screens, but they’re usually quite expensive.
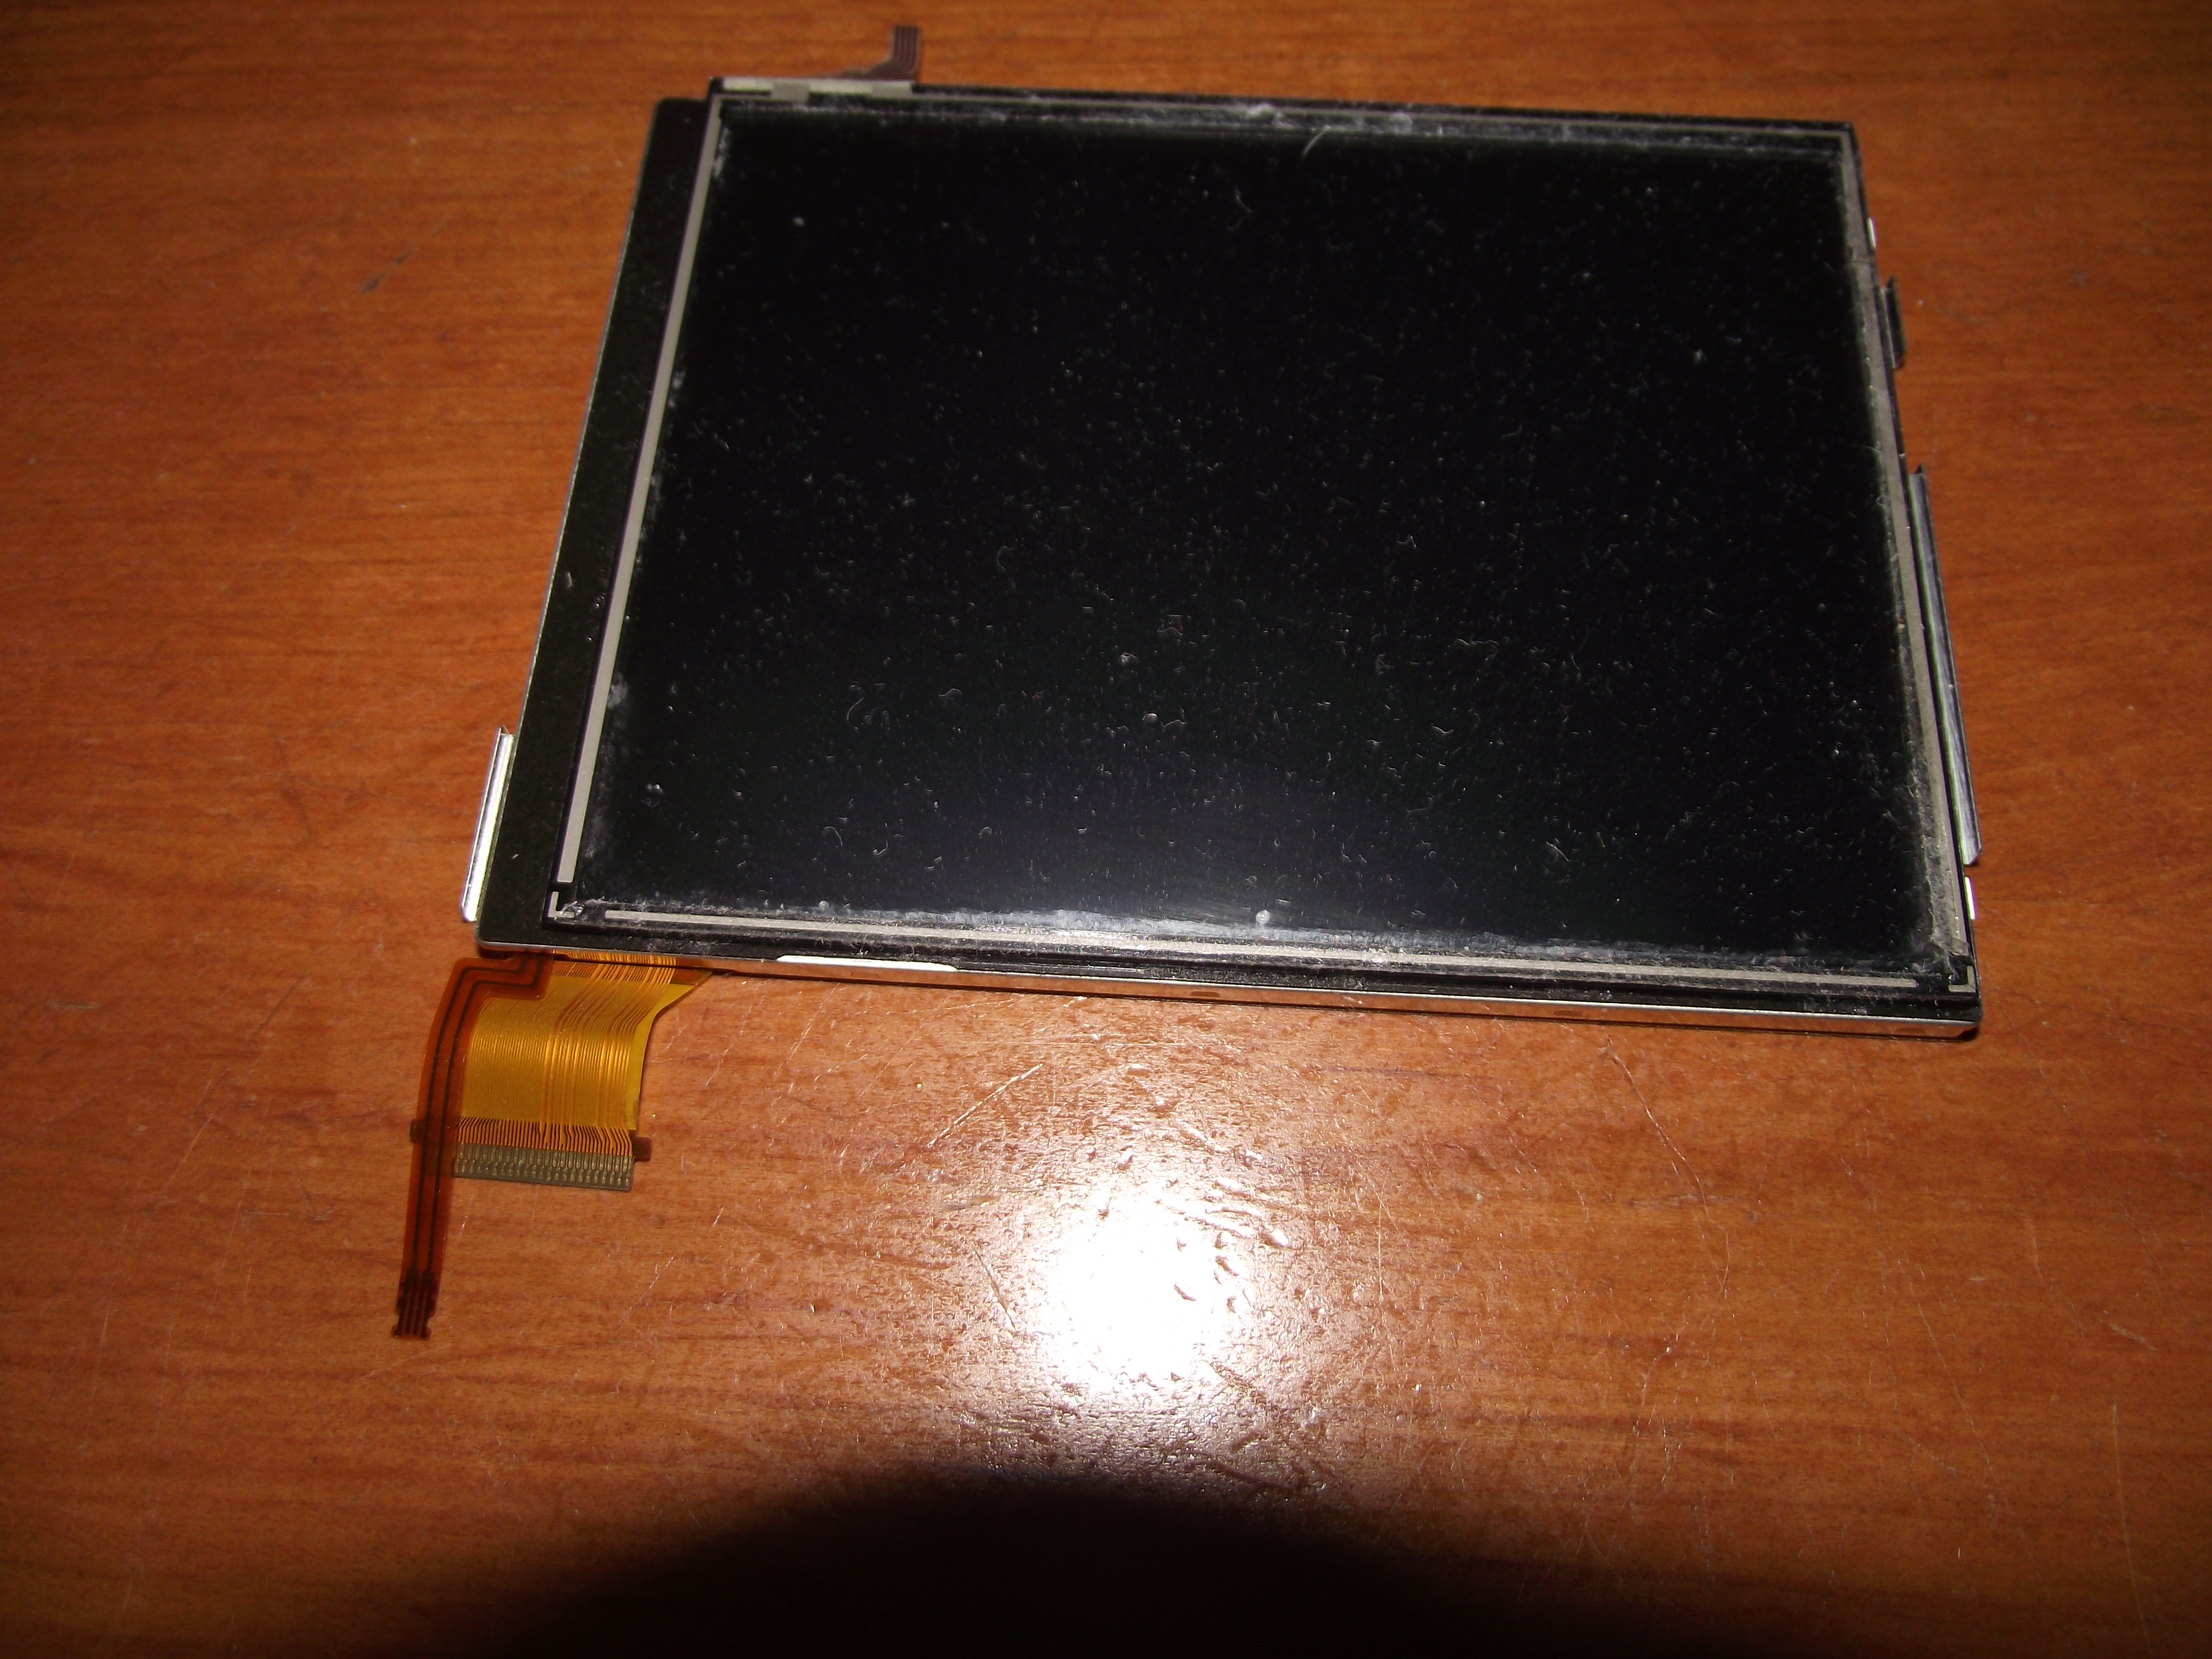
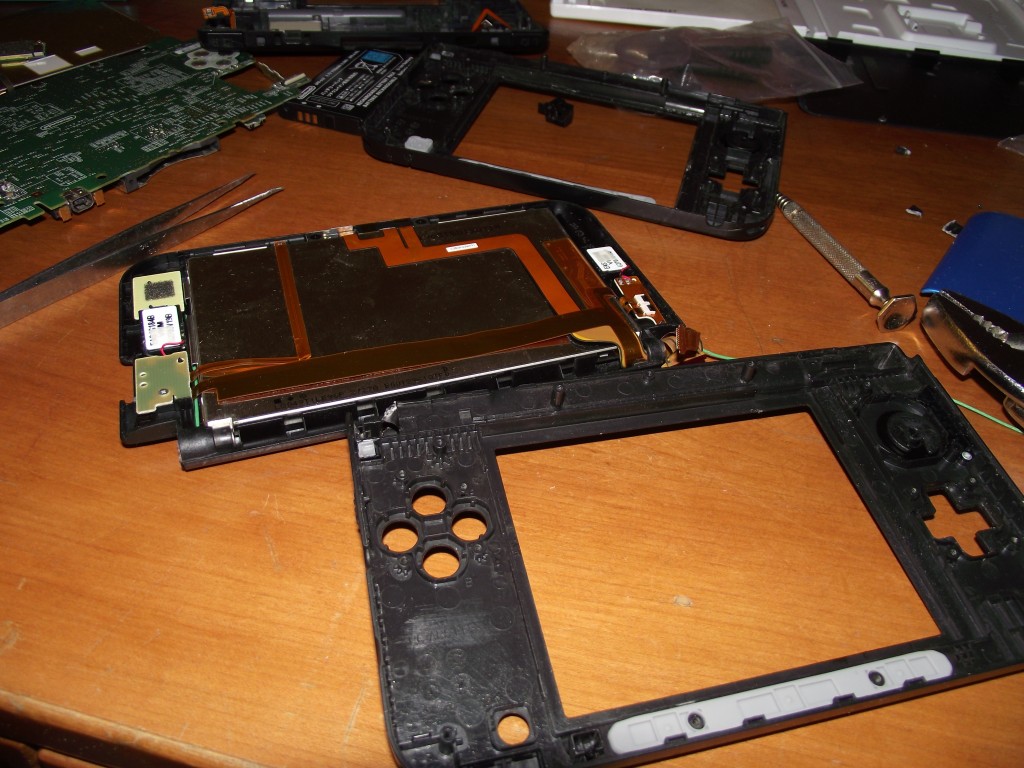
When I received the console the first thing I did was check that there was nothing else wrong with it besides the lower LCD. This was a risky move, since you never know what sorts of problems sellers will leave undisclosed on eBay auctions. They may mention one thing that’s wrong with the console but neglect to mention several other larger issues. Fortunately, when I got the above console the only thing wrong with it was that the lower LCD had some slight damage that caused those vertical lines in the picture. There were also cracks in the front housing. Luckily the uupper housing was not broken so I didn’t have to go through the trouble of rolling the ribbon cables through the hinge. I took a good lower LCD and digitizer from another console I had purchased with smashed up housing and bought a replacement front housing section for $15.

The first step, of course, is disassembly. The best method, by the way, to remove those two little rubber things on the bottom of the console without damaging them is to use a sewing needle to pry them up.

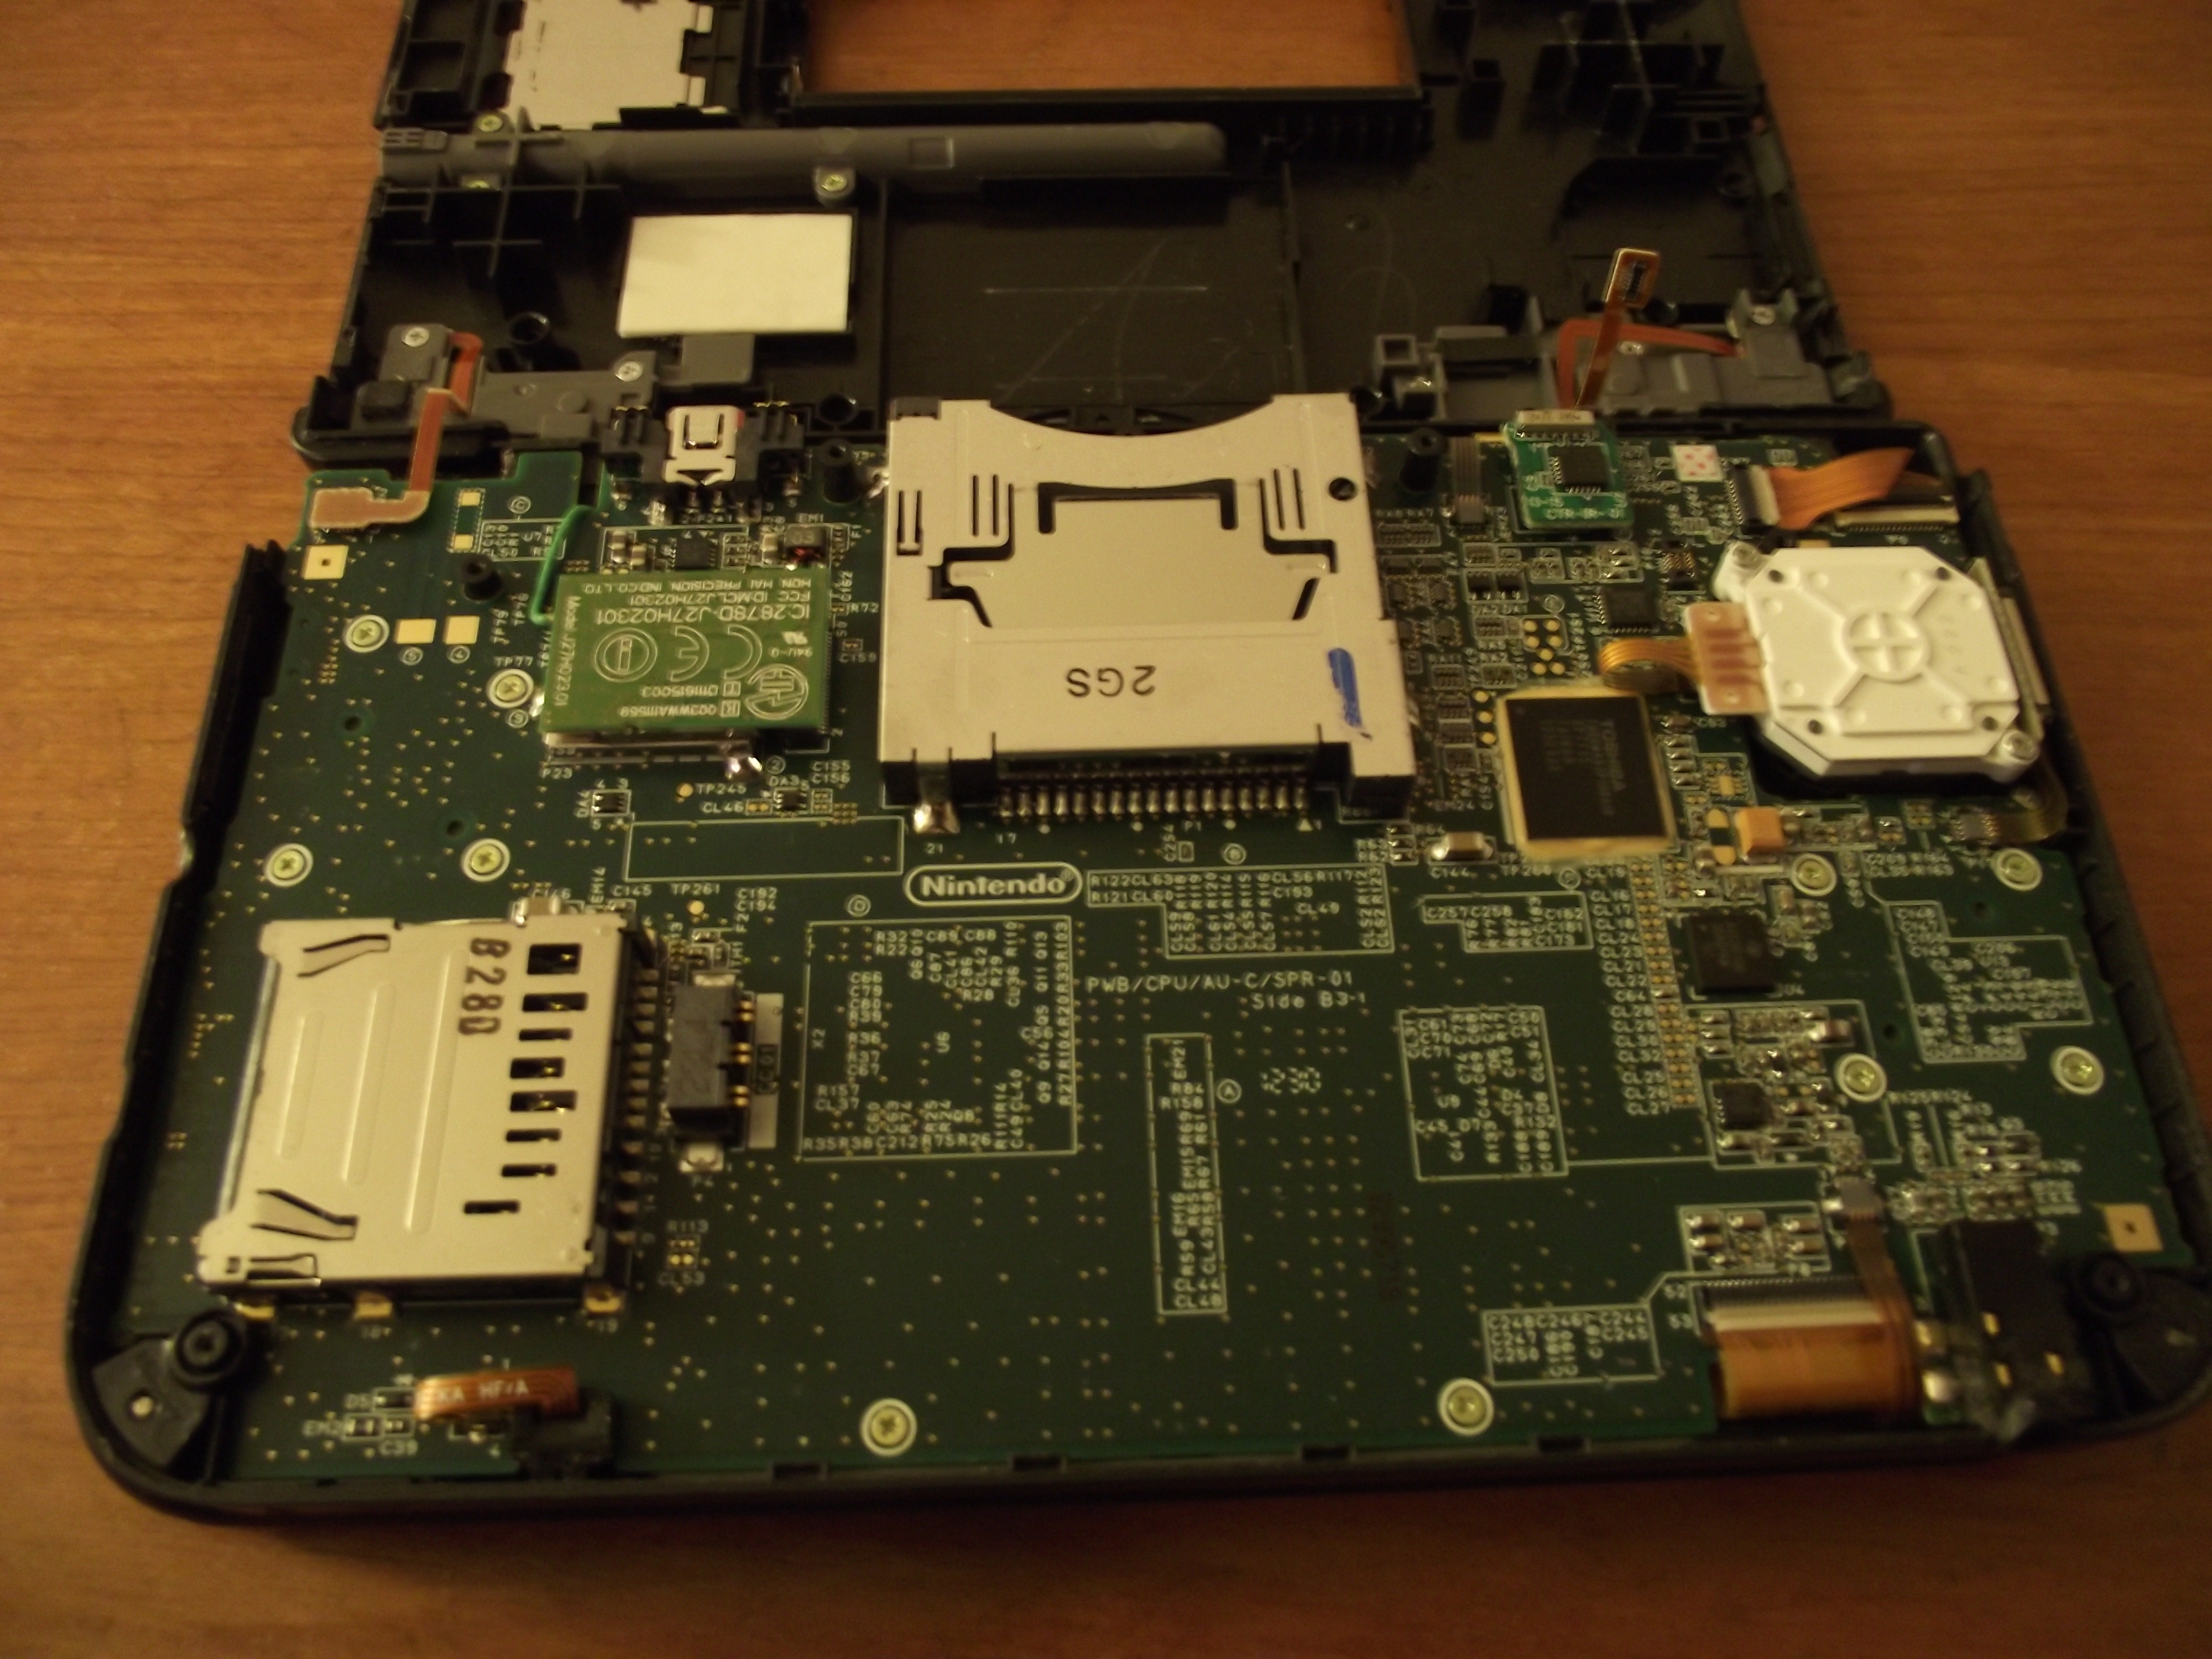
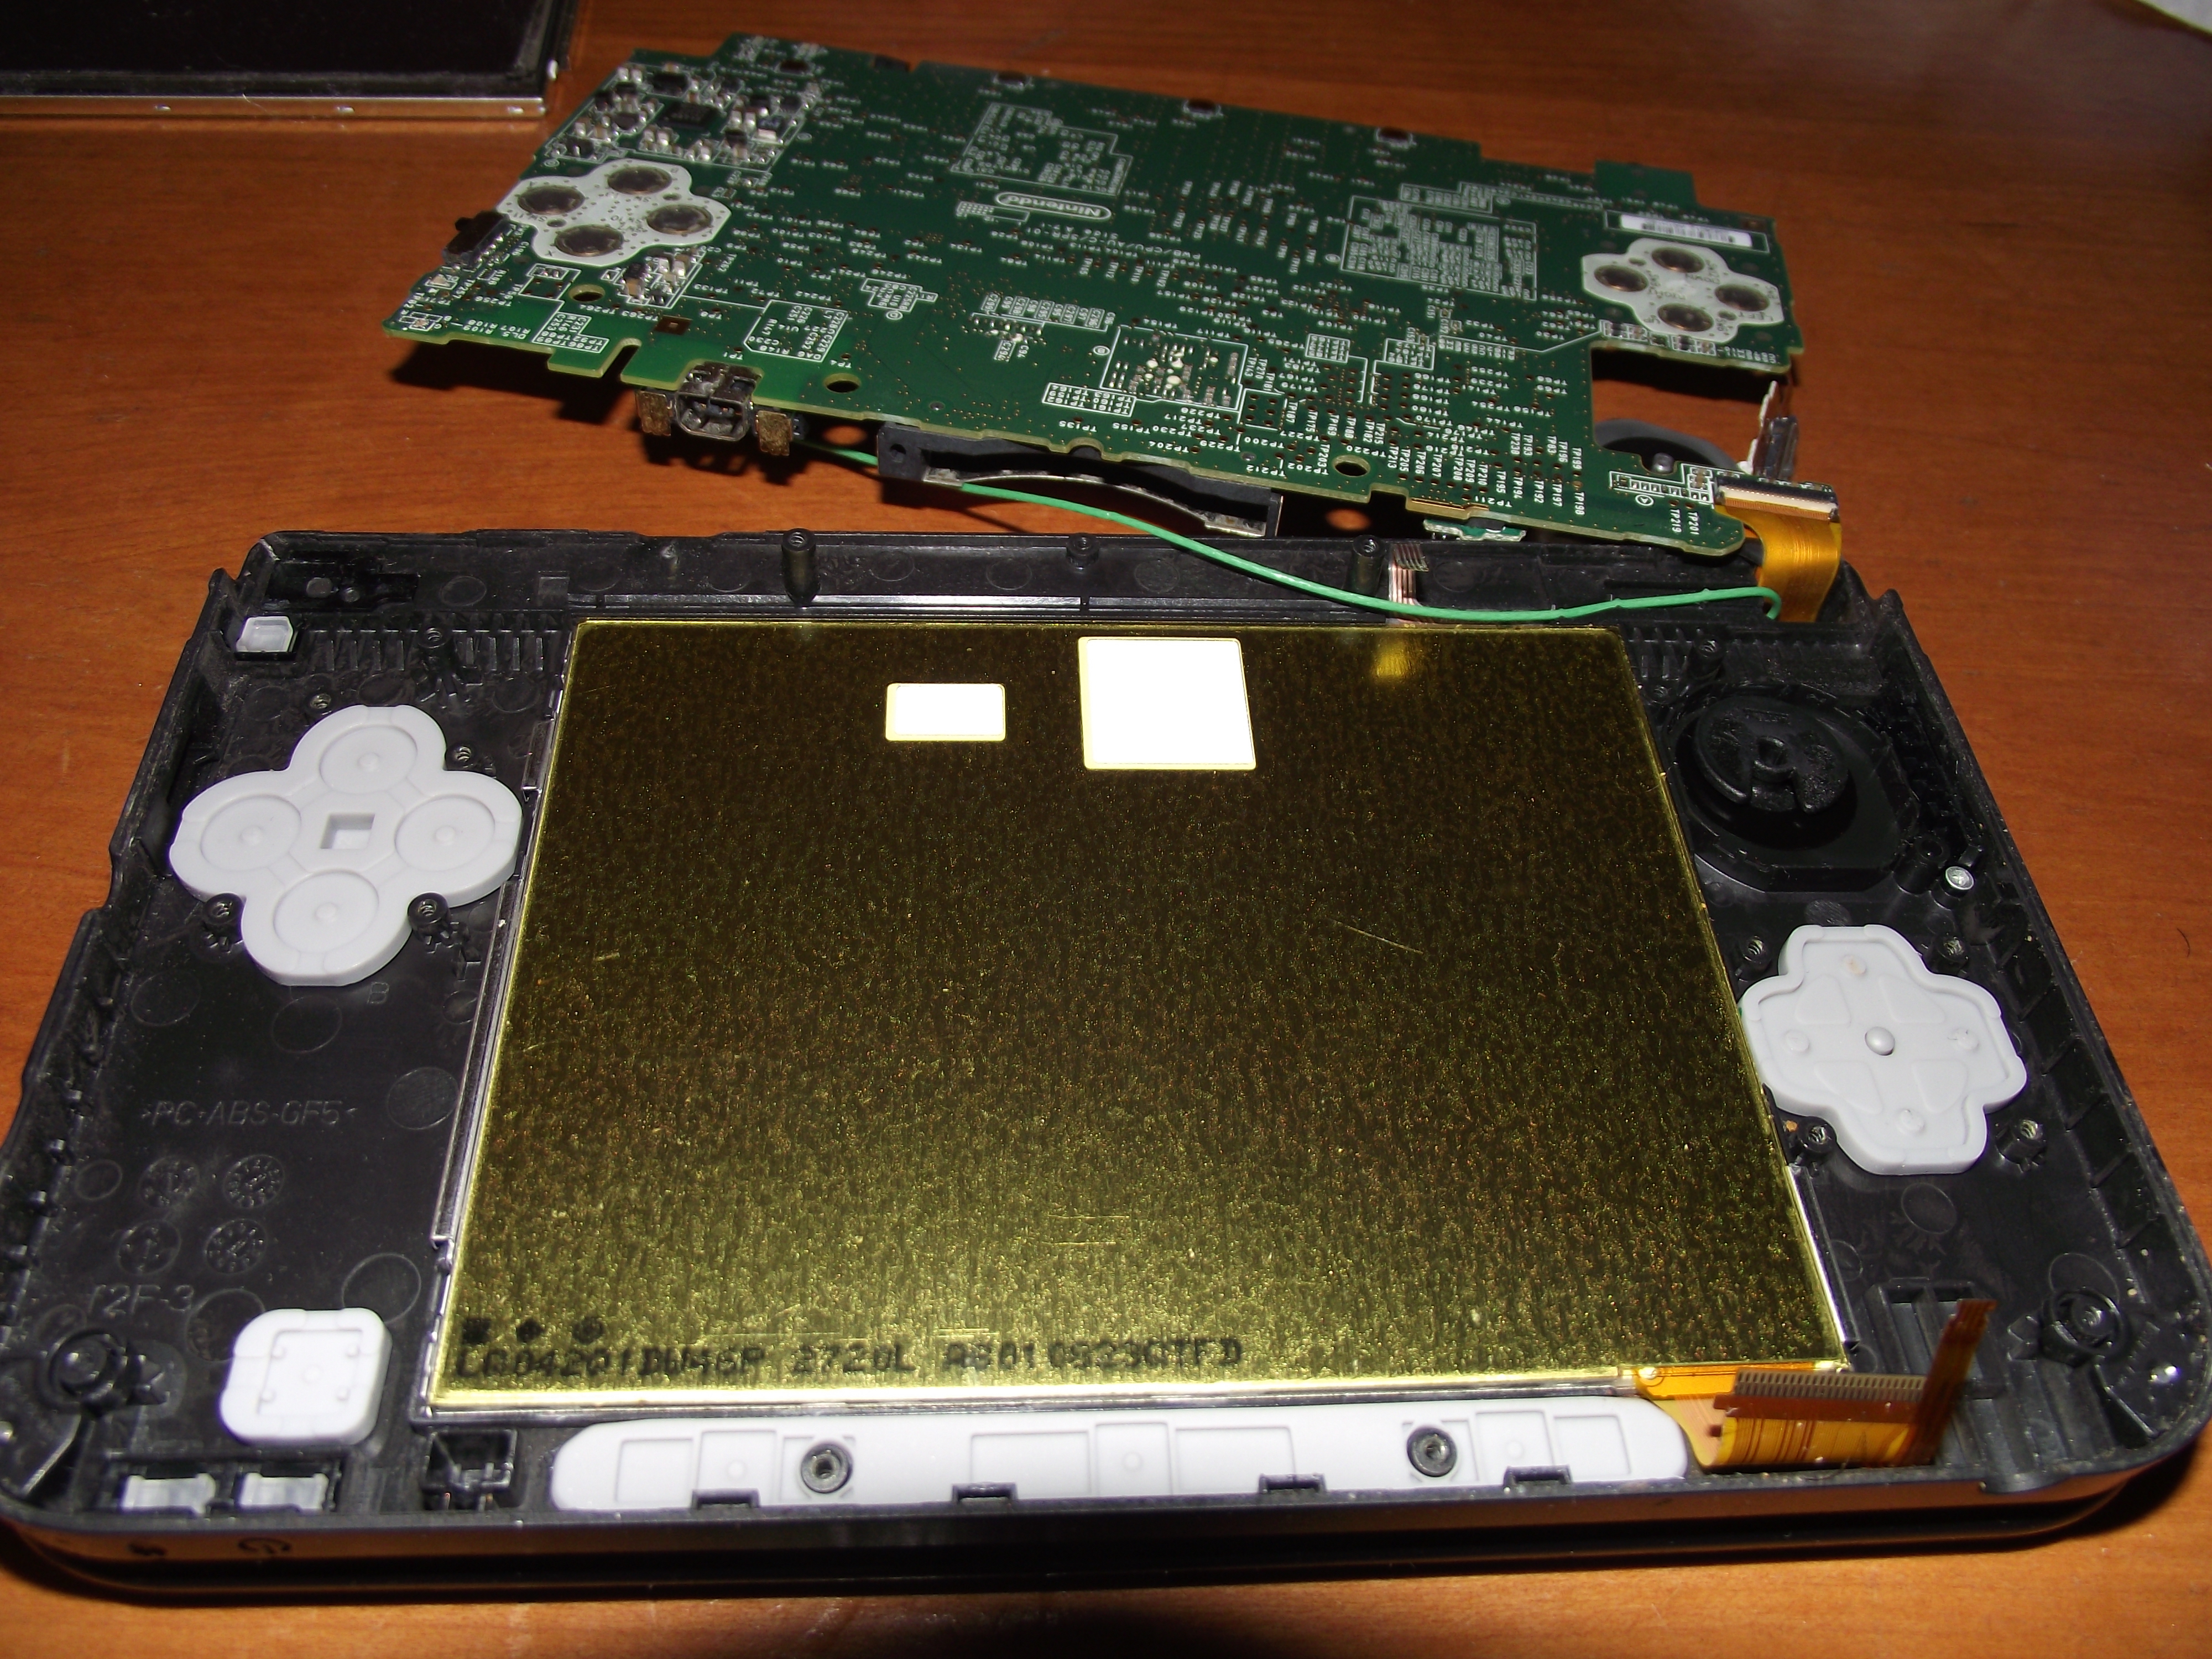
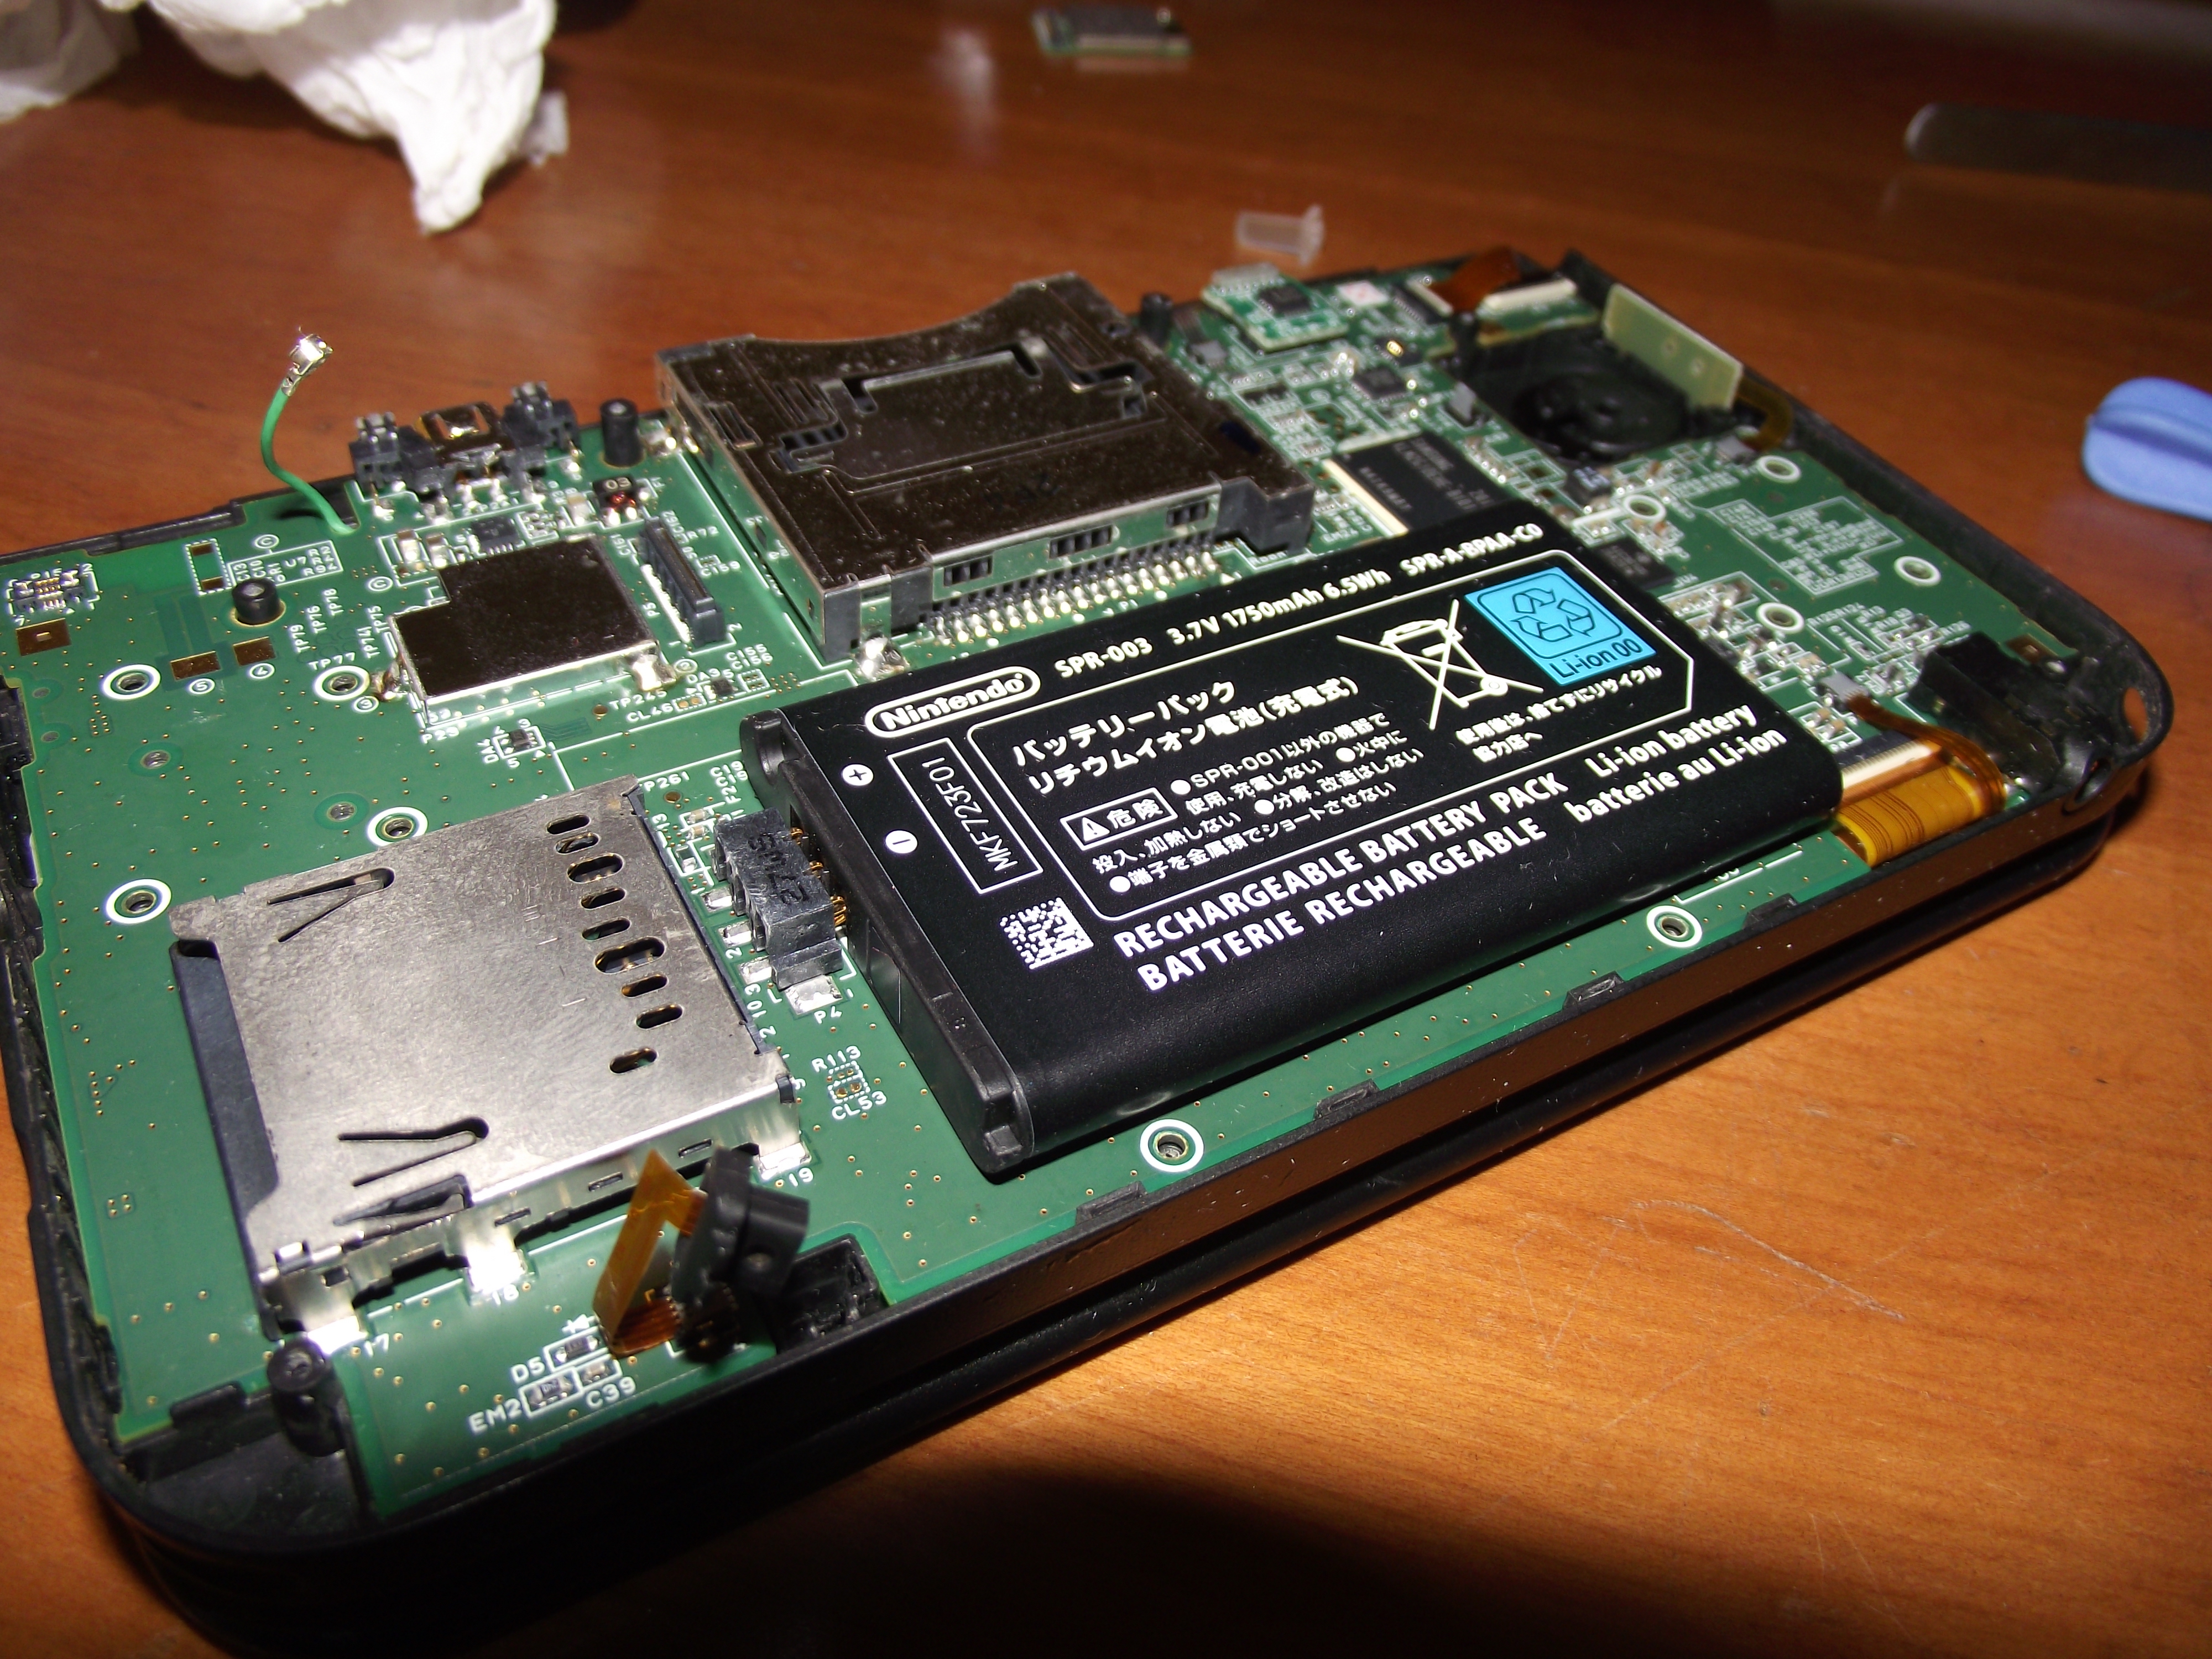
3DS XL disassembly is only very slightly different from a normal 3DS. Once you remove the battery cover, battery, and back housing the motherboard is revealed.

We then remove all those little tiny screws on the right, left, and bottom center of the board. There are 10 in total. We also remove the two very long screws that hold the analog stick control mechanism in place. There’s a round, papery thing beneath the analog stick control mechanism that you’ll want to put aside so it doesn’t fall out and go missing. You also need to remove the WiFi board (it pulls right off) and disconnect the antenna cable from it. Finally, disconnect the bottom LCD and digitizer, the speakers, and camera ribbon cables from the motherboard. Use your fingernail to open up the clips and gently pull the ribbon cables out.

Now we can lift the motherboard free of the lower housing.
The top LCD ribbon cable is still connected in the upper right of the above picture. Disconnect that. Now the motherboard is completely free.

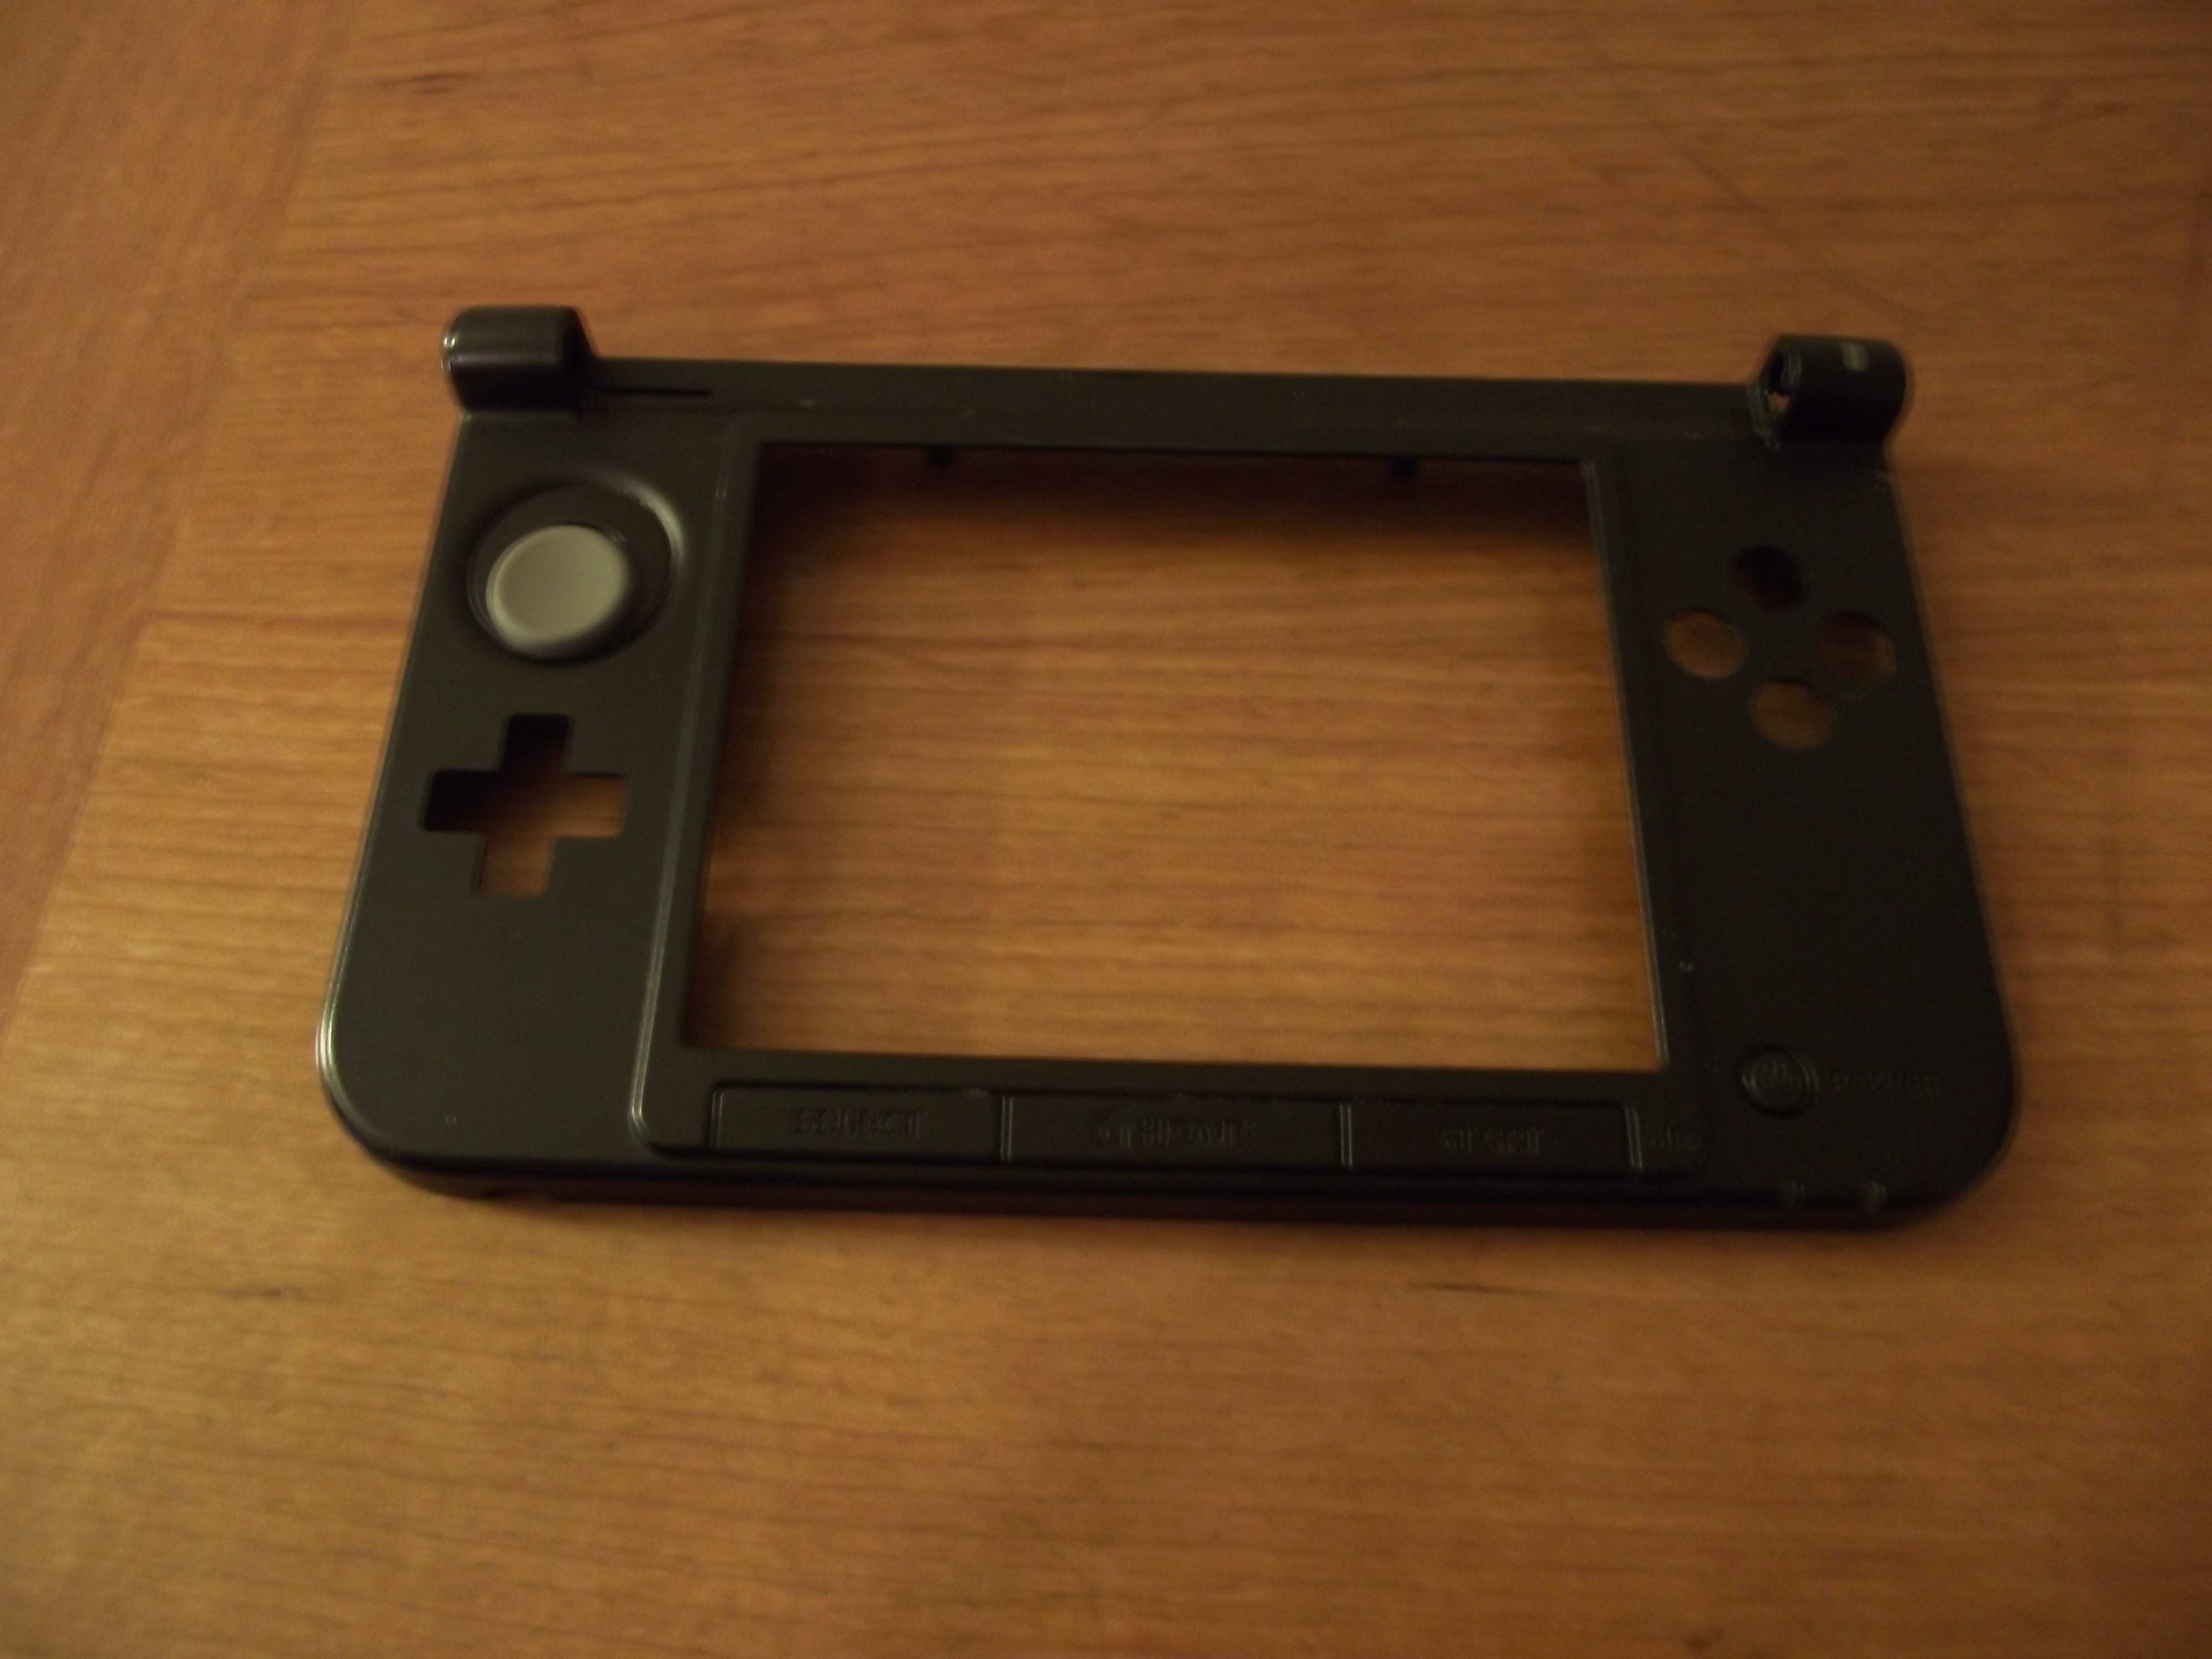
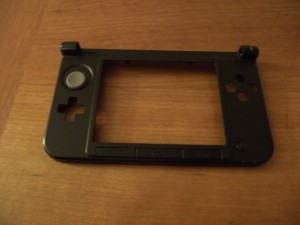
This is the ugly, cracked piece of the housing that I wanted to replace.
To replace the front section of the housing it’s necessary to open up the top housing. Remove the four square rubbery pads surrounding the top screen. Again, if you use a sewing needle for this you can probably manage to remove them without any damage so that you can later re-use them. They were already damaged on my console so I wasn’t particularly careful and ended up destroying one and losing another. Remove the four screws beneath.
Once you remove those four screws you need to push hard on the back part of the top shell. It’s hard to explain, but if you put the console on your lap with the back of it (i.e. the side with the charge port) against your torso and push forward on the top housing using your two thumbs it’ll slide upwards and off. I looked at these pictures to figure it out at first, but contrary to what the photographer writes, you definitely don’t need to use a screwdriver or anything else to pry it open. You can easily do it with just your thumbs. You push forwards, not upwards, and it slides off.
Here’s the big mess I made out of two consoles. It all works out in the end though.
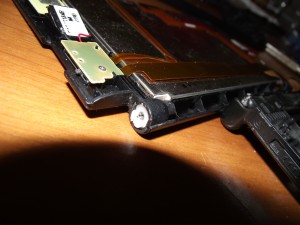
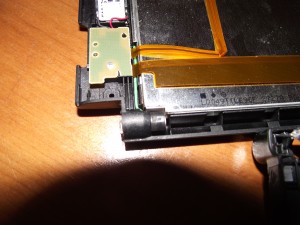
I’m not proud to say it but I couldn’t figure out how to slide the left hinge inside of the top housing in order to cleanly separate the top and bottom sections of the console. On a normal-sized 3DS you can stick a small screwdriver or a pair of tweezers into the top leftmost section of the bottom housing and push the hinge inside the upper housing, allowing you to separate the two halves of the console. I couldn’t figure out how to do this for the 3DS XL though. So, in the end, I used a pair of pliers to crack open the upper left corner of the lower housing since it was already cracked a small bit. This revealed the hinge. I then pushed it into the top housing using a small screwdriver. This allowed me to separate the two halves. It’s not the most elegant solution, but it made no difference since I was destroying a part that was already broken anyway. Below is the hinge position that will let you separate the two halves. The hinge is in the same position in both photos; they’re just taken from two different angles.
Once separated we simply slip the ribbon cables and WiFi antenna cable out through the slit in the original lower housing and pull them through. We then slip them into the slit in the replacement housing.
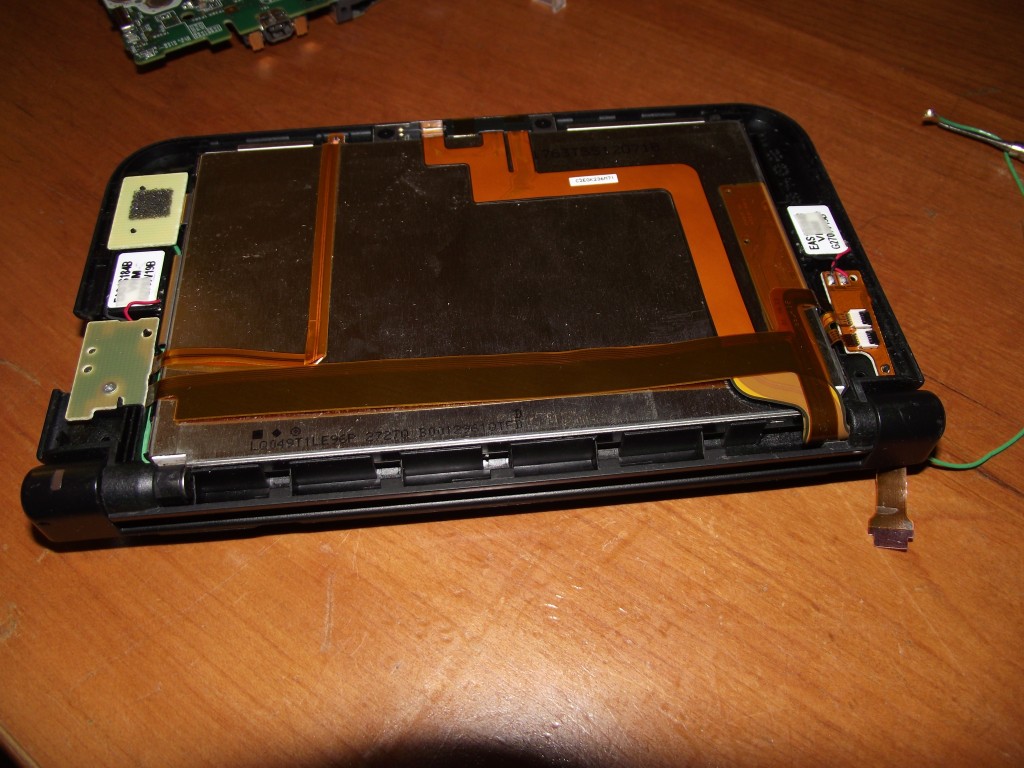
Top screen assembly installed in the replacement lower housing.
Before replacing the back of the top housing make sure the 3D slider is in place. It’s very likely to fall off. Also make sure the speakers are in place. When you’re ready to replace the back section of the top housing make sure you push the hinge back inside the lower housing. When you first push the hinge into the lower housing it will slide in and feel like it’s in place properly, but it most likely isn’t. Don’t be fooled! You need to push it quite hard once more after that and will go in a bit farther so that it’s nearly completely hidden inside the lower housing. Here are comparison images of the hinge in different positions:
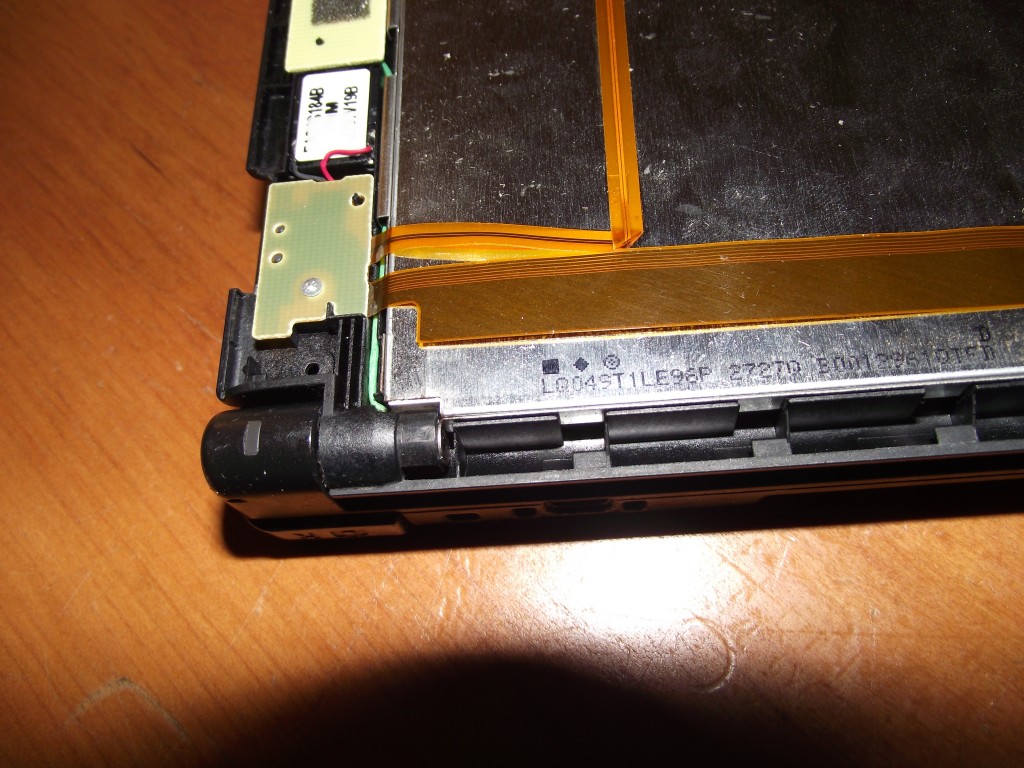
Hinge open. Top half can be separated from lower half when in this position.
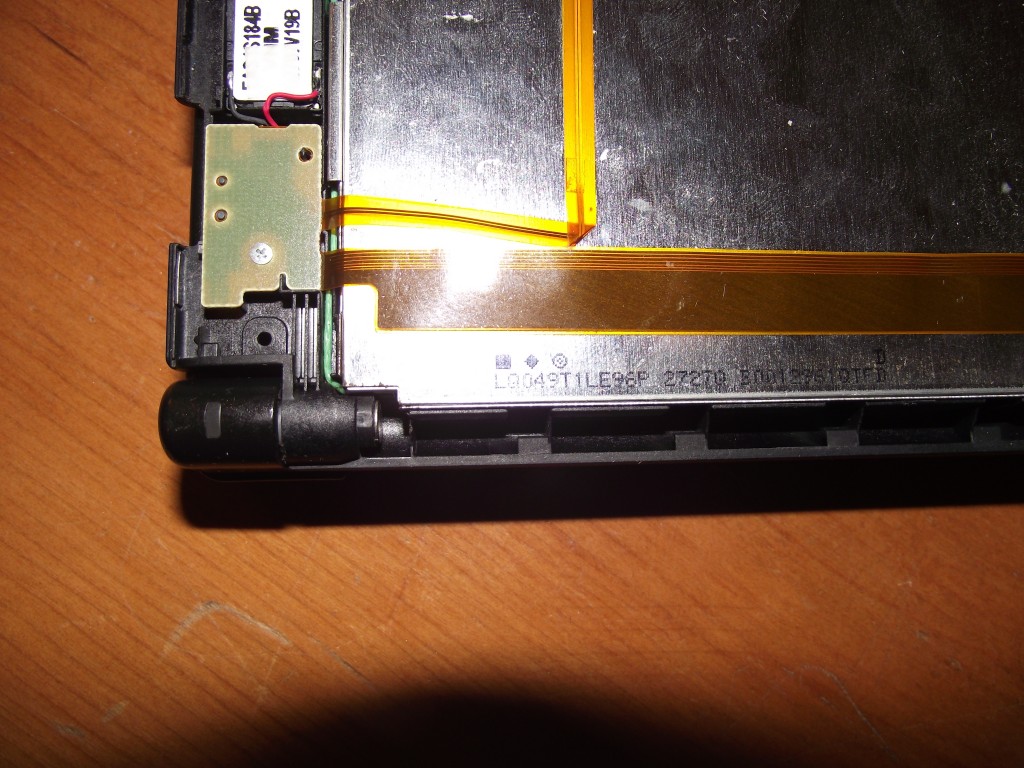
Hinge not fully inside lower housing.
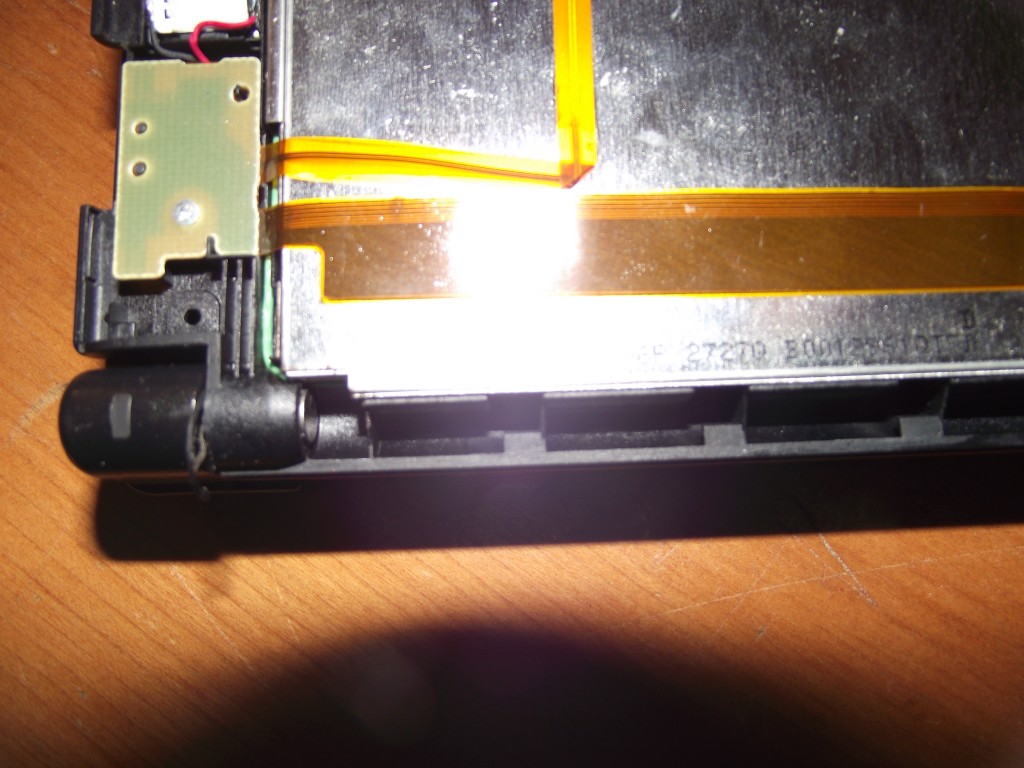
Hinge fully inside lower housing. Halves cannot be separated. The console will now “click” open and closed like normal.
Now you can replace the back part of the top screen housing. Just push the two pieces together. It’ll click into place. At this point reassembly is just the opposite of disassembly. There are guides for the ordinary 3DS and the 3DS XL isn’t much different. I would recommend that, before closing the console up, you test it by simply holding the battery in place, flipping the motherboard over, and pressing the power button with your finger.

If you hear a popping noise then double check that both screens are properly connected. Also check for debris on the connectors. You don’t need to connect everything to do the test. You just need both LCDs connected. You can leave the WiFi module and analog stick disconnected when testing and the console should still power on.
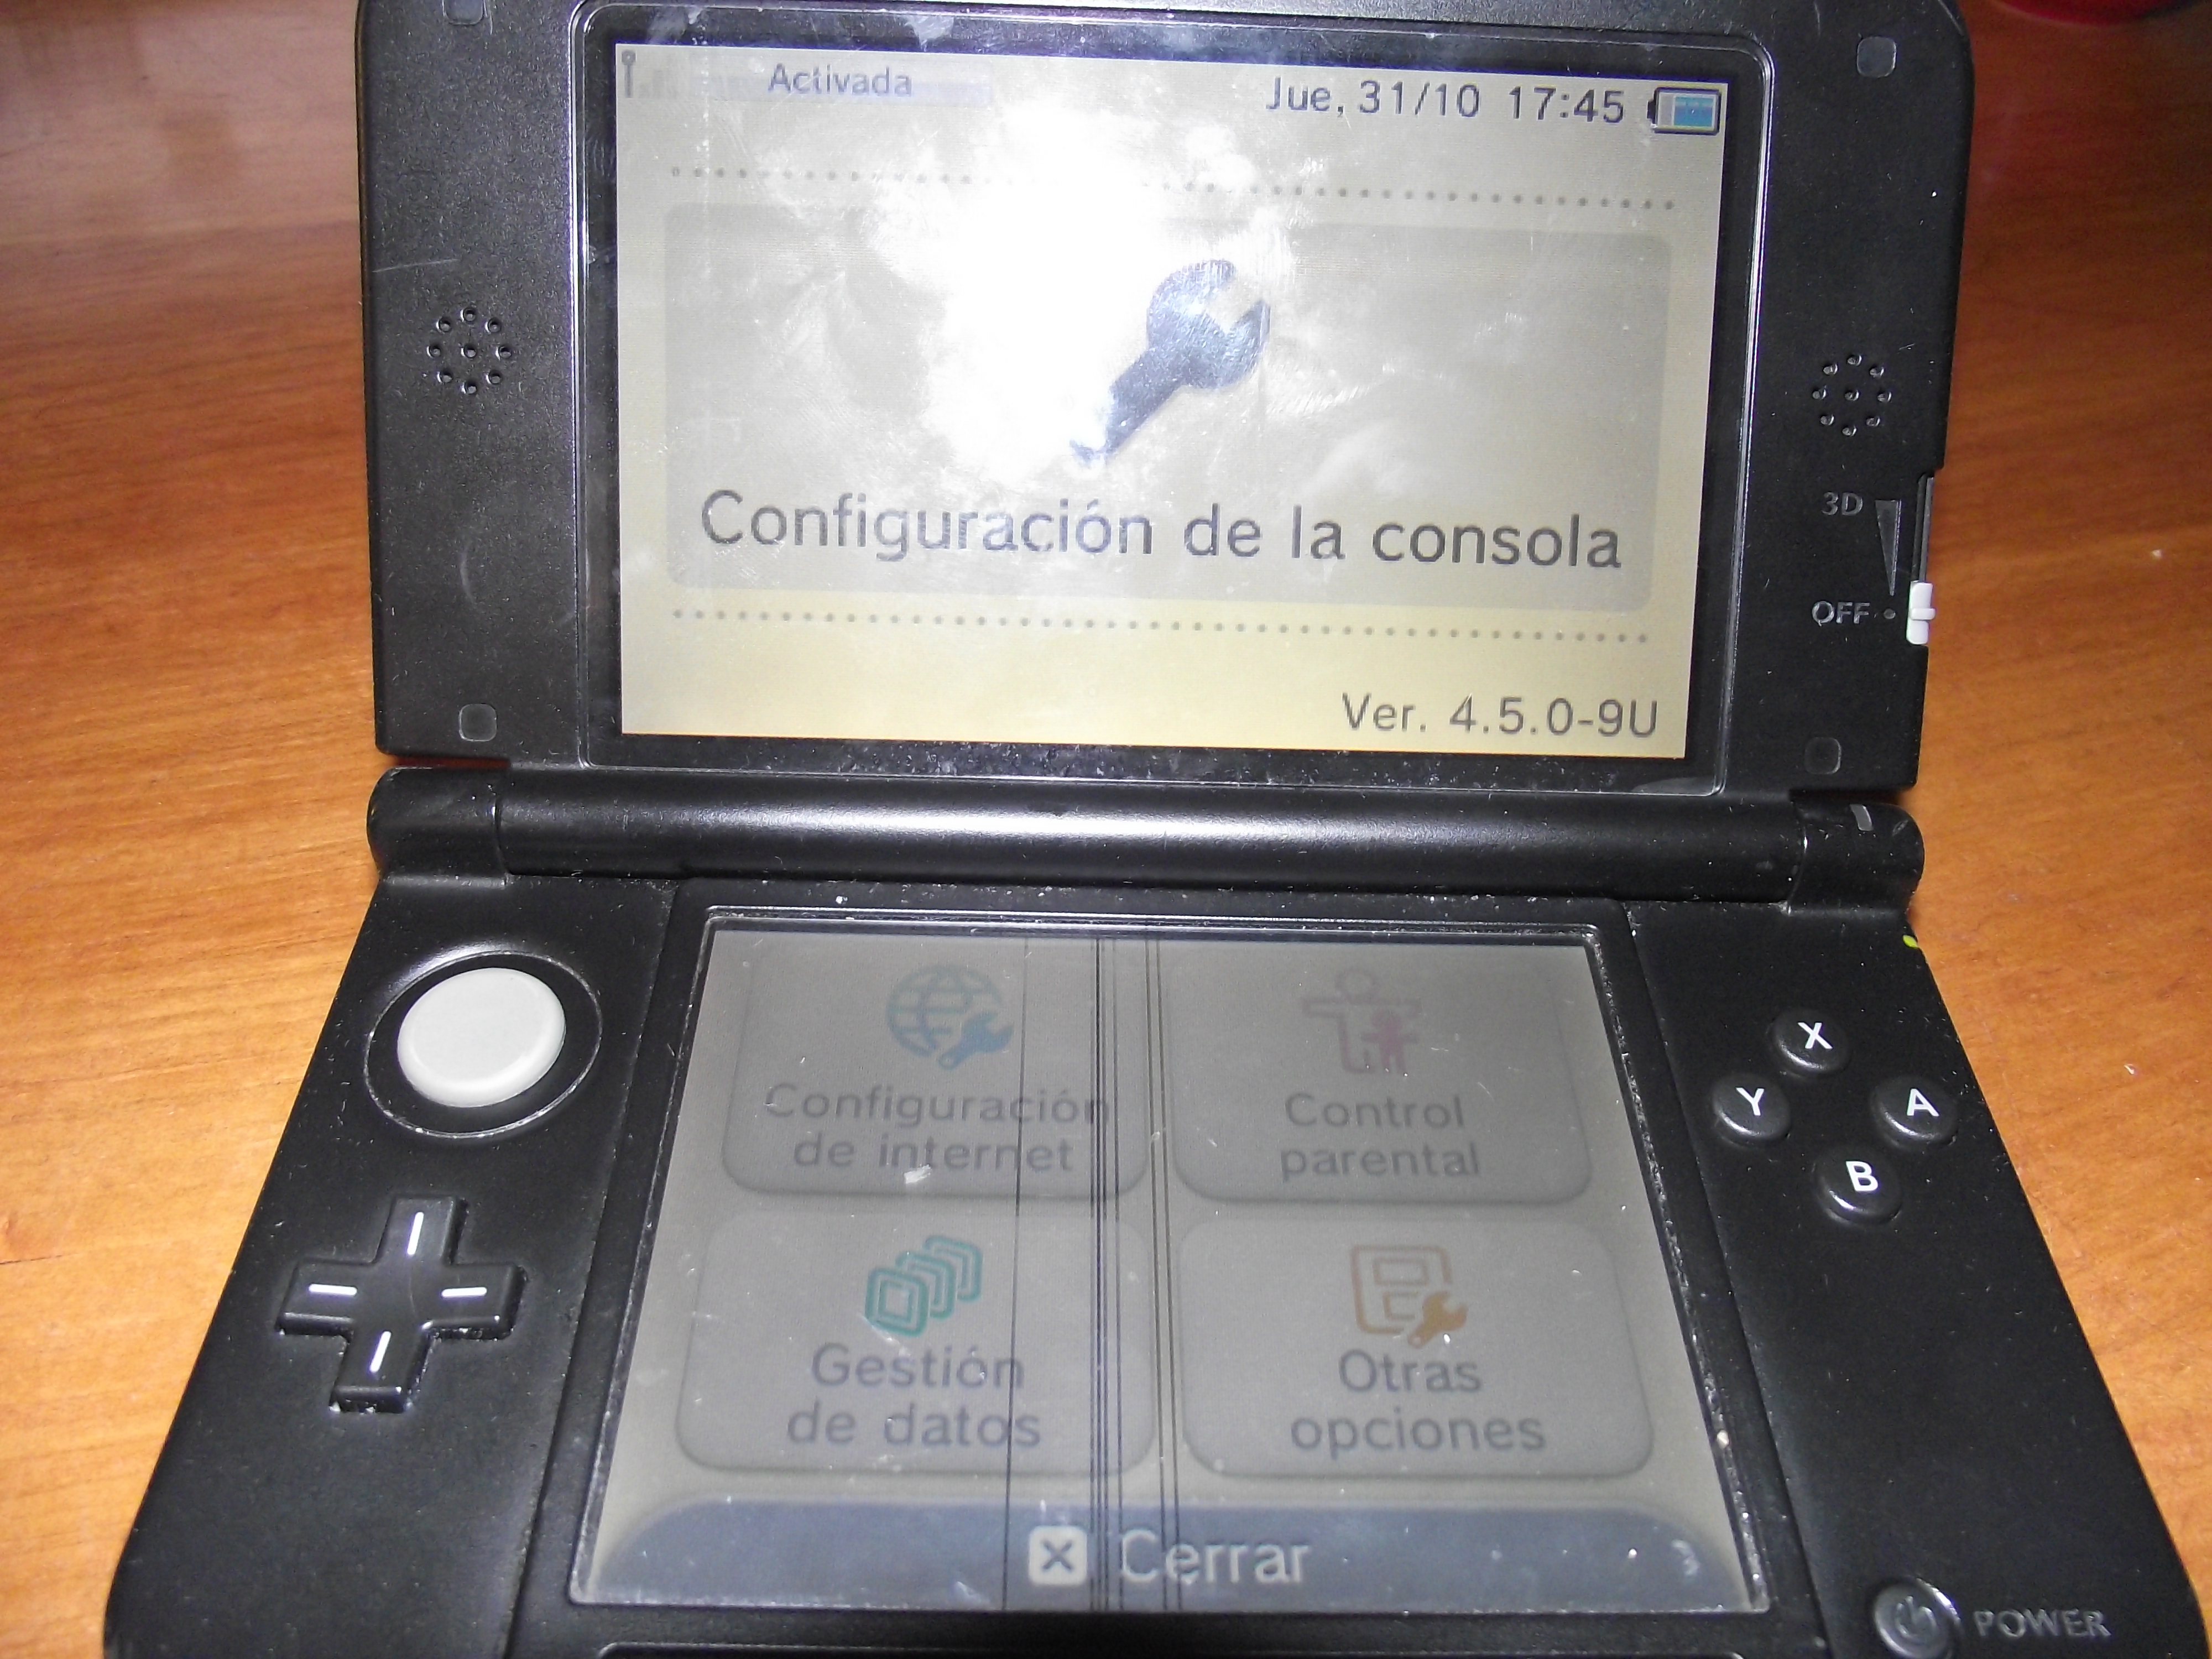
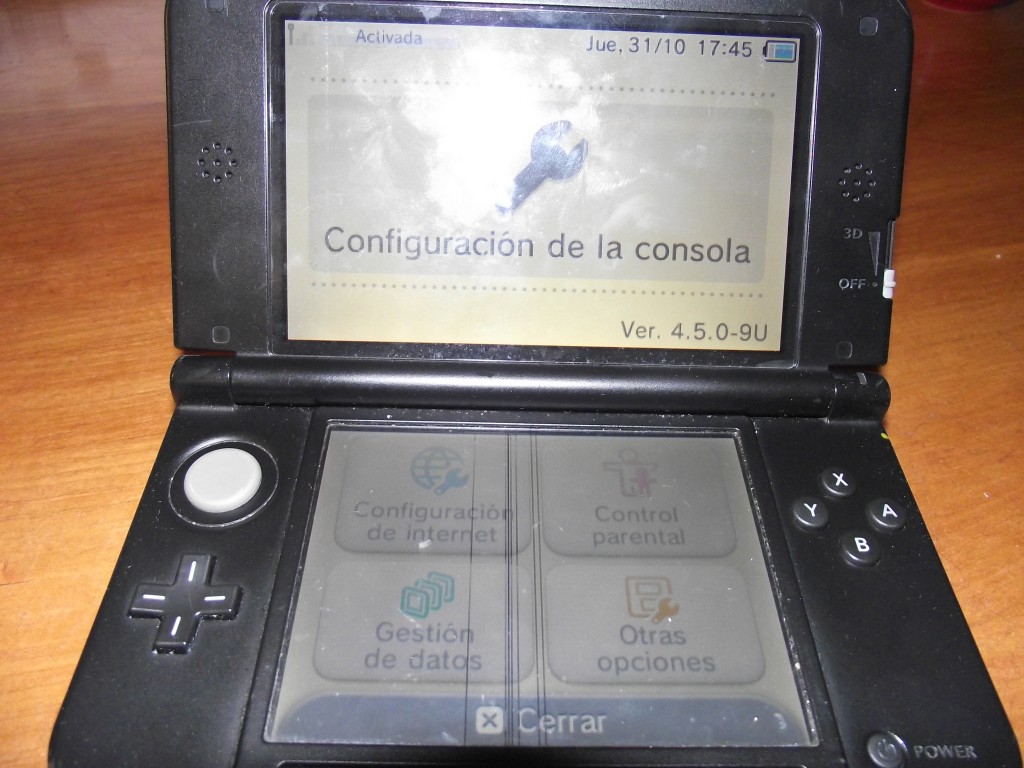
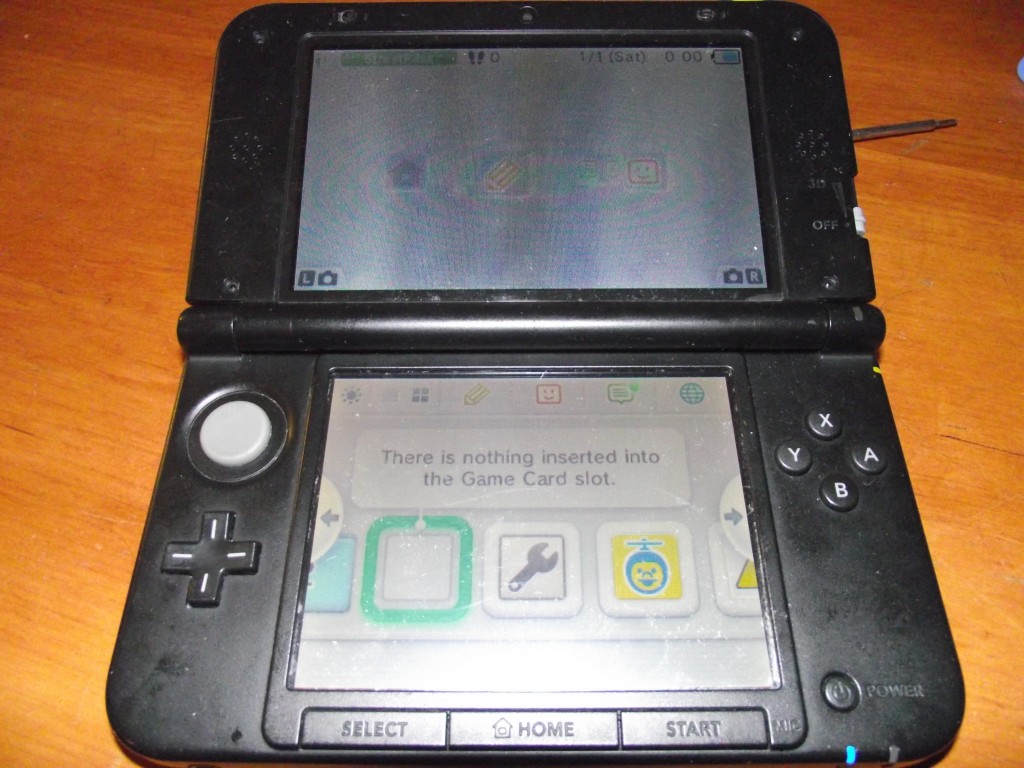
Once I confirmed that everything was connected properly, I screwed the thing back together and gave it a test. I had noticed before the repair that there were parental controls on the console because when I had tried to format it I got the following screen:

oh no! what i do now?
The last two times I bought a locked 3DS console on eBay I had to call Nintendo and pretend to be a morbidly forgetful parent who not only forgot his PIN but also the answer to his secret question in order to get a master code. Well, that was all before neimod cracked parental controls earlier this year. No more embarrassingly bad acting! This time I was able to remove the parental controls easily and quickly in my own home. Now all is right in the world. Eventually I’ll get around to replacing the battery cover and the top housing since they’re scuffed up pretty damned badly. But for now I’m satisfied with the console being 100% functional and Gateway compatible. I put my own parental controls on it to make sure I don’t accidentally update it!
All in all, the two consoles and the replacement housing piece probably cost me about $180 so it’s not like I saved much money. I could’ve bought a brand-new 3DS XL from 2012 with firmware ~4.3 for not much more than that. But it’s so much more fun and satisfying playing a console when you know you’re the one who saved it from the trash bin.