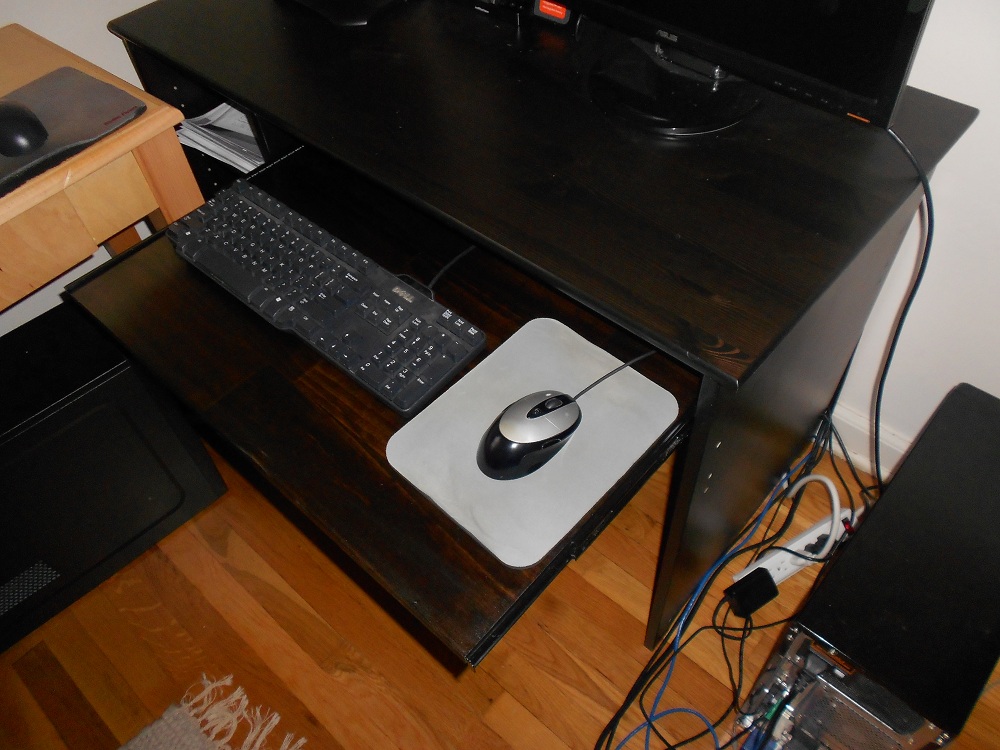
I have a lovely new desk and I am way more proud of it than I ought to be

This is a story of a teensy-weensy victory that has really put me in a good mood. I am way more proud of this than I ought to be because it’s really a very minor accomplishment that anybody with a small drill and the ability to read instructions can do, but these days even tiny little moments like these in which things all come together in a fulfilling way are very rare for me.

I always thought I had rather modest requirements for a computer desk, but it looks as though I was wrong. Ordinarily I’ve got the left side of my computer desk up against a wall with one computer partially underneath the left side of the desk, more or less up against the wall. Because of this setup, I always sit at the right side of the desk. That’s why I like to have the keyboard tray on the right side of my desk. Either that, or a keyboard tray that extends from one side of the desk all the way to the other side.

I had to replace my desk since it was ruined during Sandy. I thought it would be easy to find a desk with a keyboard tray on the right but it was surprisingly difficult. I found a few but none of them had any shelves or drawers or any other sort of storage space. I prefer a desk with either a couple of shelves or drawers to store cables and adapters and miscellaneous things like that.

I finally had the bright idea of buying a desk with storage features that I liked and then adding a keyboard tray myself. This was bold on my part, because I’m not someone you could ever call “handy”. I decided on the $99 IKEA Vallvik. It has shelves that you can choose to put either on the left or the right. It’s also just about the perfect width for a keyboard tray and it’s made of solid pine instead of that honeycomb stuff some IKEA products are made of, so I was pretty certain that the screws would hold in place well enough. Here’s the desk before I began my little project:
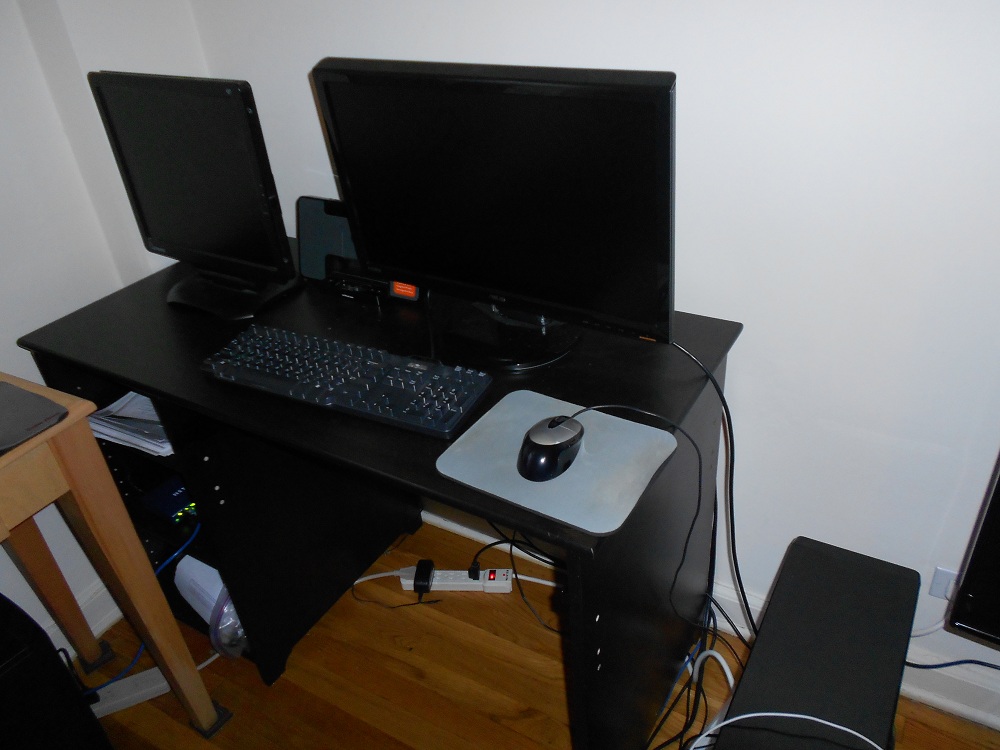
vallvik01

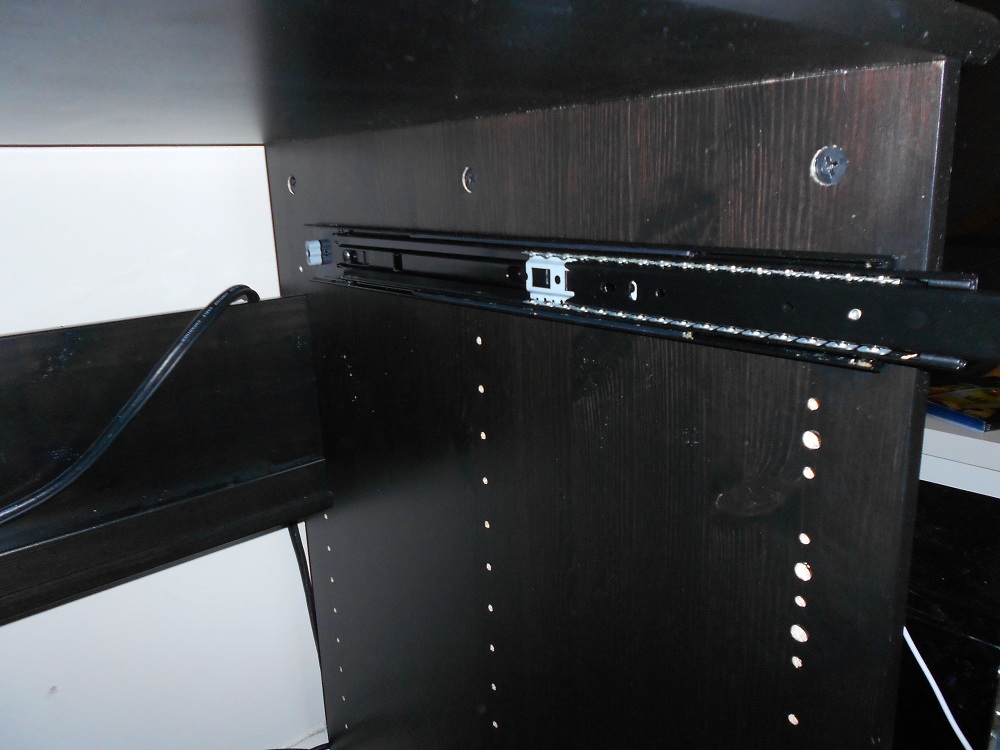
I had a look online at some ready-made keyboard trays but I didn’t like the idea that they wouldn’t run the full length between the shelves at the left and the right side of the desk. I wanted my keyboard tray to span that entire space. So I bought a set of 18-inch side-mount drawer slides (Fulterer 5000) and mounted them under the desk. I thought it was neat that these drawer slides come in different colors. I bought the black ones to match the desk.

If you're smart, you'll get a friend to help you install these.

If you’re smart, you’ll get a friend to help you install these.

I was super lazy and didn’t even remove the stuff from my desk while installing these. That didn’t turn out to be a problem, though it sure was difficult installing them alone. I ended up stacking a bunch of books on the floor to hold the slides up while I drilled some holes to screw the slides in. If I had somebody to hold the slides for me I would have finished in much less time and I wouldn’t have bumped my head on the underside of the desk nearly as many times as I did. The best way to do this would have actually been to disassemble the desk and lay the two side pieces in which the drawer slides get installed flat on a table.

The next step was to measure the distance my keyboard tray would need to be. According to the instructions for the drawer slides:

Check that the side clearance between drawer and cabinet side
is at least 12.7mm (1/2in.) on each side. Maximum allowable
clearance is 13.5mm (17/32 in.)

The distance from one side of the desk to the opposite was 28 inches. 28 inches minus two halves of an inch is 27 inches. So I got a board 27 inches long. The other two dimensions don’t matter too much as long as the board is not so wide that it doesn’t fit under the desk and not so thick that it looks silly.

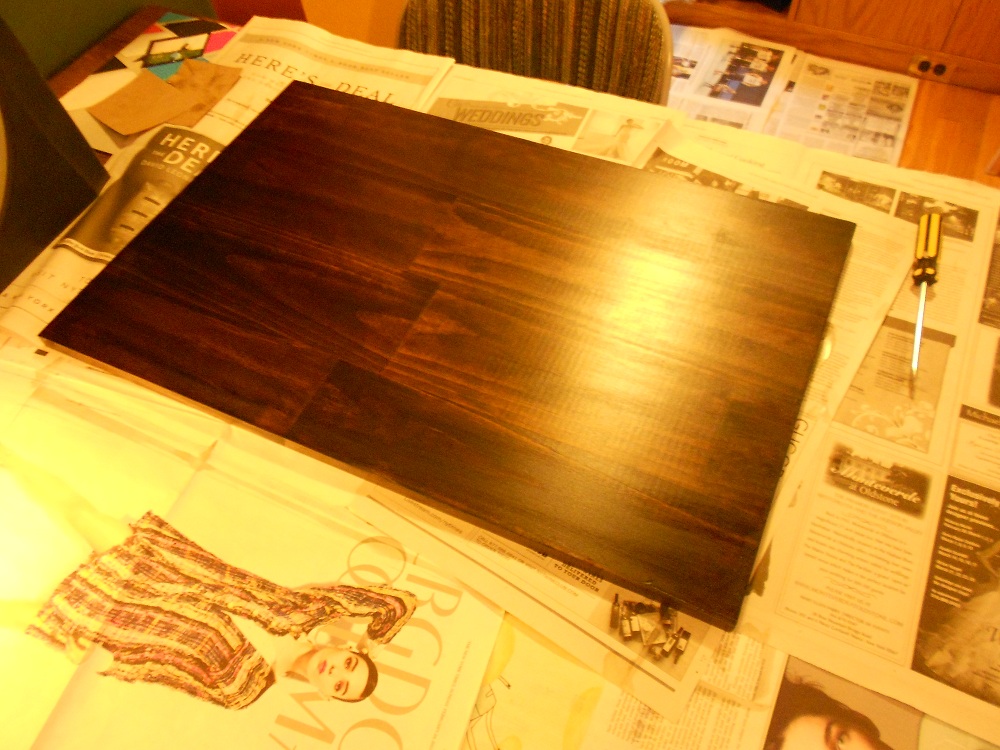
So I got a board 27x18x1 inches. It was unfinished pine so it was a very light color, similar to the color of the table in the far left side of the first picture on this page. It would have looked lousy if I installed it as-is. So I got “Minwax Dark Walnut 2716” wood stain and a polyurethane finish. I followed the directions on the can and did 2 coats of the stain, allowing 4 hours drying time between each, followed by 2 coats of the finish, letting it dry 24 hours between each coat of finish. Now my board is a work of art.

vallvik03

All in all, it took 4 days of on-and-off staining, finishing, and drying before the board was ready for installation. I probably would have been just fine without waiting the full 24 hours for each coat of finish, but I wasn’t in any hurry so I was happy to wait.

Again, it would have been much easier to have somebody hold either the board or the slide while attaching the “drawer profile” pieces, but I managed to get it done myself with only a few minor splinters. Thank goodness I sanded that thing so well beforehand or else I might have bled to death.

The final result.

The final result.


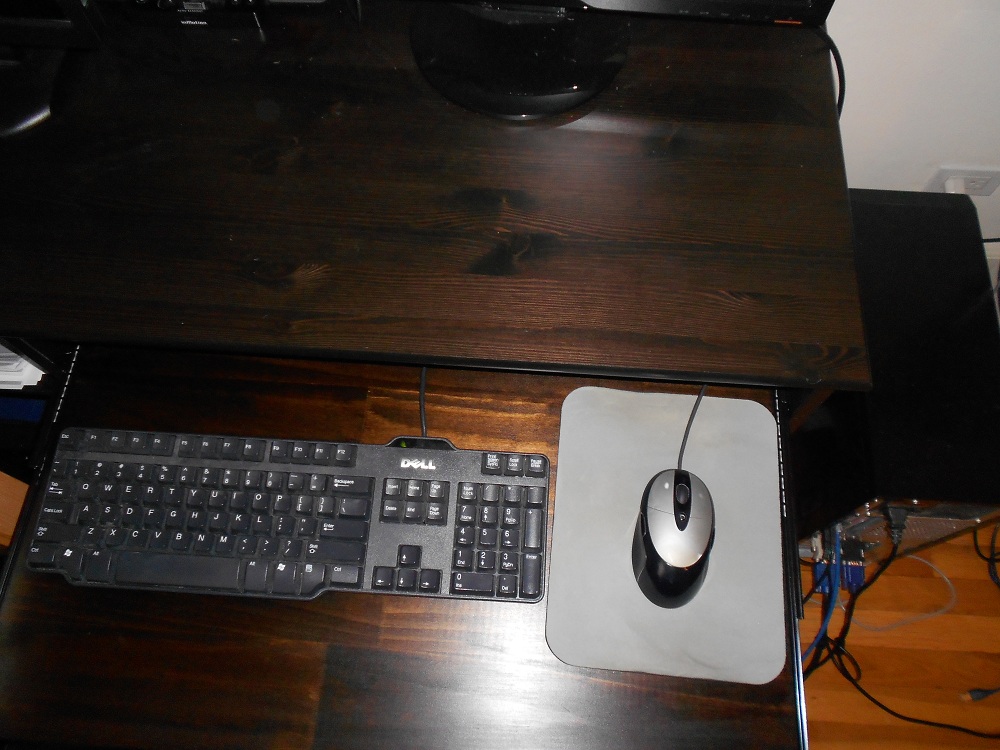
You can see when I use the flash on the camera that the color doesn't match quite perfectly, but it's not noticeable under normal light conditions.

You can see when I use the flash on the camera that the color doesn’t match quite perfectly, but it’s barely noticeable under normal light conditions.

Success! I fixed my laptop

So I bought this laptop on eBay with a broken screen for virtually zero money. I was sort of vaguely thinking about setting up a dedicated MythTV box or something to leave by my TV but then I got scared since I don’t know how to use MythTV so I decided to use GB-PVR, which I already use but only inconveniently since I need to run a 50 foot cable from my STB to my desktop computer, which is a fire hazard since you’d probably trip over it when trying to leave the apartment. Whew.

Anyway for more or less this reason, as well as the fact that I evaluate my self-worth in terms of the good deals I find on eBay, I was half-heartedly browsing for reasonably priced laptops with cracked or broken screens to set my plan in motion.

A desktop would have worked, I suppose, but I like the idea of giving an abandoned laptop with a cracked screen a nice home and steady work. I also don’t have much space. A desktop needs desk or floorspace but a headless laptop could just sit on top of my standalone DVD/DivX player, which, incidentally, I also procured on eBay.

Among the broken laptops I found on eBay, however, was the one I’m currently using to write this. It was listed as fully working but with a broken screen. The auction even explicitly mentioned that when connected to an external monitor via HDMI it worked fine. So I bought it.

Dual core 2.0GHz processor, 3.0GB of RAM, expandable to 8GB, 802.11n (which is actually useful to me finally since the Actiontec router Verizon gave me for FiOS supports N), and a CD/DVD±R/RW/BD-ROM drive. That means if I ever brick my PS3, which I also bought broken from eBay and fixed, by neglecting to read the readme before flashing it with some CFW, I’ll still have a working Blu-Ray player.

When I got it though I liked it so much that I decided I should try to get the thing into perfect working condition. It looked completely unused with barely a single blemish on the plastic cover, body or anywhere else. The screen was really beautiful without a single mark on it. There is just one small stain on the left side of the speakers. If it weren’t for that though you’d think this was a brand new computer, so I thought it was a shame that the screen didn’t work.

When I got the laptop I went ahead and turned it on, not expecting to see anything. I did not, in fact, see anything on the screen. I connected it via HDMI to my nice ASUS monitor and it POSTed fine. I was surprised though when I entered BIOS to see that it had an HDD installed. I didn’t realise that it was going to come with one. Not wanting to spend more money than was necessary, I was planning on using a 40GB laptop HDD that wasn’t getting much use, but I was sort of considering buying a larger capacity HDD since 40GB is not much for a PVR system.

That’s why I was happy that the thing came with a 160GB HDD. I tried to format it with gparted but it kept saying it couldn’t find any disks. I tried to use DBAN and got some cryptic error. I tried to format it using an Ubuntu installation disc and got some other error. I tried to use an XP install disc but that just hung indefinitely at the disk partitioner screen. I then boot into BIOS and tried to do some HDD self test diagnostic feature that this laptop seems to have. No problems found. Tried the Ubuntu disc again, got same error. Oddly enough the Windows 7 installation disc didn’t complain at all, so that’s the OS I’ve got on it right now. Don’t torch my house, pl0x.

Anyway, once I had an OS installed I realised eventually that the screen wasn’t broken; it was just really, really, really dark. It was so dark that you really couldn’t tell it was turned on at all unless there were some very high contrast images on the screen at the time. I set the following image as the background and could kinda sorta see Nino’s left eye if I placed my face close enough to the screen so that my nose nearly touched it. If you didn’t get that close, you probably wouldn’t notice that it was displaying anything at all.
Nino

So that was a great discovery. It meant that the screen was probably fine; the backlight was just out. That’s easy. Hell, I thought, it might just be a loose cable somewhere. I open it up and have a look-see. I cut my left thumb trying to open it. The damn inside corners of the screen enclosure are sharp. That was not the encouragement I needed. I disconnected and reconnected everything I could find, reassembled the computer and powered it up, not expecting it to work. It didn’t.

Now I was determined. This was a nice computer. I bought a compatible screen, installed it, tested it and was disappointed. No luck. After installing the new screen I had the same problem as before; image was fine but very, very dark. Being naïve and never having done this before, I thought the screen would come with an inverter, but it didn’t. Since the problem was exactly the same with the new screen as with the old screen I put the old screen back in since it was now pretty clear it was actually perfectly fine.

So I went ahead and bought a new inverter from Hong Kong for USD14, 1/18th of the price some US-based online stores were selling for (I kid you not, one site listed the exact same part number for USD252). I was disappointed since I had spent about the same amount on a new screen as I had on the damned computer. But as I said, I was determined now, having cut both my thumbs by this point.

The inverter arrived surprisingly quickly for Hong Kong Post SAL. On a related note, I bought an item from ShopTemp on November 30, 2010, had it shipped by China Post Registered Airmail and didn’t get it until two days ago. They shipped it within a day or so, so ShopTemp gets all the praise in the world for that. ShopTemp did everything right. I am sad they are no more, since this was the very first purchase I had ever made from them and it was a great experience as far as ShopTemp was concerned. On the other hand, it was a terrible experience with China Post and I would caution said post that they should prepare to feel my wrath. Hell, the tracking number still said it was in Beijing on the day I received it in my mailbox. My experiences with Hong Kong Post have been mostly good though, with items usually arriving within 1 to 4 weeks.

Anyway, I receive the inverter and install it. Same problem as always. Now I was utterly baffled. I thought this must mean it was a bad CCFL. That’s something I don’t know how to replace. Perhaps it’s easy, but I didn’t feel like learning anything after my ordeal.

Just before giving up I decided to triple check all the connections inside the computer and screen enclosure. While doing so, I noticed this:
backlight cable

THAT’S THE BACKLIGHT CABLE! IT IS COMPLETELY WORN THROUGH! I NEVER NOTICED IT! I MUST BE THE LEAST OBSERVANT PERSON WHO EVER TRIED TO FIX A COMPUTER.

So I bought a replacement cable and the screen works fine now. Beautiful too. Not a single dead pixel. The only thing is that while I was replacing that broken cable with the new one I cut my left thumb again. I suppose the lesson here is that you should buy broken electronics even if you don’t know how to fix them because the solution is often as simple as replacing a broken cable. Whoever sold this laptop really lost an opportunity to make a fair amount of money since, as I said, the thing is basically brand new. The screen and one small brownish stain on the speaker were the only imperfections.

Now I have one brand new screen I’ve got to resell.