
This is the same console owned by the blighted mudcrab whose shoulder buttons I had the pleasure of cleaning previously.
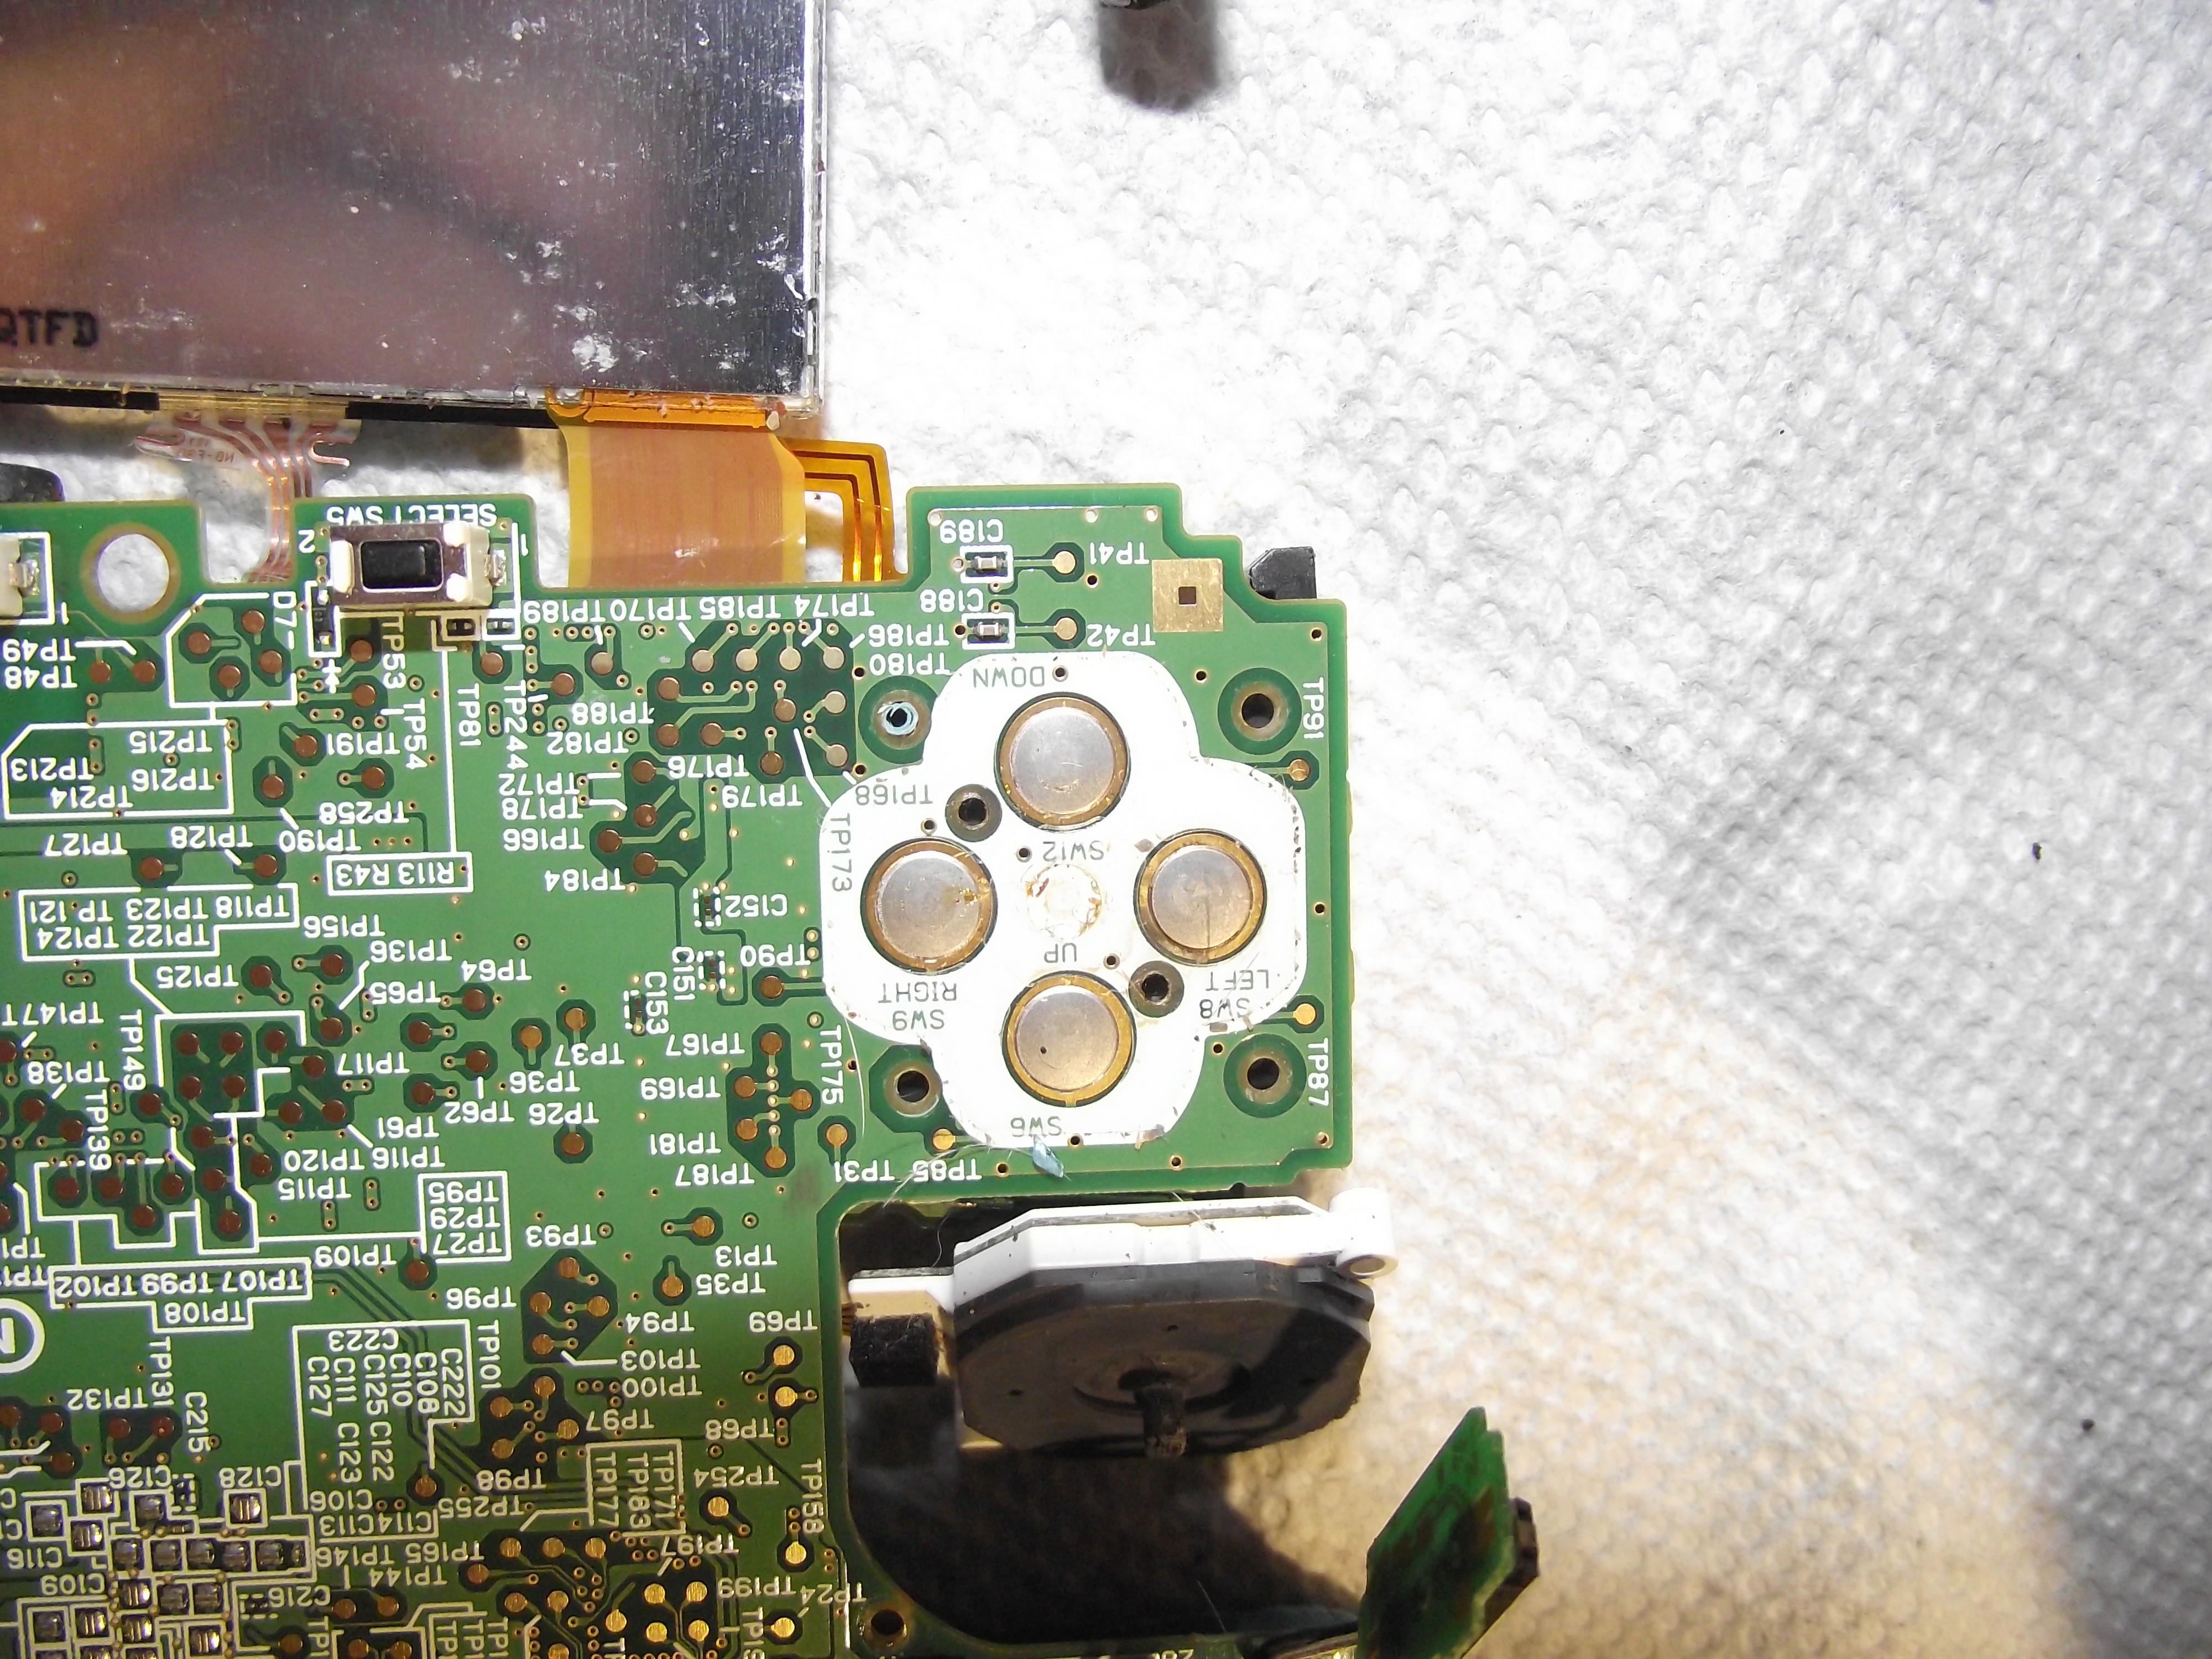
While unresponsive shoulder buttons are far more common, sometimes the face buttons of a 3DS or other console become sticky or unresponsive. If the button works when pressed very hard but not when pressed lightly, it’s almost certainly due to dirt accumulation. If the button feels sticky or jammed, it’s most likely because there’s dirt built up around and beneath the plastic buttons, as in the above photo where thick rings of filth have built up around the circumference of each button. If the button doesn’t feel jammed but it’s not as clicky as it once was, it may be due to dirt under the conductive pads on the motherboard. In either case, it’s necessary to remove the motherboard from the housing (or at least remove the screws securing it in place and flip it over, if you’re in a hurry, like I was).
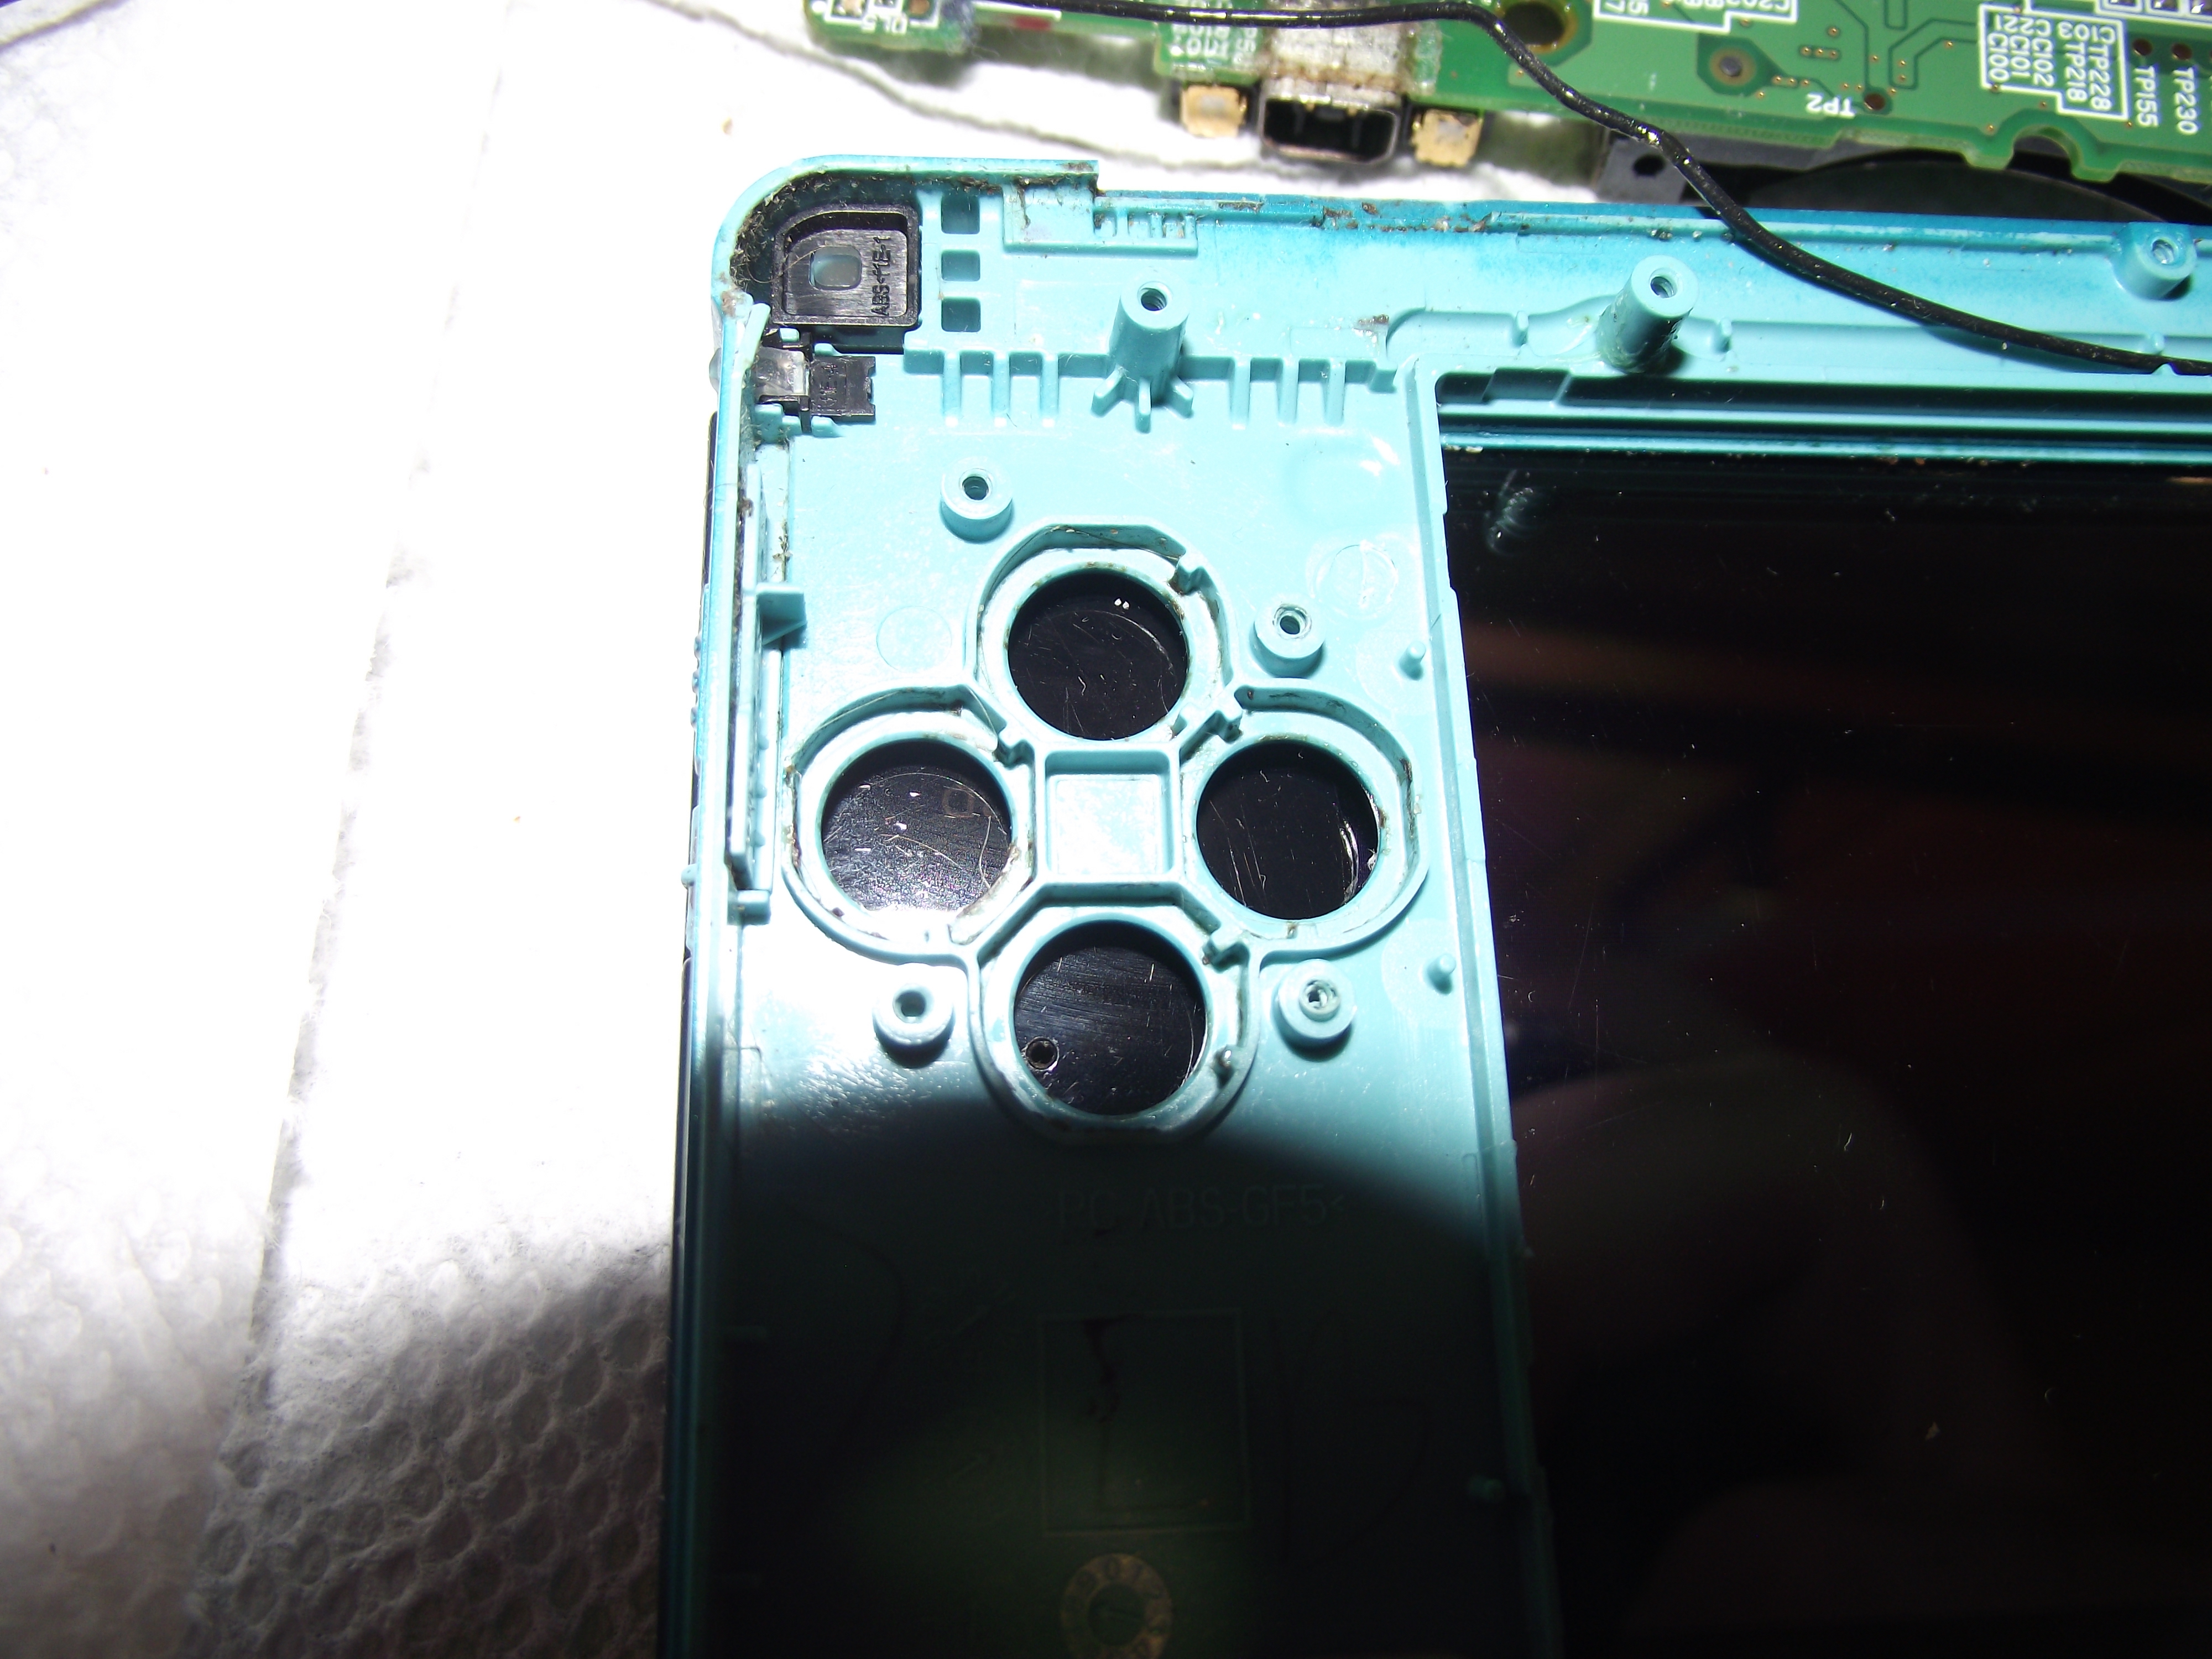
 Here’s the rubber pad between the plastic buttons and the contacts on the motherboard. Doesn’t look too bad, does it? 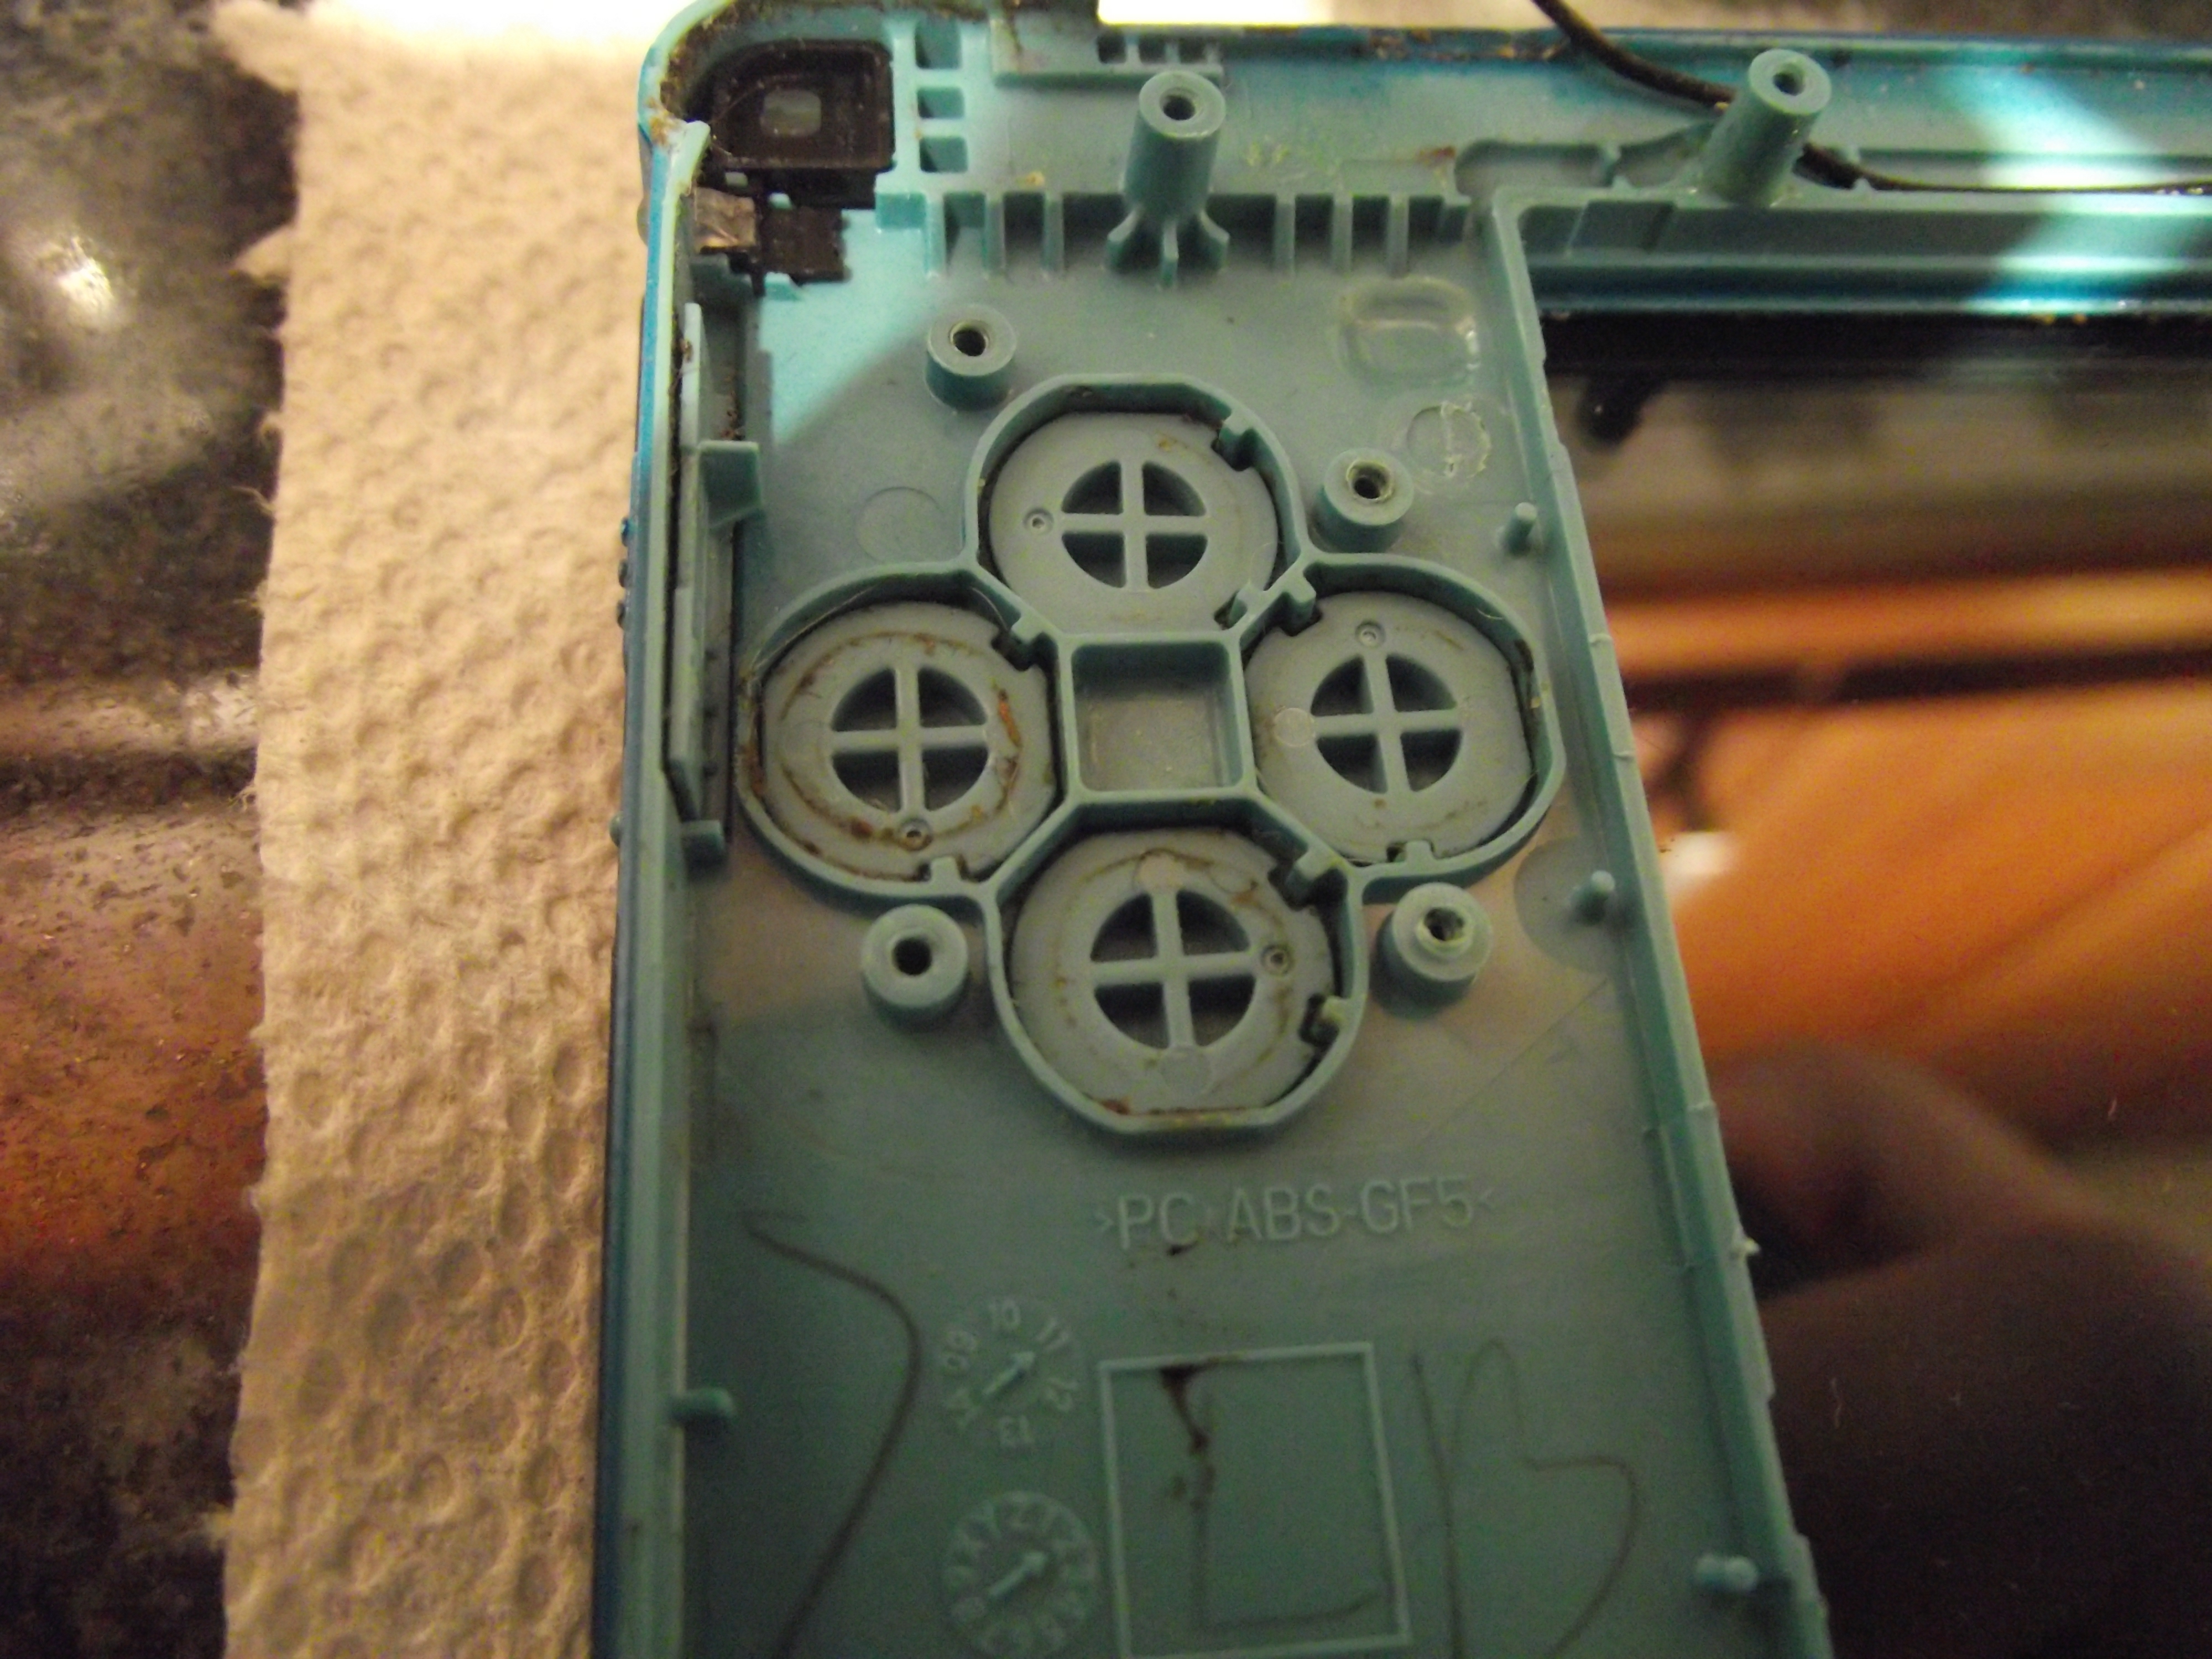 But peel it away to reveal a cache of shit and grease. |
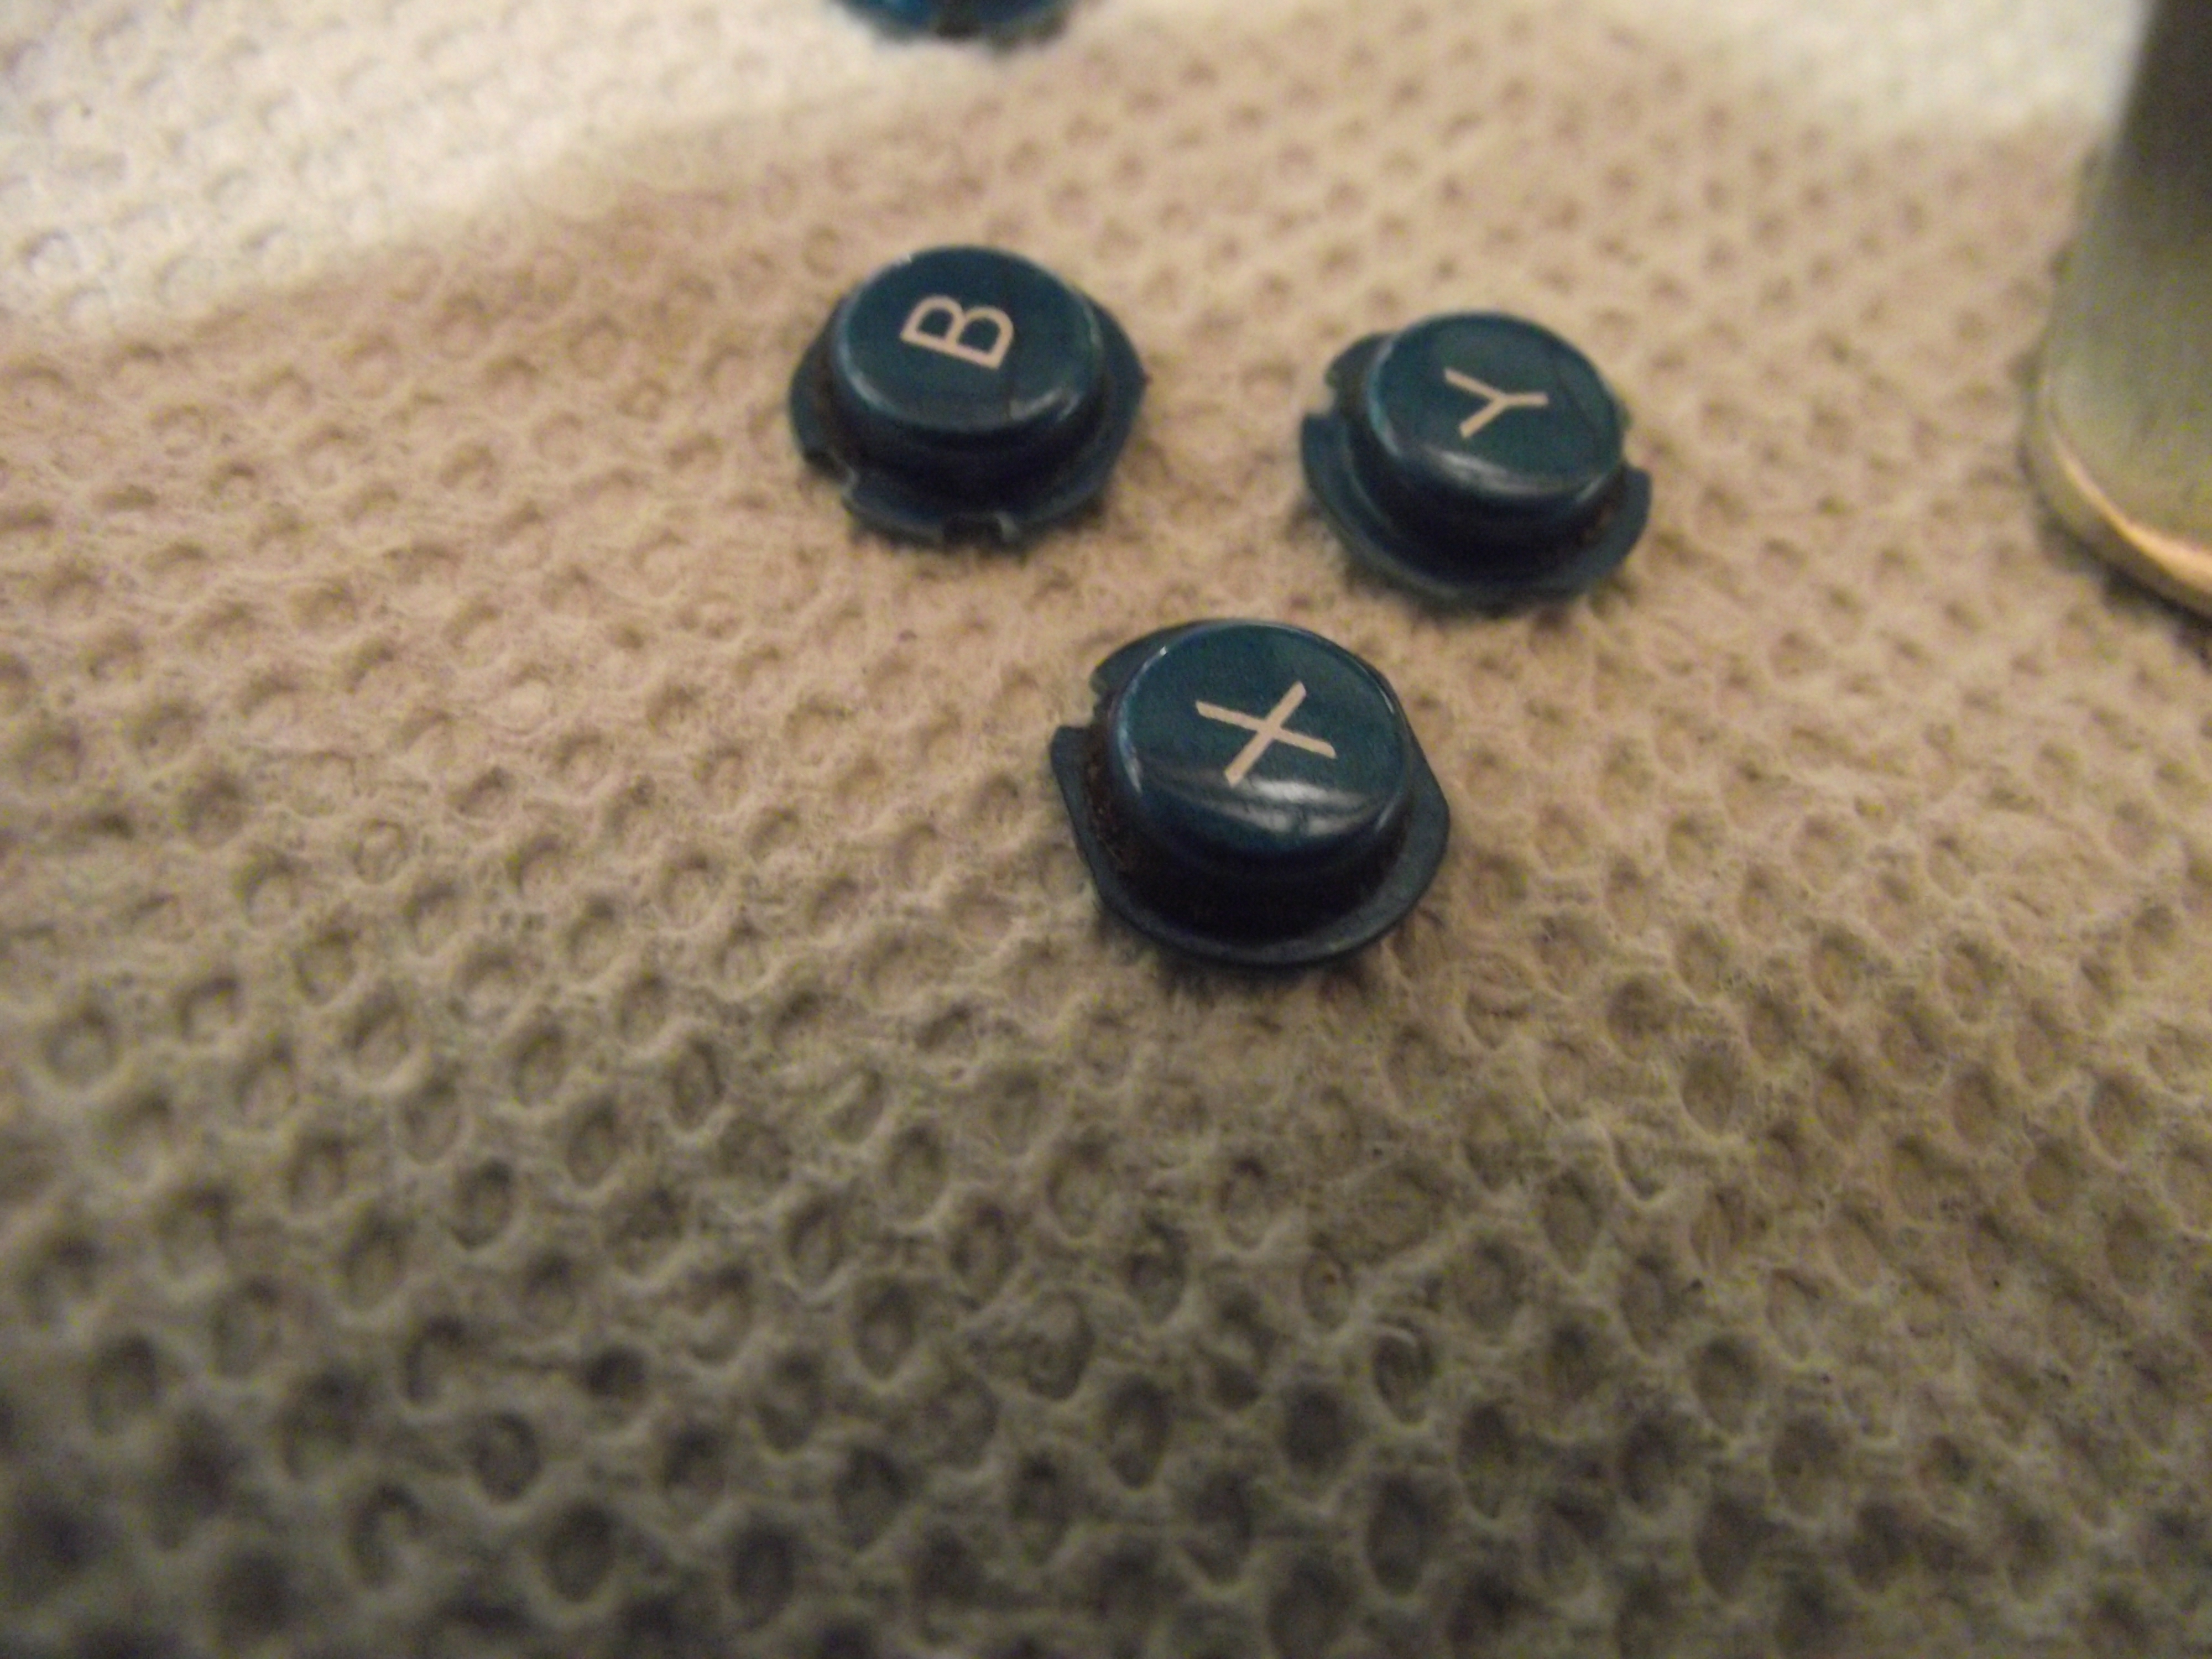
 Remove the buttons one by one and clean the slots. Toothpicks help. 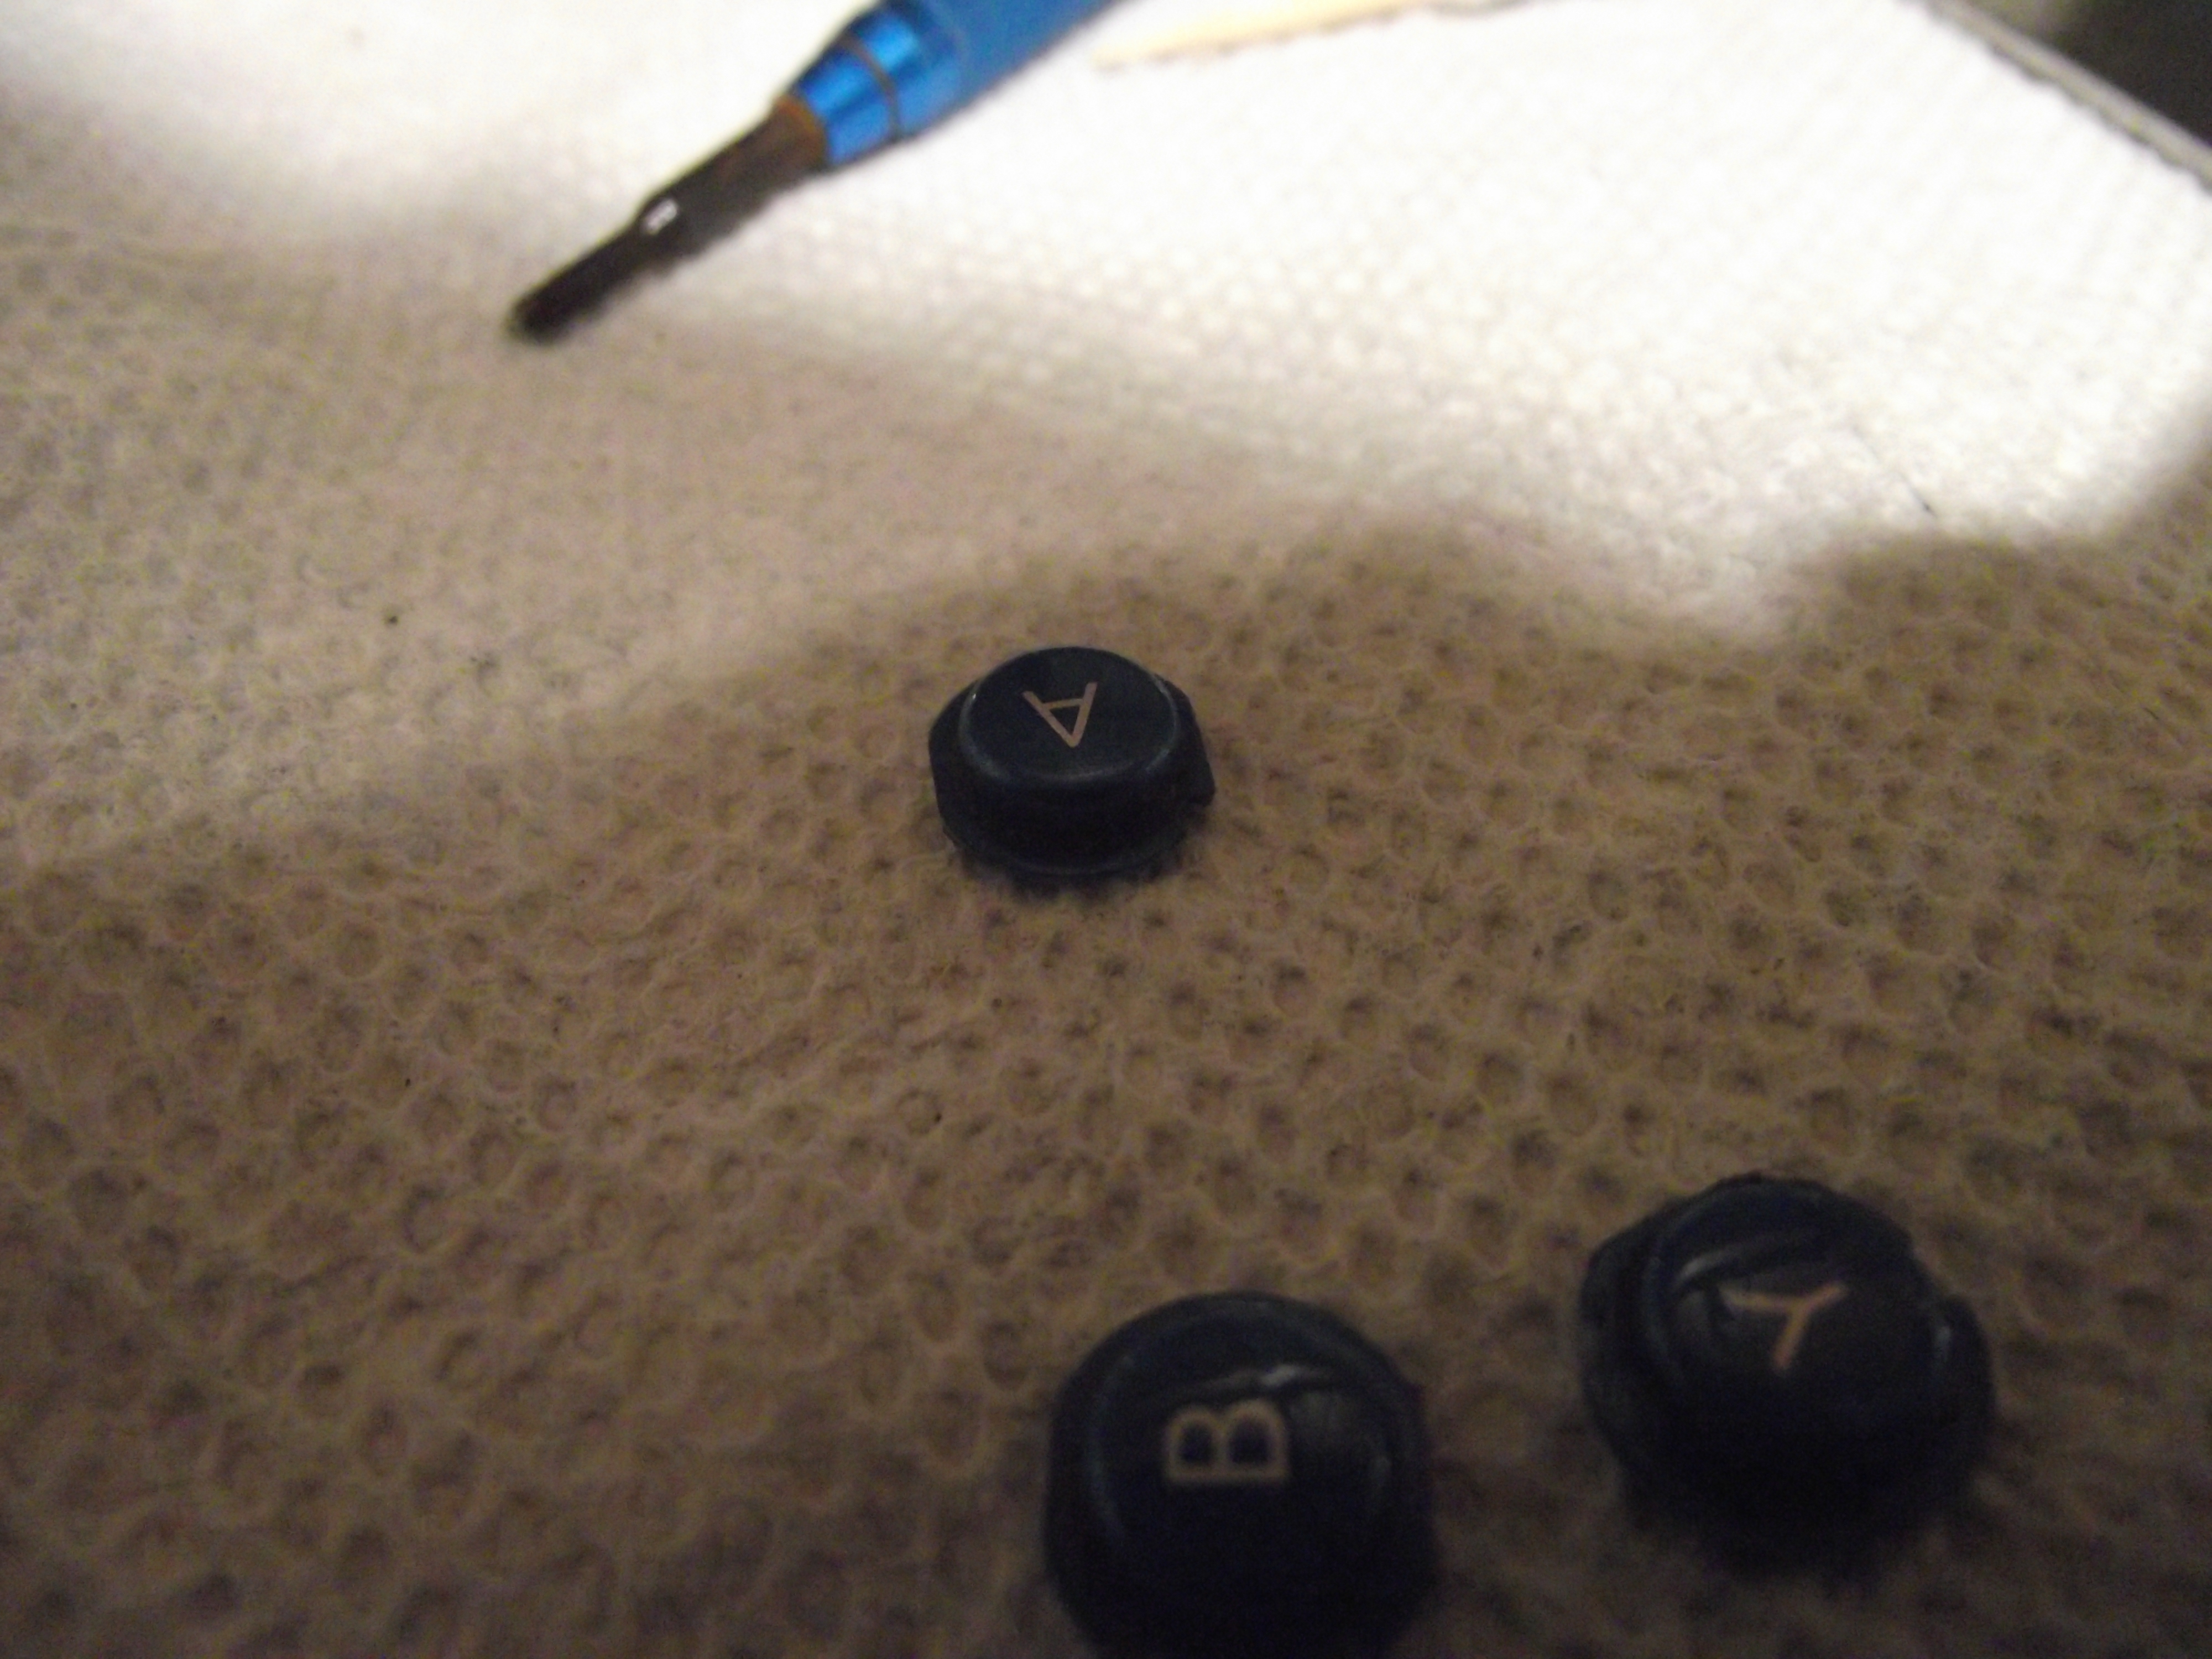 Clean the buttons, too. As you can see, they’re usually even dirtier than the slots in which they sit. |
Of course, while you’re at it you should also clean the D-pad and power buttons. It’s the same nauseating process as for the ABXY buttons, so I didn’t bother photographing them. When you have to disinfect your camera after each part of the process, you’ve got a strong incentive only to photograph the most essential steps.
Don’t close up your console yet. The most important part is to clean the contacts on the motherboard. If you’re a particularly depraved slimebucket—or if the console has suffered liquid damage—you should clean beneath the contacts as well.
 As with most things, these contacts don’t look too bad from afar. 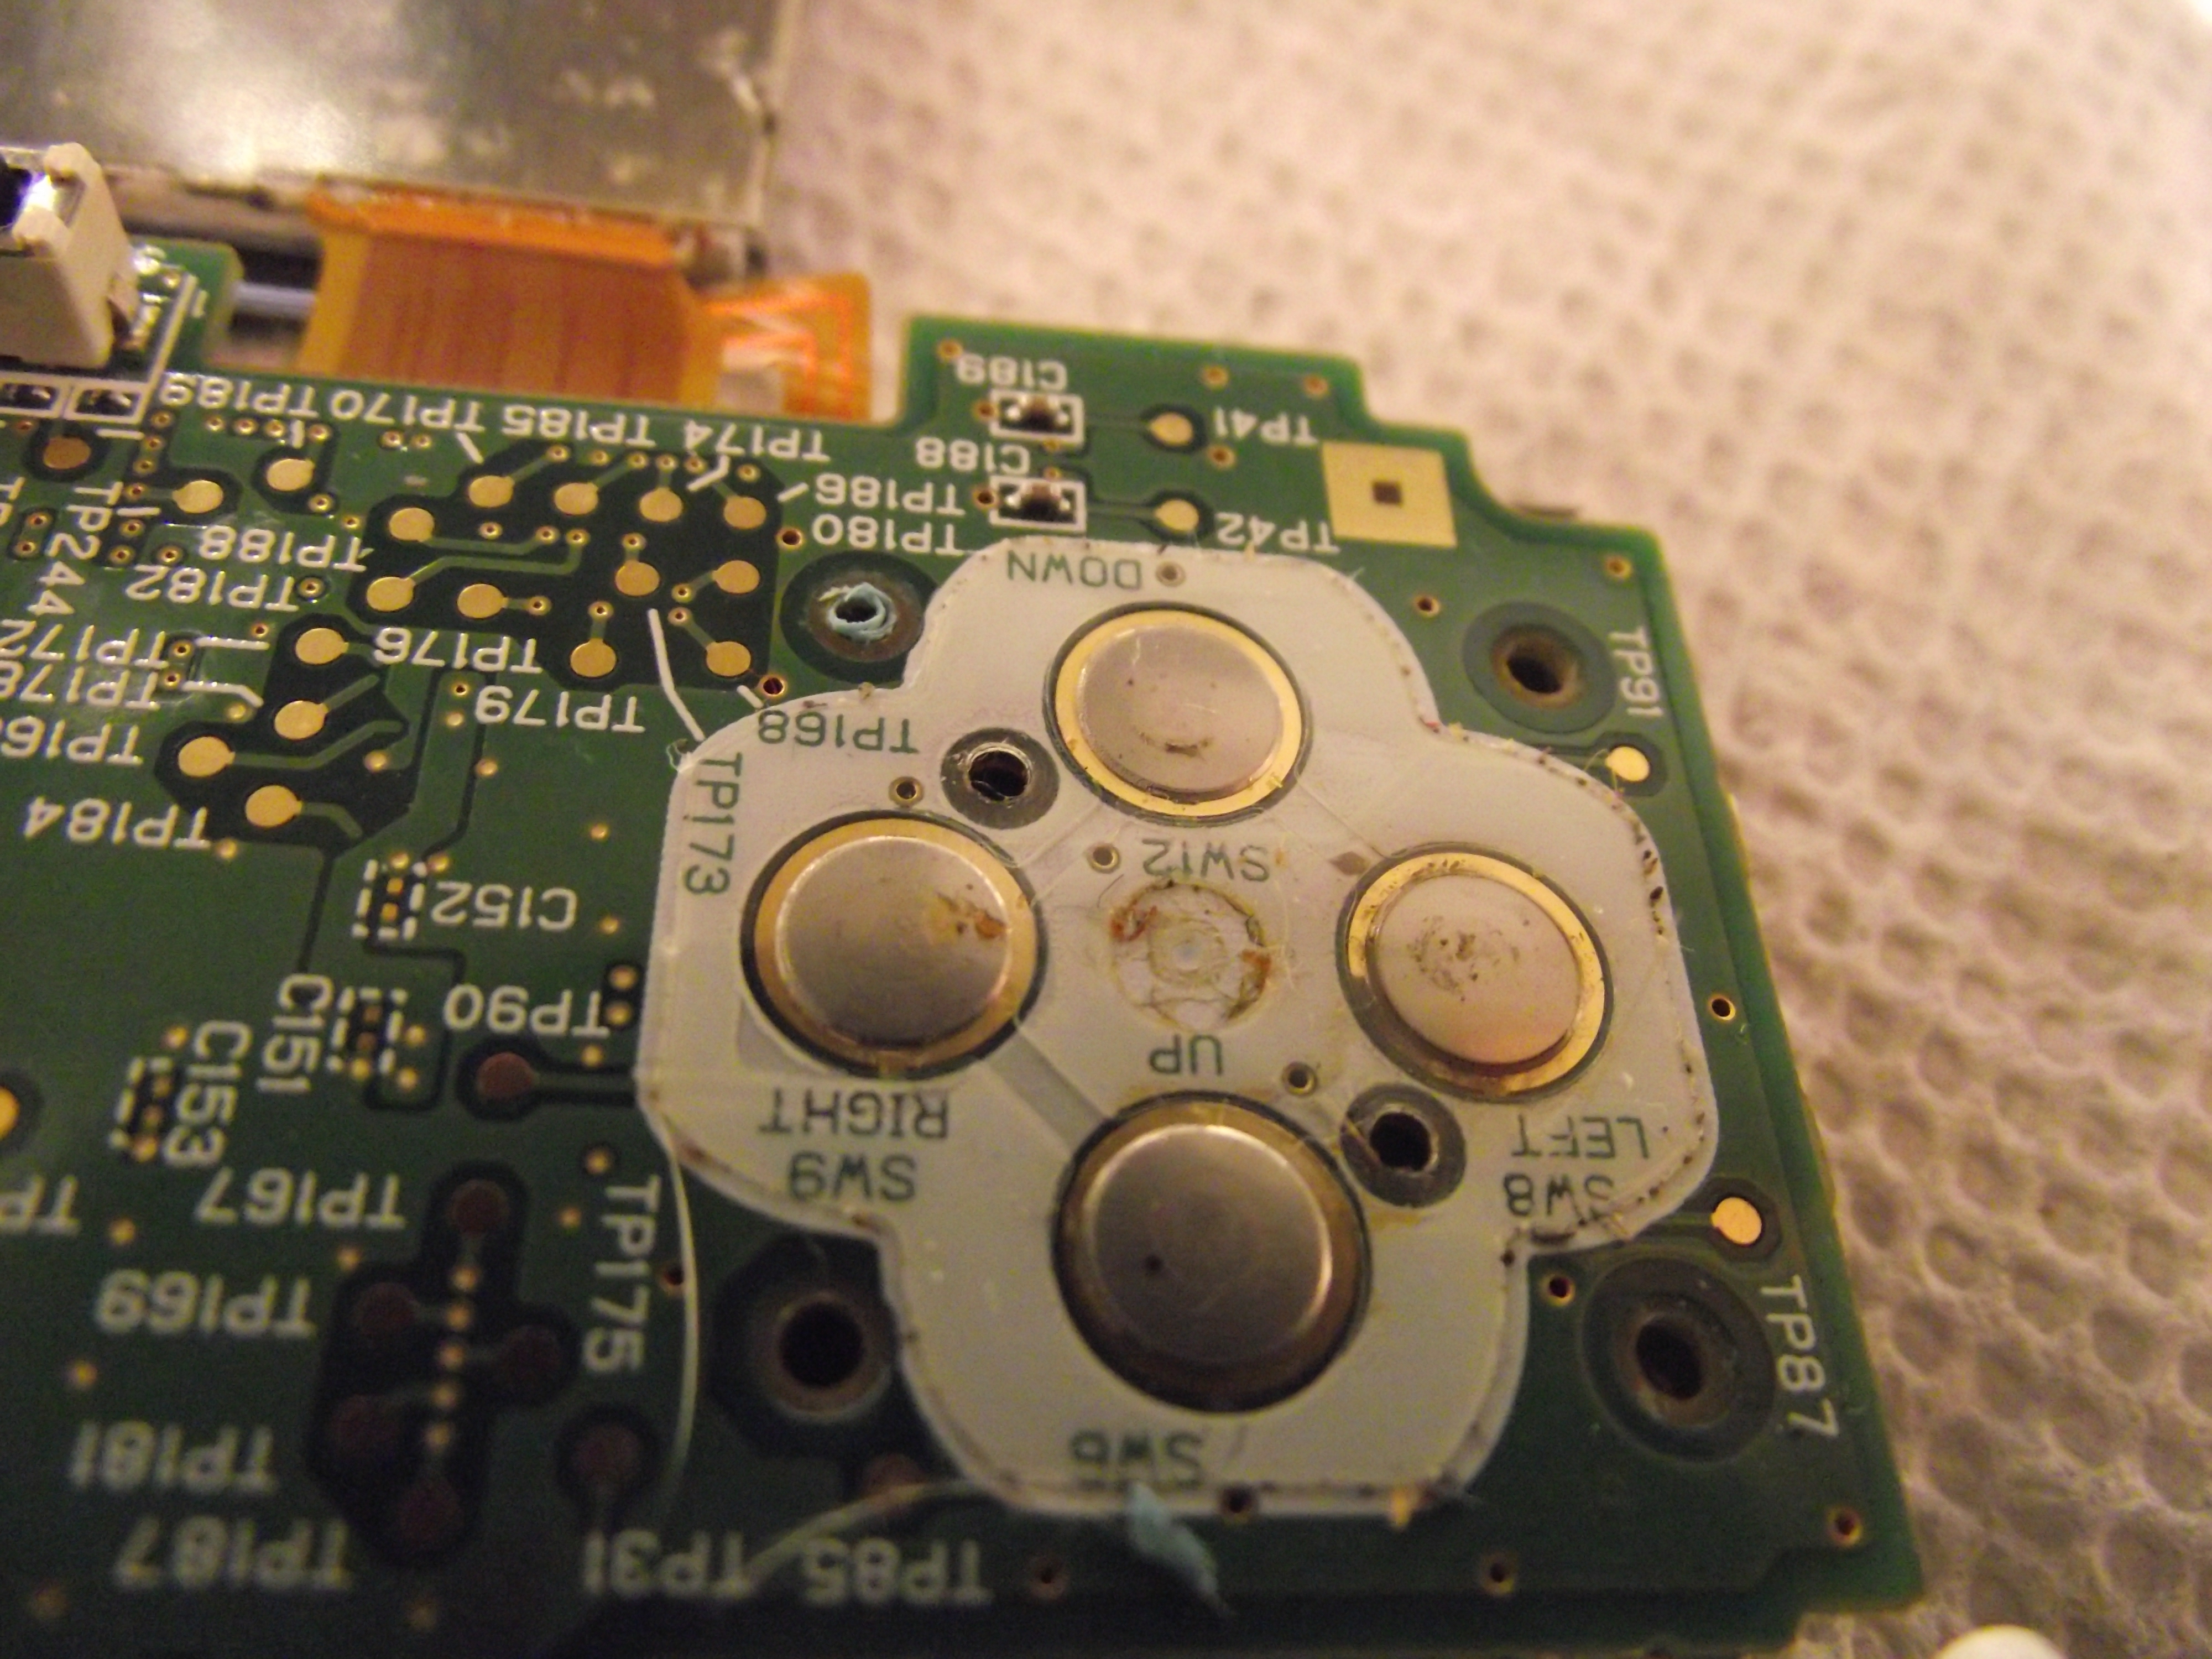 But look more closely and you’ll be horrified. We need to clean this sludge off with isopropyl alcohol and a cotton swab. |
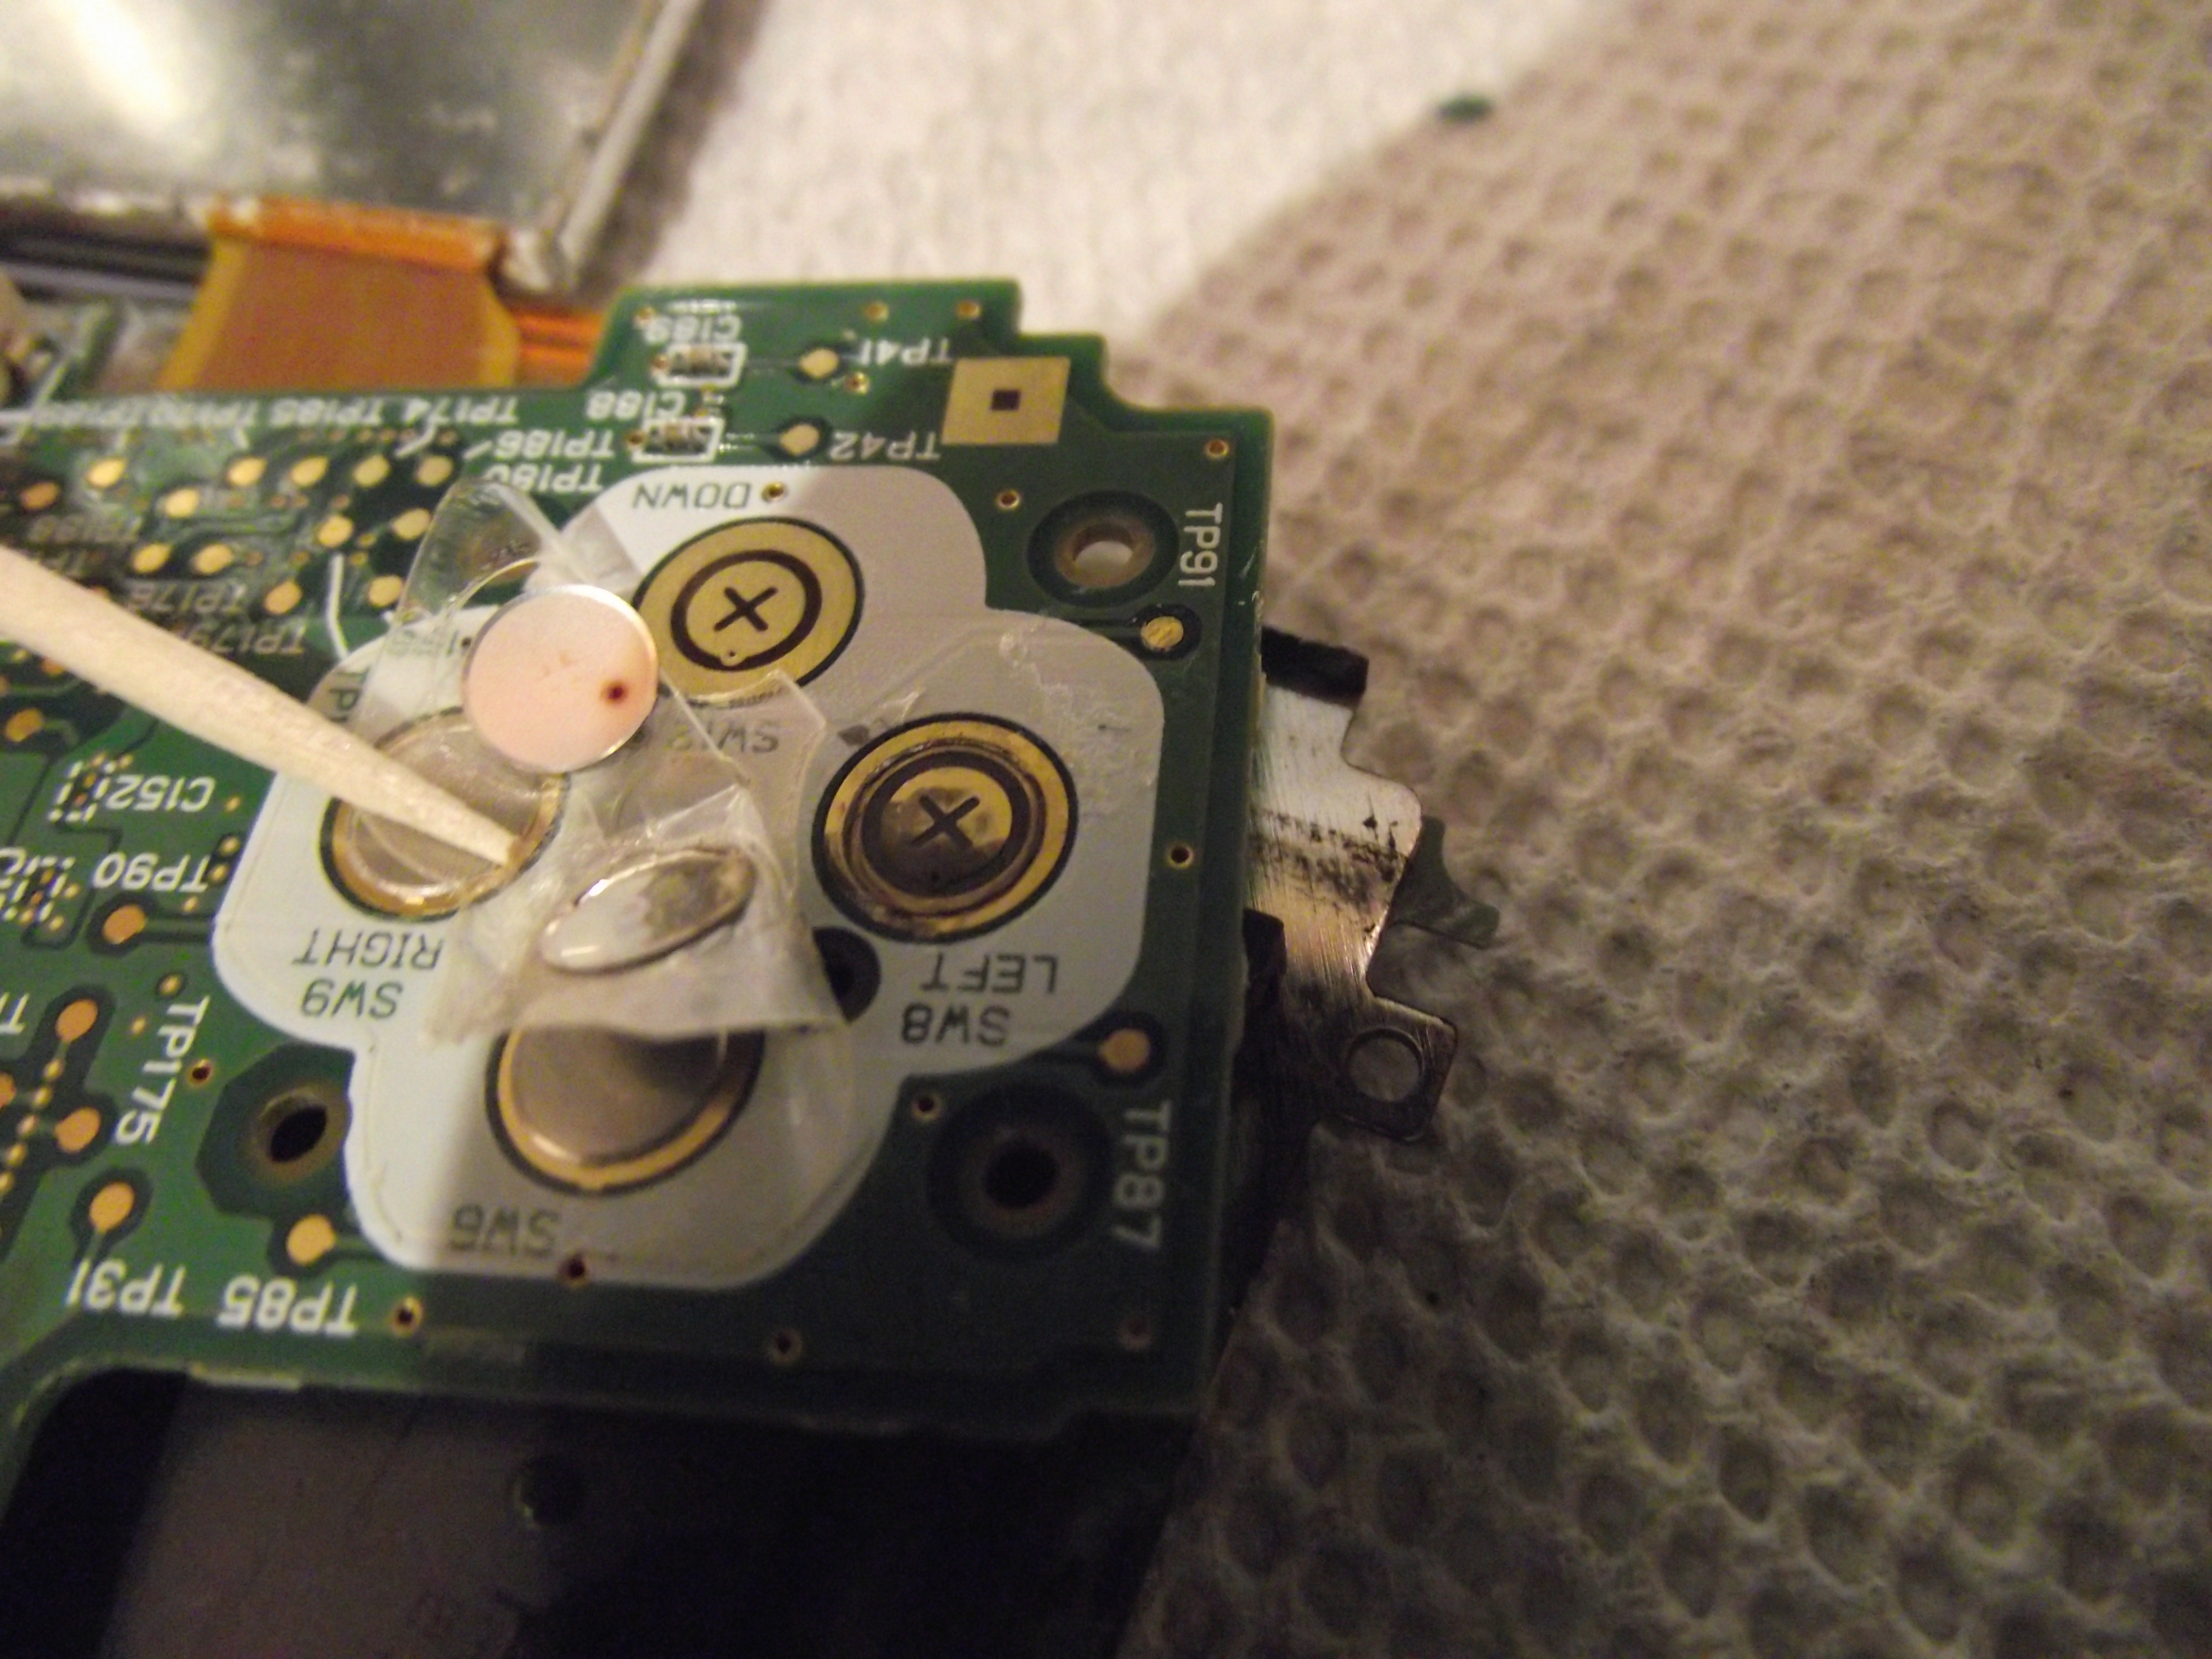
For the worst cases you will need to clean beneath the contacts as well. Mainly this is only necessary when there was liquid damage, but in this particular case the owner was such a slovenly clodhopper that there was a horrifying amount of dirt underneath the contacts even in the absence of anything else that looked like liquid damage.
You can peel the contacts up with a toothpick, but I actually find it easier to use my fingernail. As long as you’re careful, you can just stick them back down on the board when you’re finished cleaning. The adhesive is very strong, so it can be reused. However, if you do accidentally destroy the contacts you can replace them either from another motherboard or by buying replacements on eBay or Aliexpress for about $2, so there’s no great risk involved here. Just don’t scratch the motherboard.
 It’s amazing the D-pad worked at all with this level of accumulation. 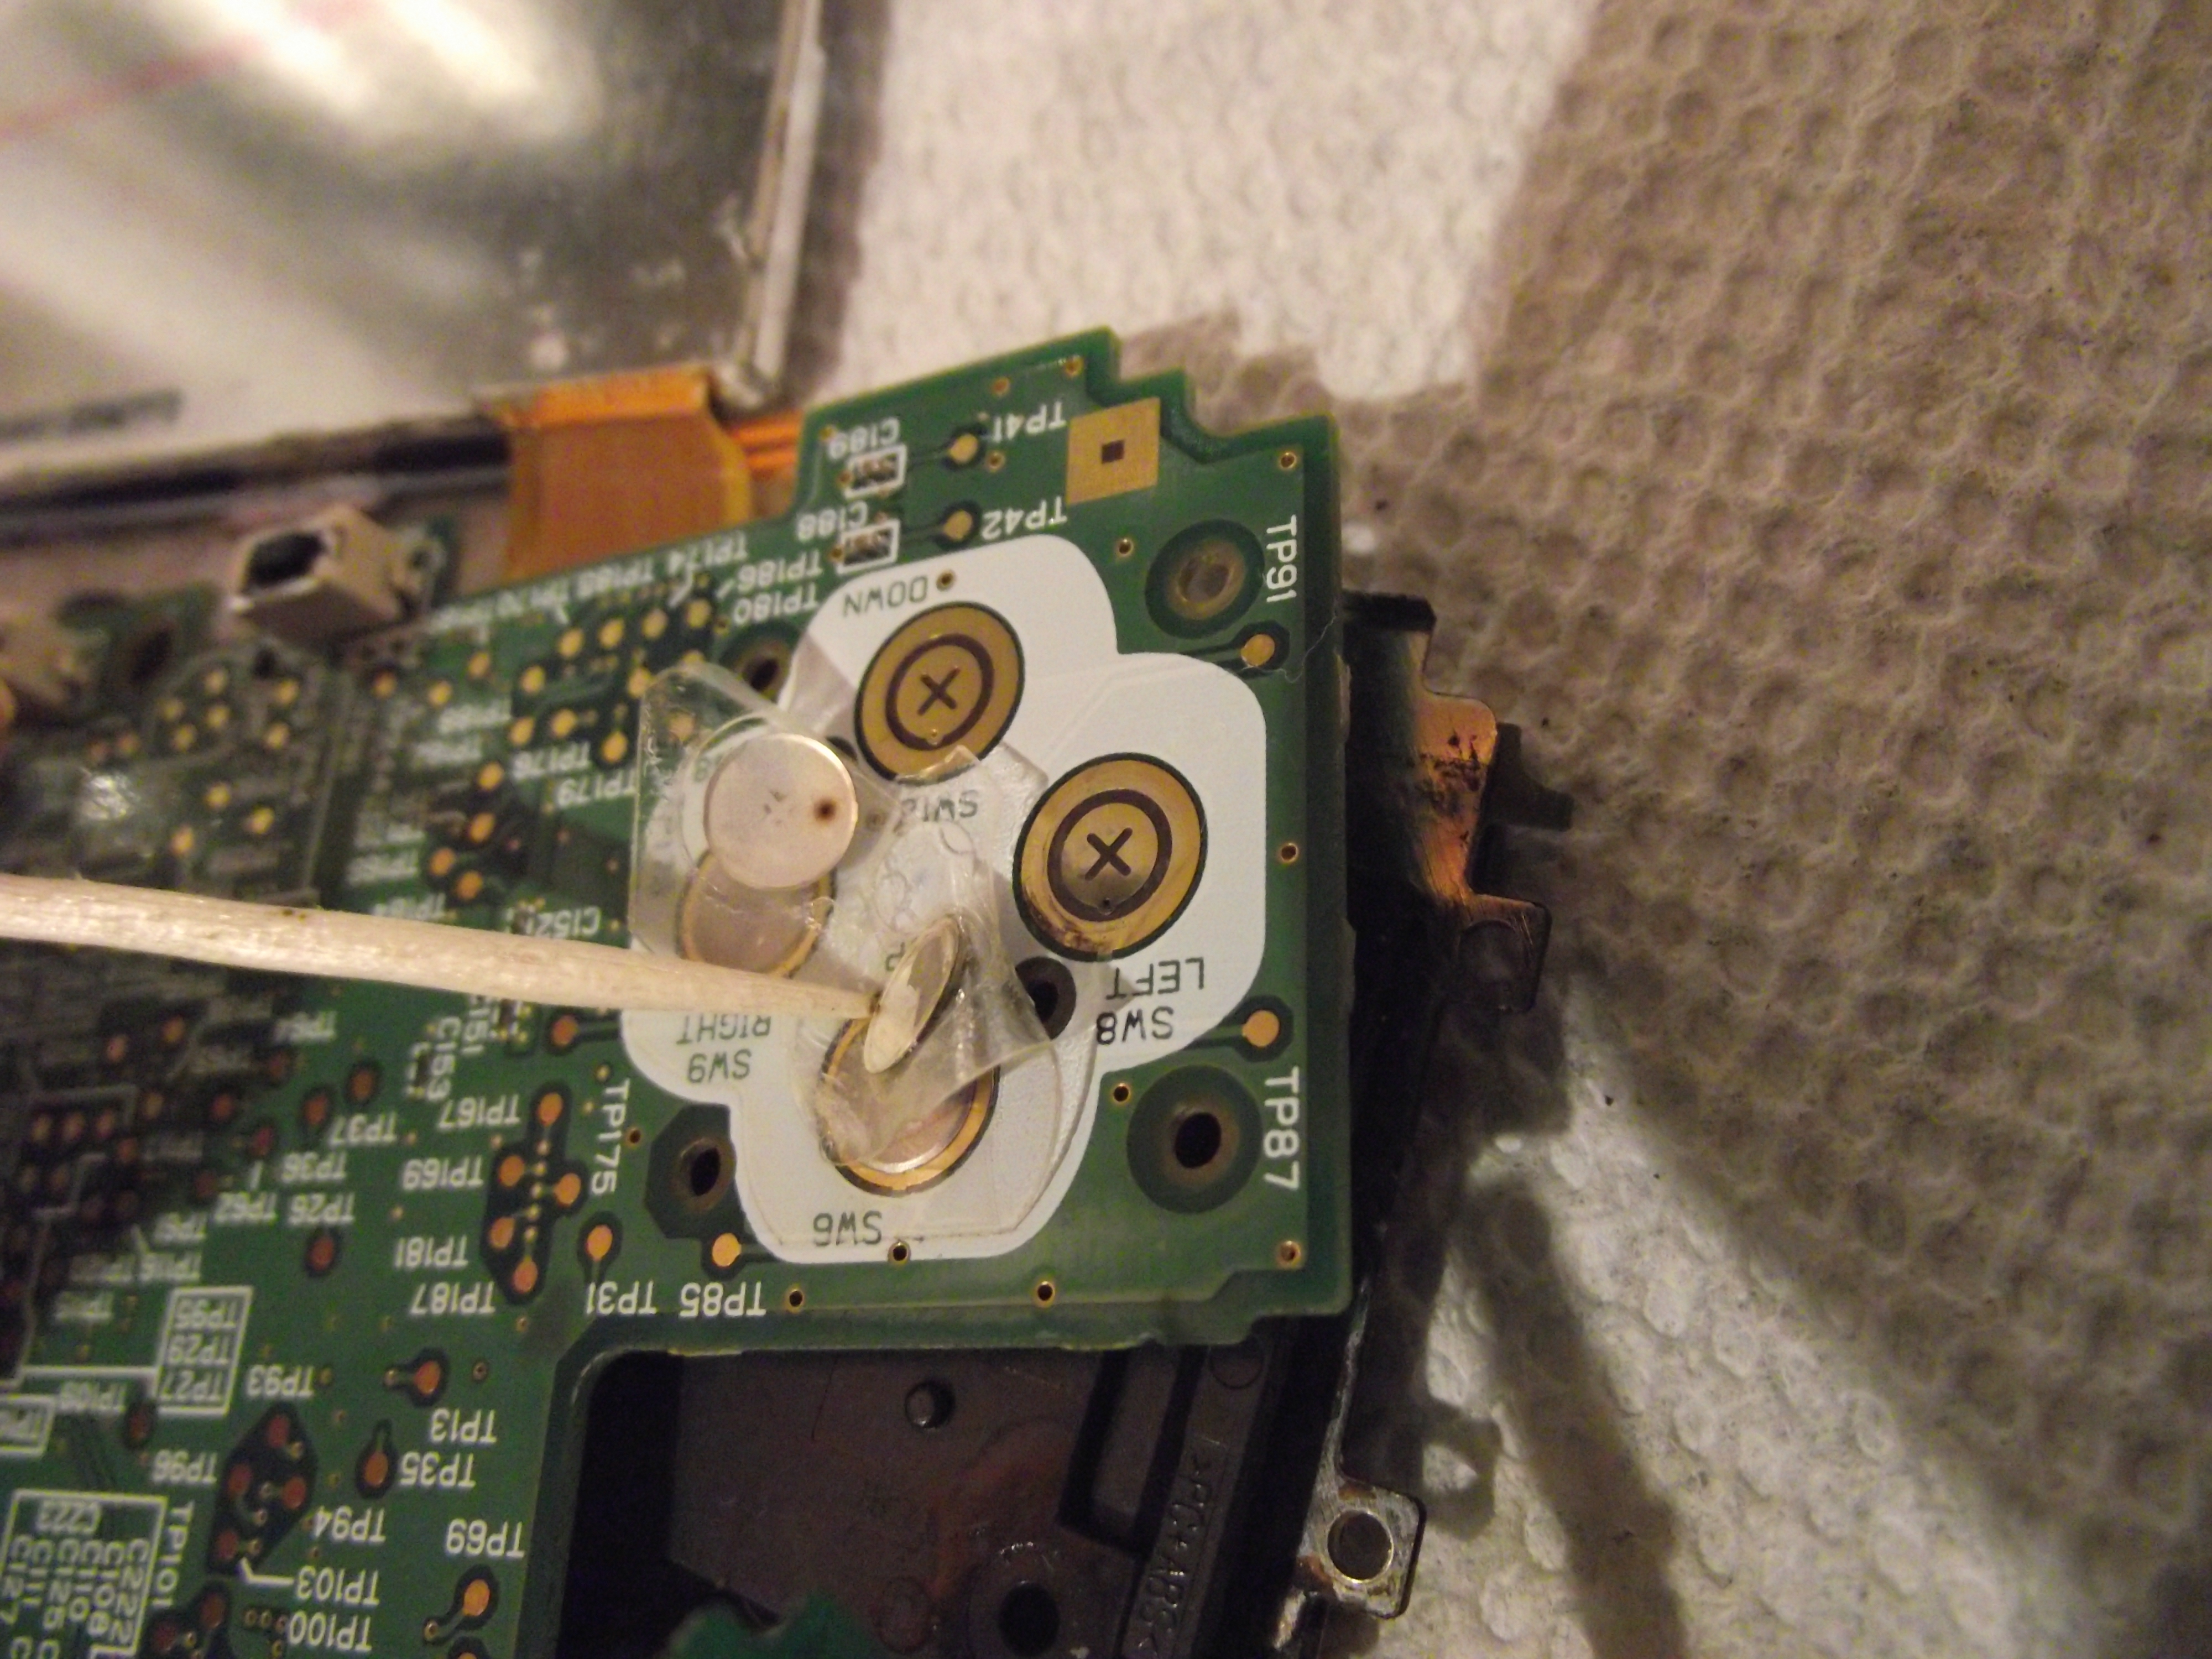 When cleaning it’s fine if you don’t remove 100% of the dirt. It’s not necessary to be perfect. In this case the contacts are clean enough to restore completely normal functionality even though there is still a small amount of stubborn dirt left that I couldn’t remove. |
And that’s it. If people weren’t such swine none of this would be necessary.
How did you get the motherboard contacts off? I can’t find any spot to remove them
I just use my fingernail. It takes a long time, but if you start at the edge of the board and pick at it for awhile you’ll eventually lift up enough of the sticky part that you can grab it with your fingertips and pull it the rest of the way off.
Thank you!
I followed this tutorial last night and it worked perfectly!
My A button required a very hard press to get it to register. I took it apart and it looked very clean, so I don’t think dust or anything got underneath the sticker part. There was, however, some brown marks on the metal cap on the sticker side. What I think is happening is because the metal cap is completing an electrical circuit to trigger the button press, this may cause a small little spark/arc in the same spot over and over again, and eventually the button gets a bit of build up in the spot where it makes the connection.
I tried to clean this off with isopropyl alcohol, but it remained on the part. So I took my exacto knife and lightly dragged it across the surface (of the sticker part, not on the circuit board), scratching away the carbon. I could have probably used electrical contact cleaner but I didn’t have any on hand.
When I put it all back together the button was working as well as it was the day it was new!
Nice! Glad to hear it worked out.
I currently am having a problem with a 2ds i just bought.where to keep a person running in a game i have to press b in the middle of the button and hold it down harder than my other 2ds. And i was going to do what you showed but it has a completly rounded out mother board gold screw. Is there a certian size drill bit to drill it out as its completly round no chance for. Thanks in advance
I’ve never worked on a 2DS before, but if the screws are the same size as the 3DS I use a 1/16th inch drill bit and try to destroy the head so I can lift the back off and remove the rest using pliers. But I’m not very good at it and I end up cracking the post about half the time, so I’d suggest you take it slow and be careful.
i have the problem with my X and B button, they dont work anymore, i bought a new button sticker, and i couldn’t find any dirt, i did cleaned the contacts and placed the new sticker. still not working, anybody knows what else to check for? thanks..
That’s odd. I’m sorry though. Other than cleaning them I’m not really sure what the issue could be. Maybe a broken trace somewhere? If that’s the case, it might be difficult to fix.
I added a single circle of paper in between the grey plastic and the buttons, that helps as well.
Is it the same for the new 3ds? I don’t see why not.
It’s similar. The contacts for the ABXY buttons aren’t on the motherboard though. They’re on the separate power board that connects to the motherboard with a big flat flex cable. It looks like this.
There’s also a separate PCB just for the directional pad, so it may be easier to just replace it entirely if the contacts are bad. They’re around $5 on eBay.
https://cdn.discordapp.com/attachments/610652110073102385/637742830239875112/20191026_130053.jpg
i need to replace these 4 metal contacts. iso wont clean off the “short” dots. do u know exactly what these are called? so i can put 4 new little metal dots on
I usually call them “metal dome buttons”, but I’m not sure if that’s really the correct term.
It looks like you can find them on Aliexpress. There are different versions for both the original 3DS and new 3DS:
https://www.aliexpress.com/wholesale?catId=0&initiative_id=SB_20191026125854&SearchText=3ds+metal+dome
I haven’t personally bought any, so I can’t vouch for the quality.
Wow, thank you so much for sharing this. Had the exact same problem and solution as Scott on a New 3DS XL and it works perfectly now. I wish there was a way to bump this to the top of Google over all the forum posts without solutions. The detail here gave me confidence to get it done the right way rather than worriedly guessing based on bits and bobs I picked up elsewhere trying to piece a solution together.