
I never knew headphones could be as stinky as this pair that I bought on eBay.
I got a great bargain on eBay, gambling on a “for parts or not working” auction. I bought a pair of Sennheiser HD 280 headphones. When I got them I disinfected them first with some Lysol and 99% isopropyl alcohol. I eagerly put them on and listened to a few songs I knew well to test them out. At first I thought, “Wow, these work just fine”. The next day, however, I noticed that the balance seemed very slightly off. The right speaker seemed just a bit weaker than the left. After checking that it wasn’t a problem with my sound card drivers I recalled that I had read somewhere that people occasionally assume they have a faulty pair of headphones when they notice a balance problem, failing to realize that it could just be that the driver has slipped out of place. I removed the pads and unscrewed the two screws underneath the right one and, sure enough, the driver had slipped out of the clip that holds it in place.

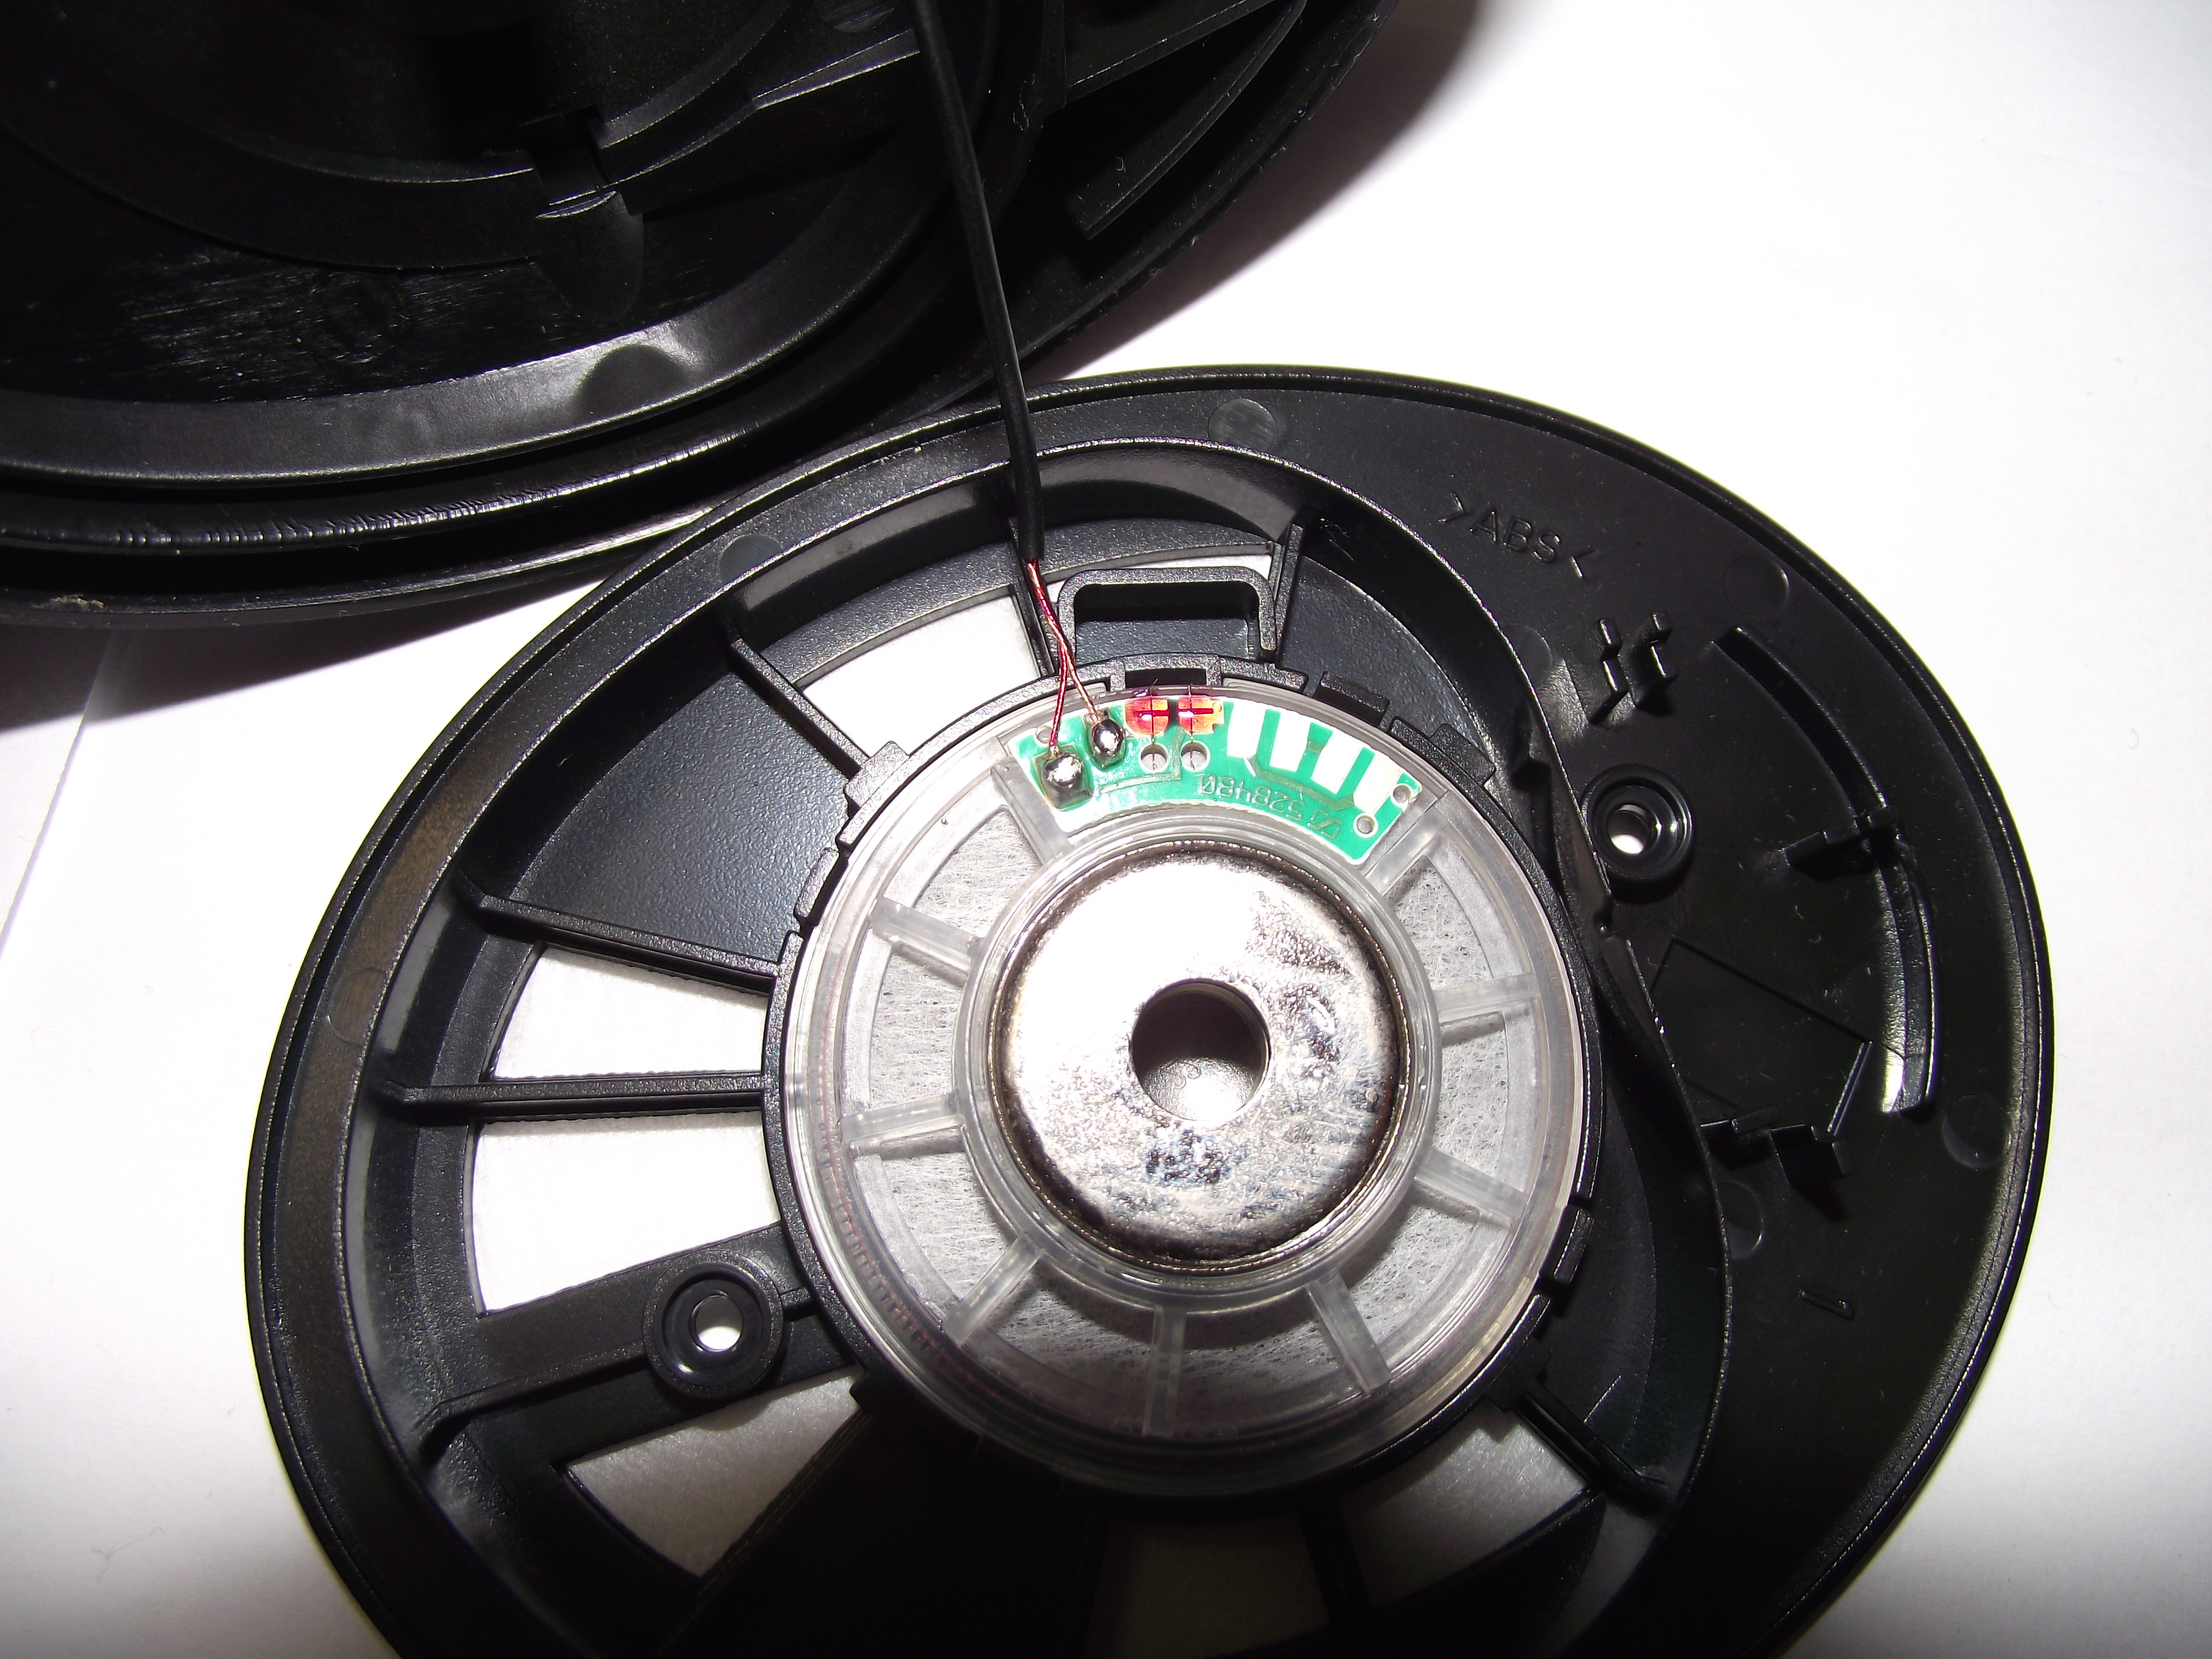
It was only a few centimeters out of place so that’s why the difference was so very subtle that I didn’t notice it at first. I clipped it back in place so it was nice and snug, closed up the headphones, and then tested them, comparing them with my Sony MDR-7506. One of the most useful websites to test that your headphones are working properly is the ultimate headphones test.
After listening to these headphones for a few weeks I’m very happy to say that the only thing wrong with them was that the driver was physically out of place. The balance is now perfect.
Once I was sure that they were 100% functional my next task was eliminating the smell. The previous owner must have worn one hell of a lot of cologne, because these headphones reek of the stuff. The initial disinfection routine of Lysol and alcohol that I performed when I first took them out of the box was nowhere near enough. I tried using a bit more alcohol and cleaned the pads with a cotton ball but it didn’t help too much either. These things were soaked through and through with a powerful cologne stench.
The pads are actually very easy to remove. I had trouble figuring it out at first, but all you have to do is pull them out from the groove surrounding the earpiece into which they’re tucked. They’re quite sturdy so they won’t break even if you stretch them a bit. Once I removed them I decided I would simply put them in the laundry. I wrapped them up individually in some clean socks so that they wouldn’t get damaged in the washer or scorched in the dryer.

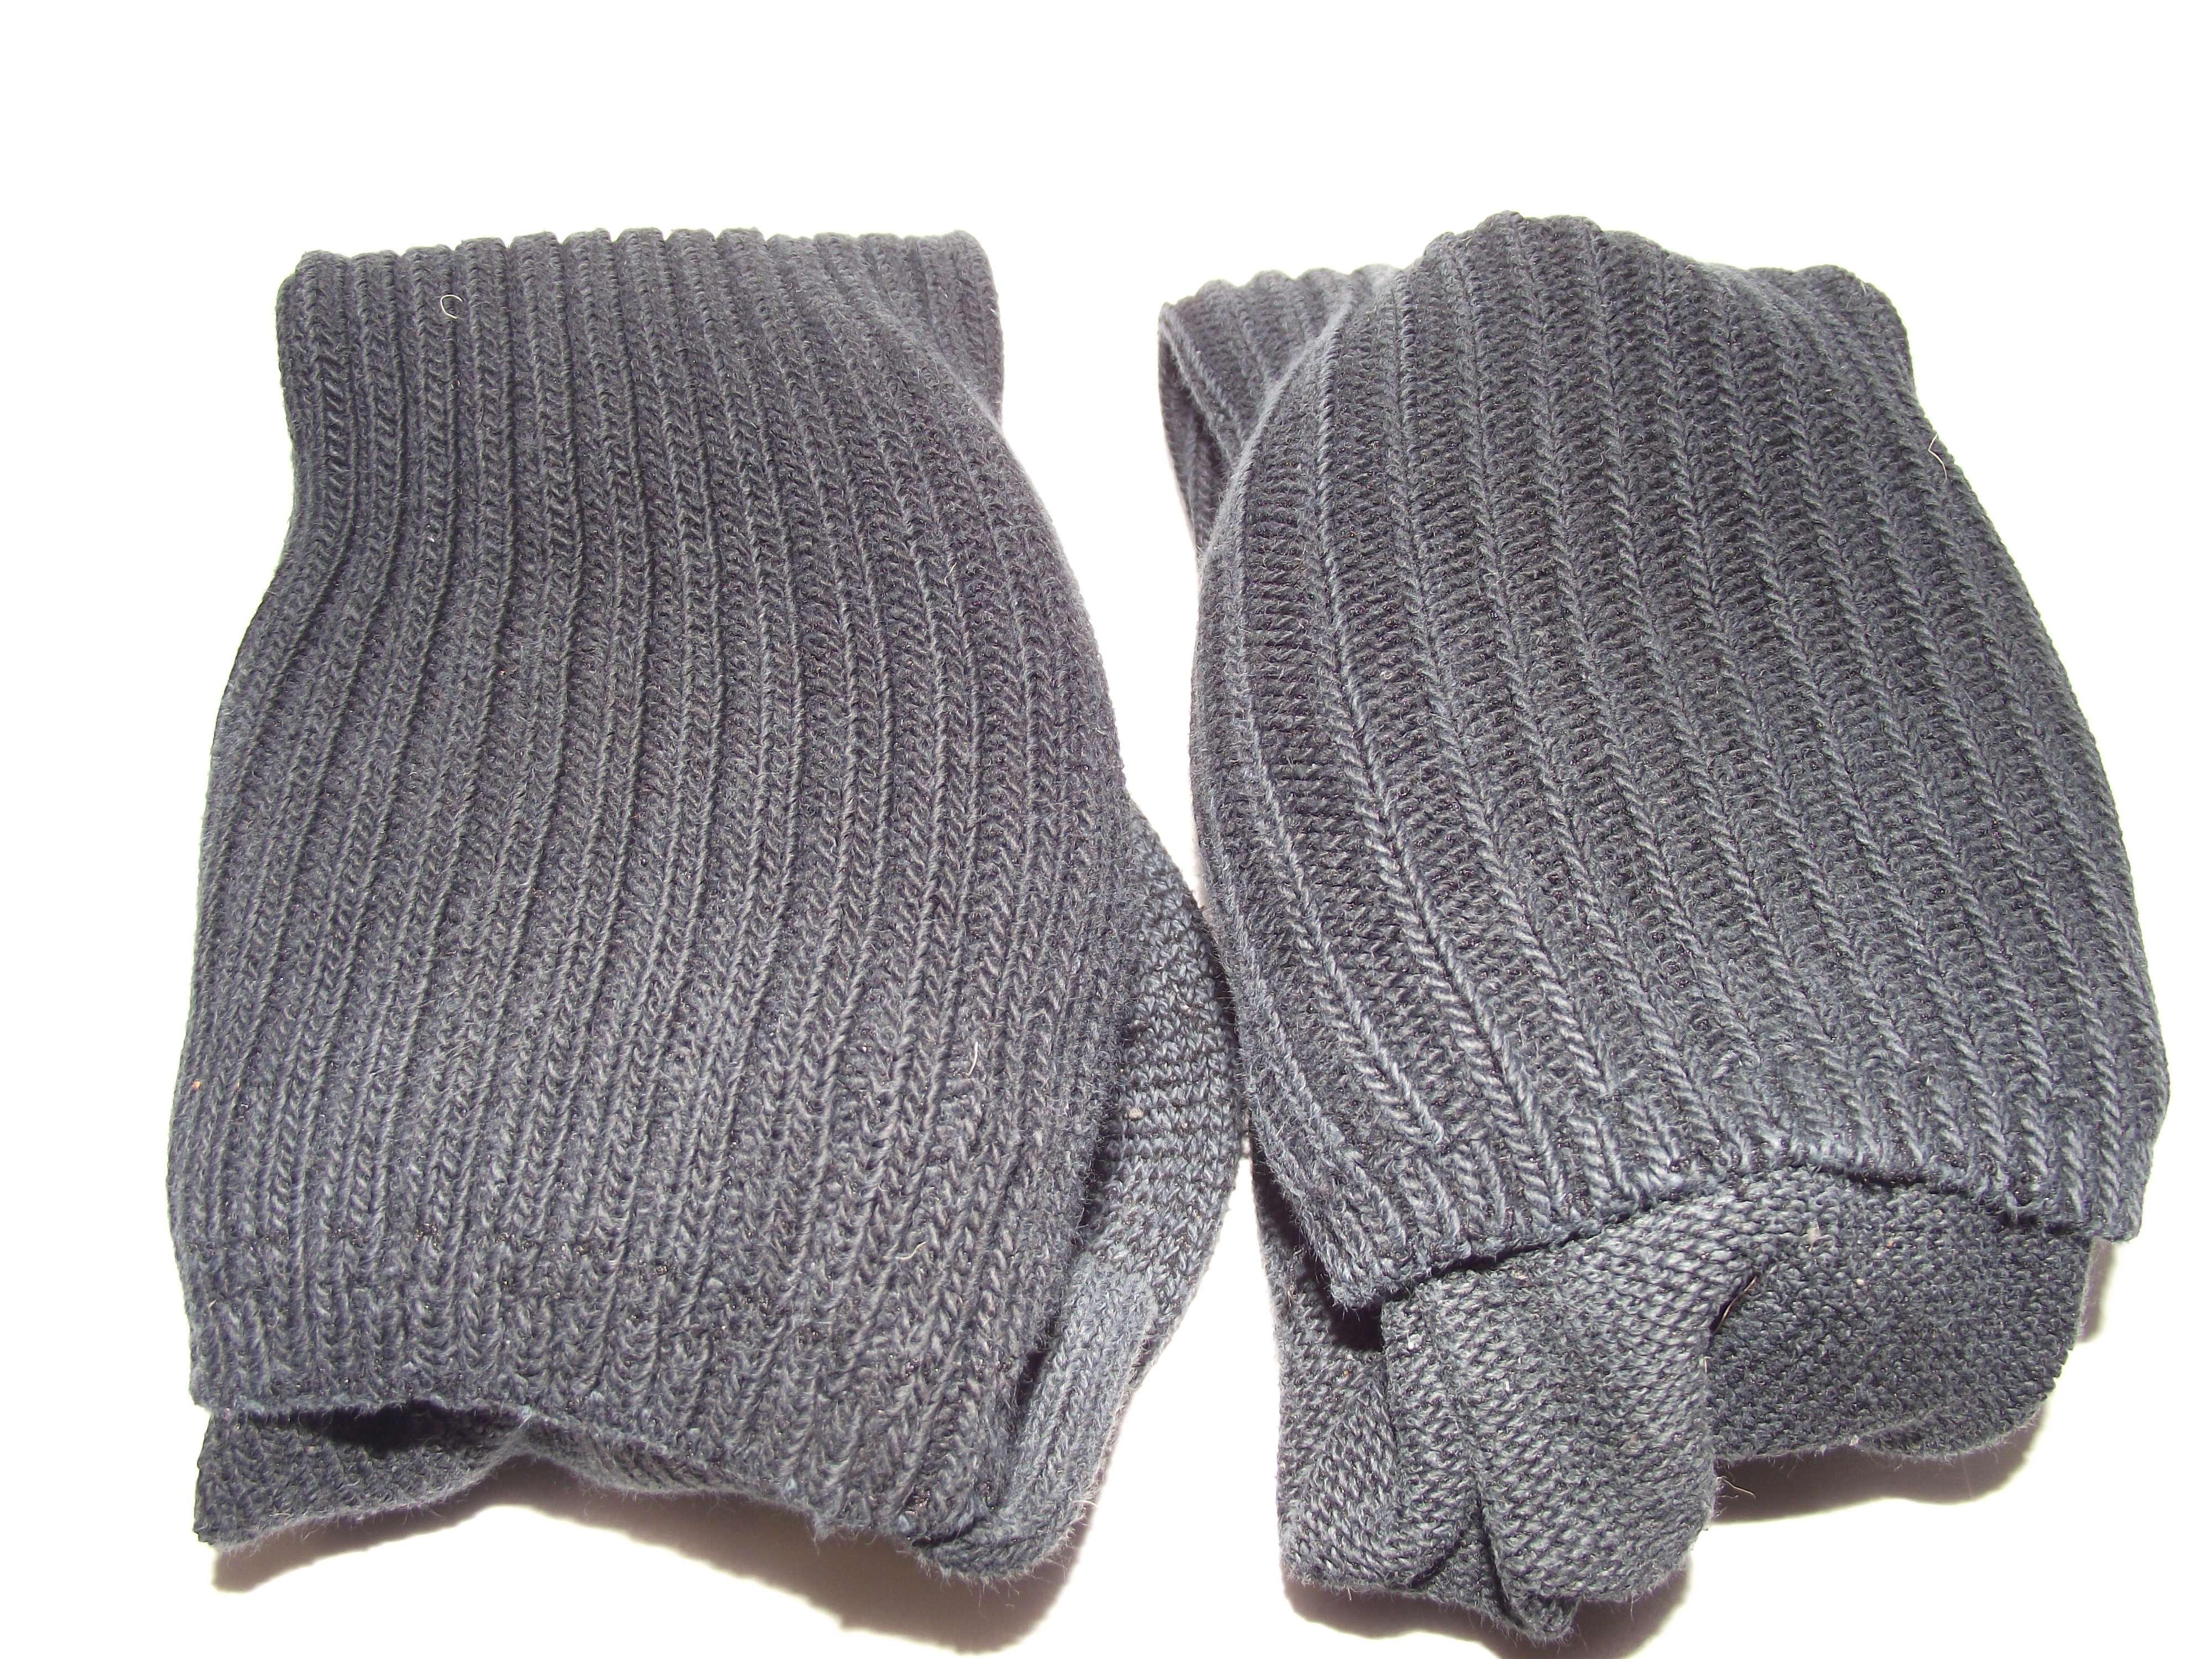
I put them in the washer with the rest of my clothes. I considered washing them separately to avoid the risk of them getting snagged on a zipper or something and getting misshapen, but I figured the socks would protect them well enough. I used the “bright colors” setting on a Maytag commercial washer. It uses cold water. I used ordinary detergent and nothing else. When they were done I put them in the dryer along with the rest of my clothes on the normal setting. Again, I felt there was no need to use the “delicate” setting since they were protected by the socks. When I took them out of the dryer they were undamaged, but they still stunk pretty badly. They were also still a bit wet. I knew I had to take more drastic measures.
It was then that I remembered when I had bought a liquid-damaged DS Lite console that also stunk to high heaven of whatever liquid the console had come into contact with. I had also tried alcohol, Fantastik, Lysol, and even Febreze to clean the stench from the housing of that console but all to no avail. The housing had been in very nice condition so I wanted to salvage it. I then had the bright idea of submerging the housing completely in dishwashing soap. This was an old trick of mine that I’ve used for years to clean keyboards. You remove all the keys and put them in a Ziploc bag. You then squeeze in a generous dollop of dishwashing soap and fill it about halfway to the top with warm water. You don’t want to use water that’s too hot because you could warp the plastic of the keys. You then zip up the bag and shake it vigorously until your arms get too tired to continue and you let it sit for a half hour or longer before rinsing and drying the keys.
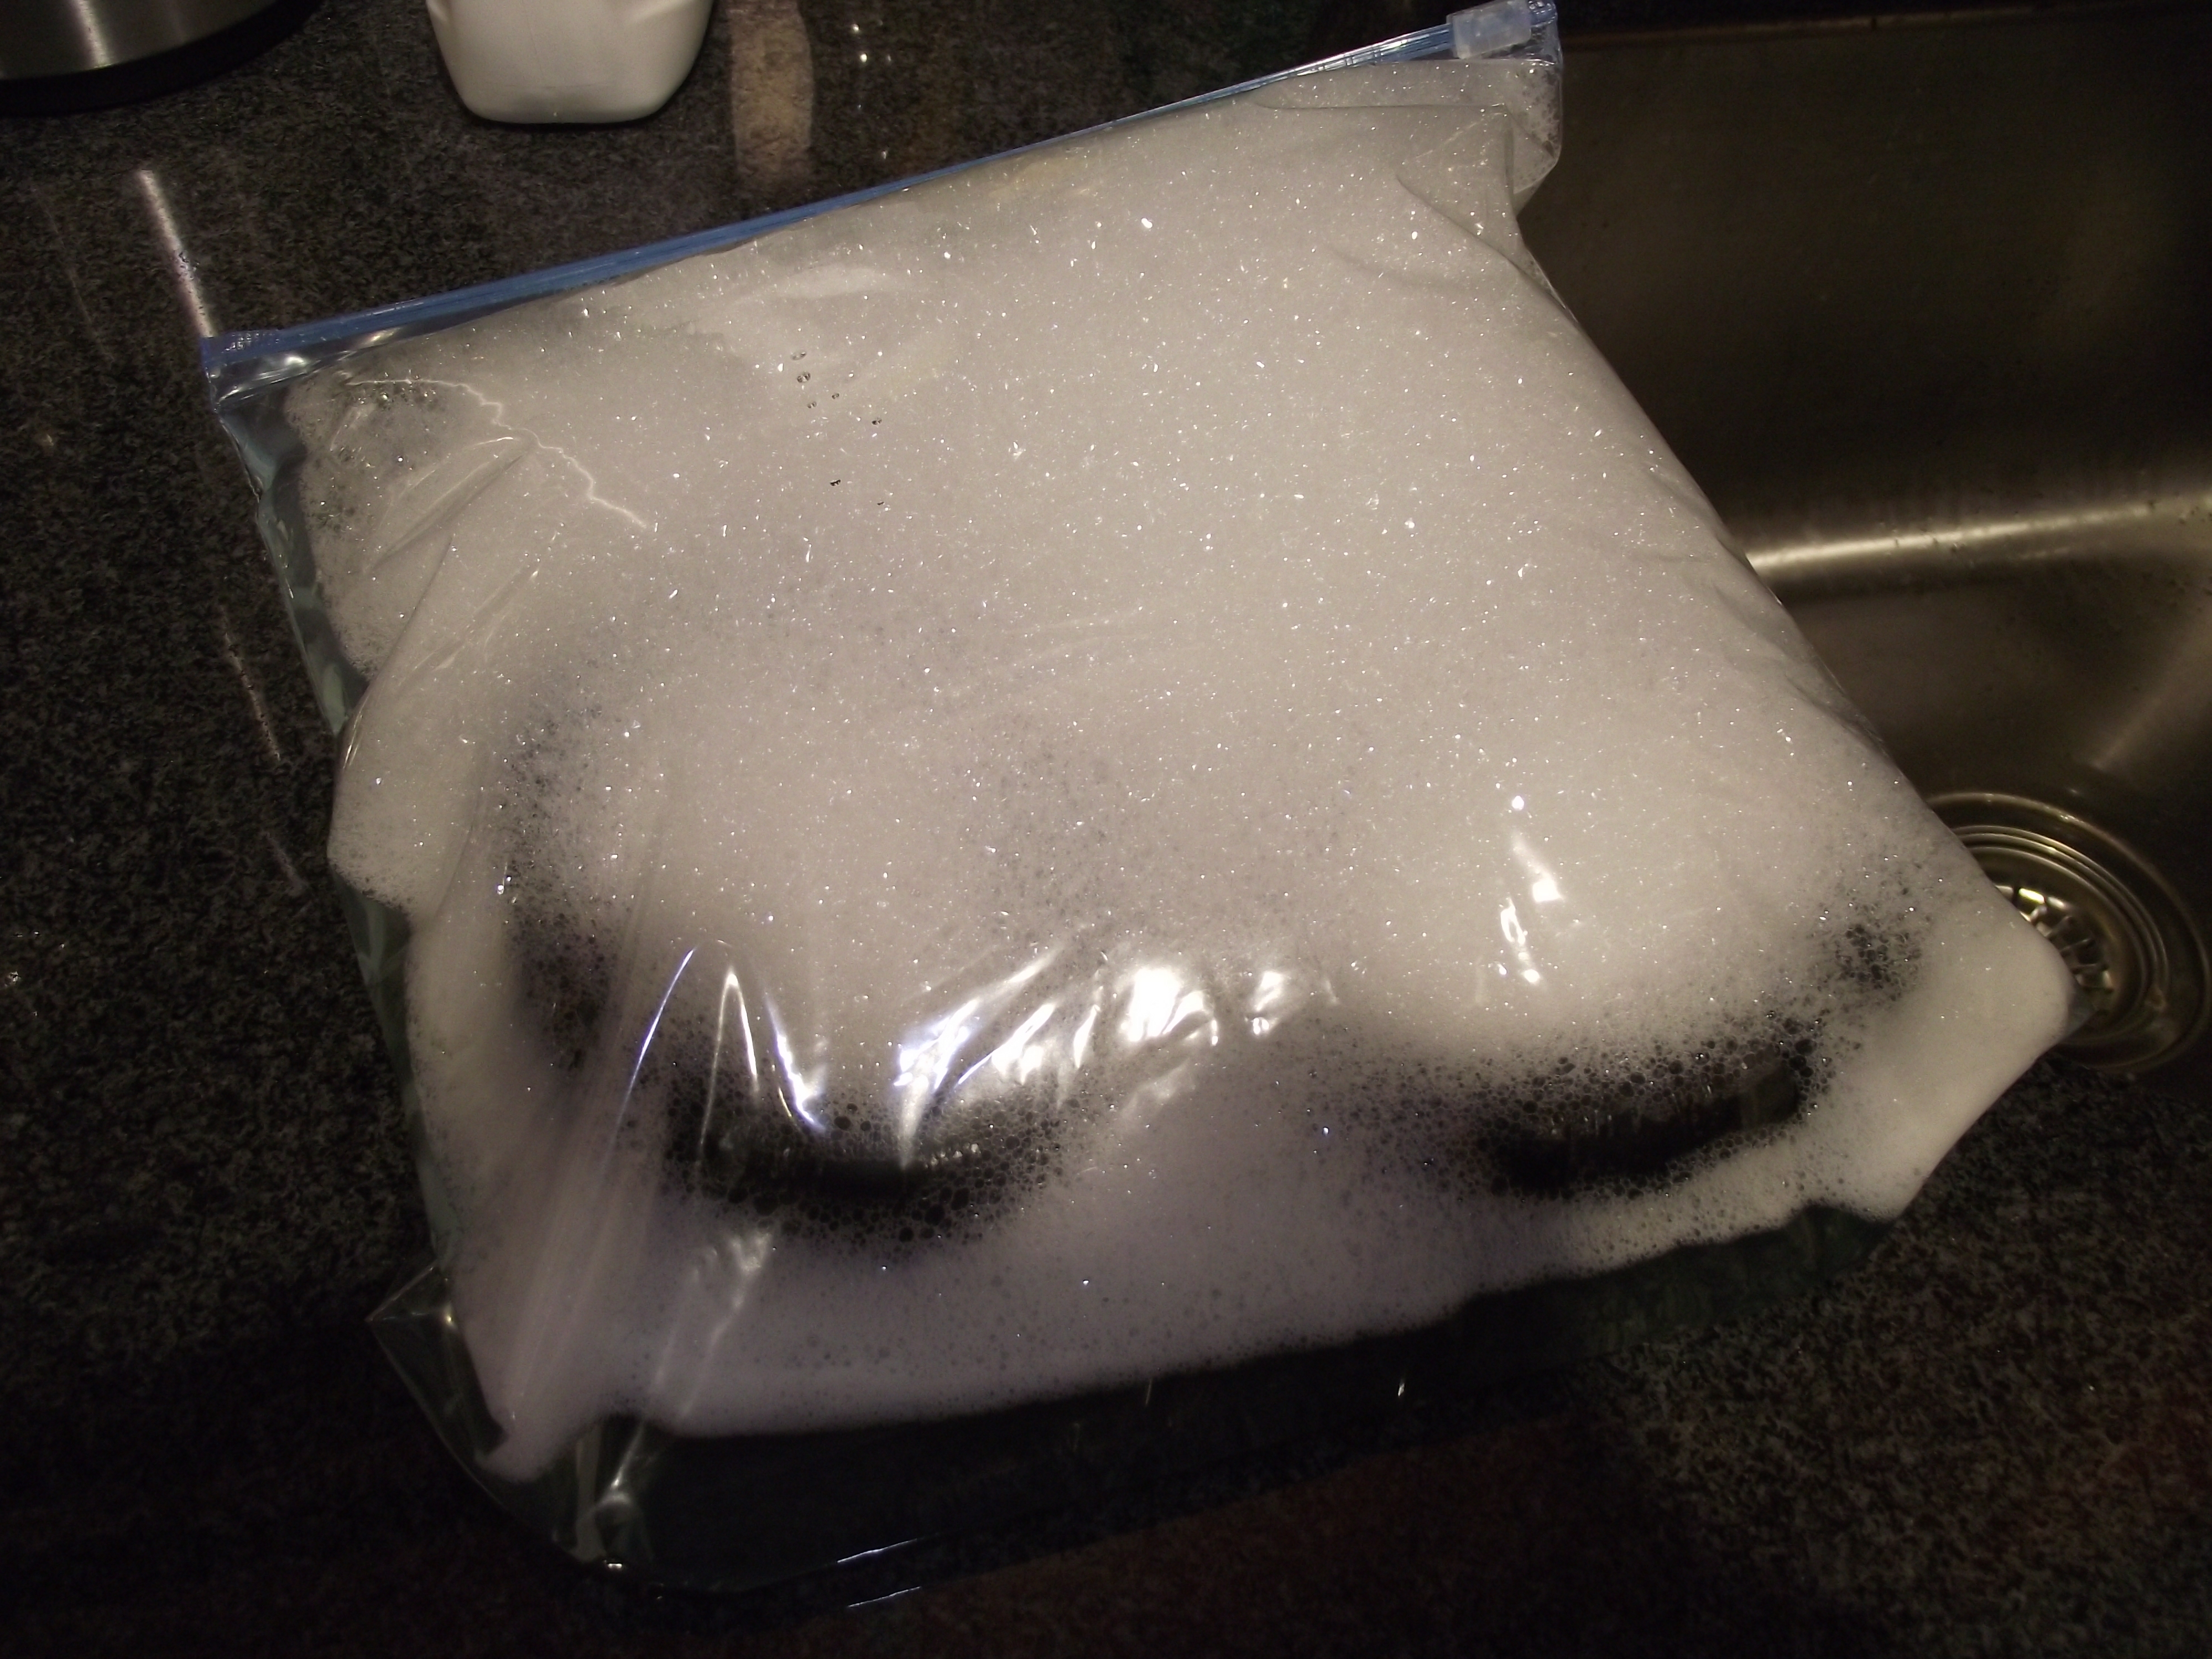
So I gave it a shot. I used a massive amount of green Palmolive dishwashing soap and placed the pads inside. I shook it up, let it sit, and then after about 30 minutes removed the pads and rinsed them a bit. I then figured I’d put them back in the washing machine for a second spin to get the dishwashing soap out. Since the pads hadn’t dried very well the last time when they had been wrapped up in socks I put them inside pillowcases this time, on the theory that, since the pillowcases were much thinner than the socks they wouldn’t hinder the drying process as much but they’d still protect the pads from scorching.
After leaving them in the dryer for an hour I took them out and they were still dripping wet. Fed up, I removed them from the pillowcases and put them in for a second hour-long cycle completely unprotected. When I took them out they were almost completely dry. They weren’t scorched or damaged at all. I let them sit overnight to dry out completely and now the stink is nearly imperceptible. If I really get my nose in there I can still faintly smell the cologne, but I feel that this is good enough.
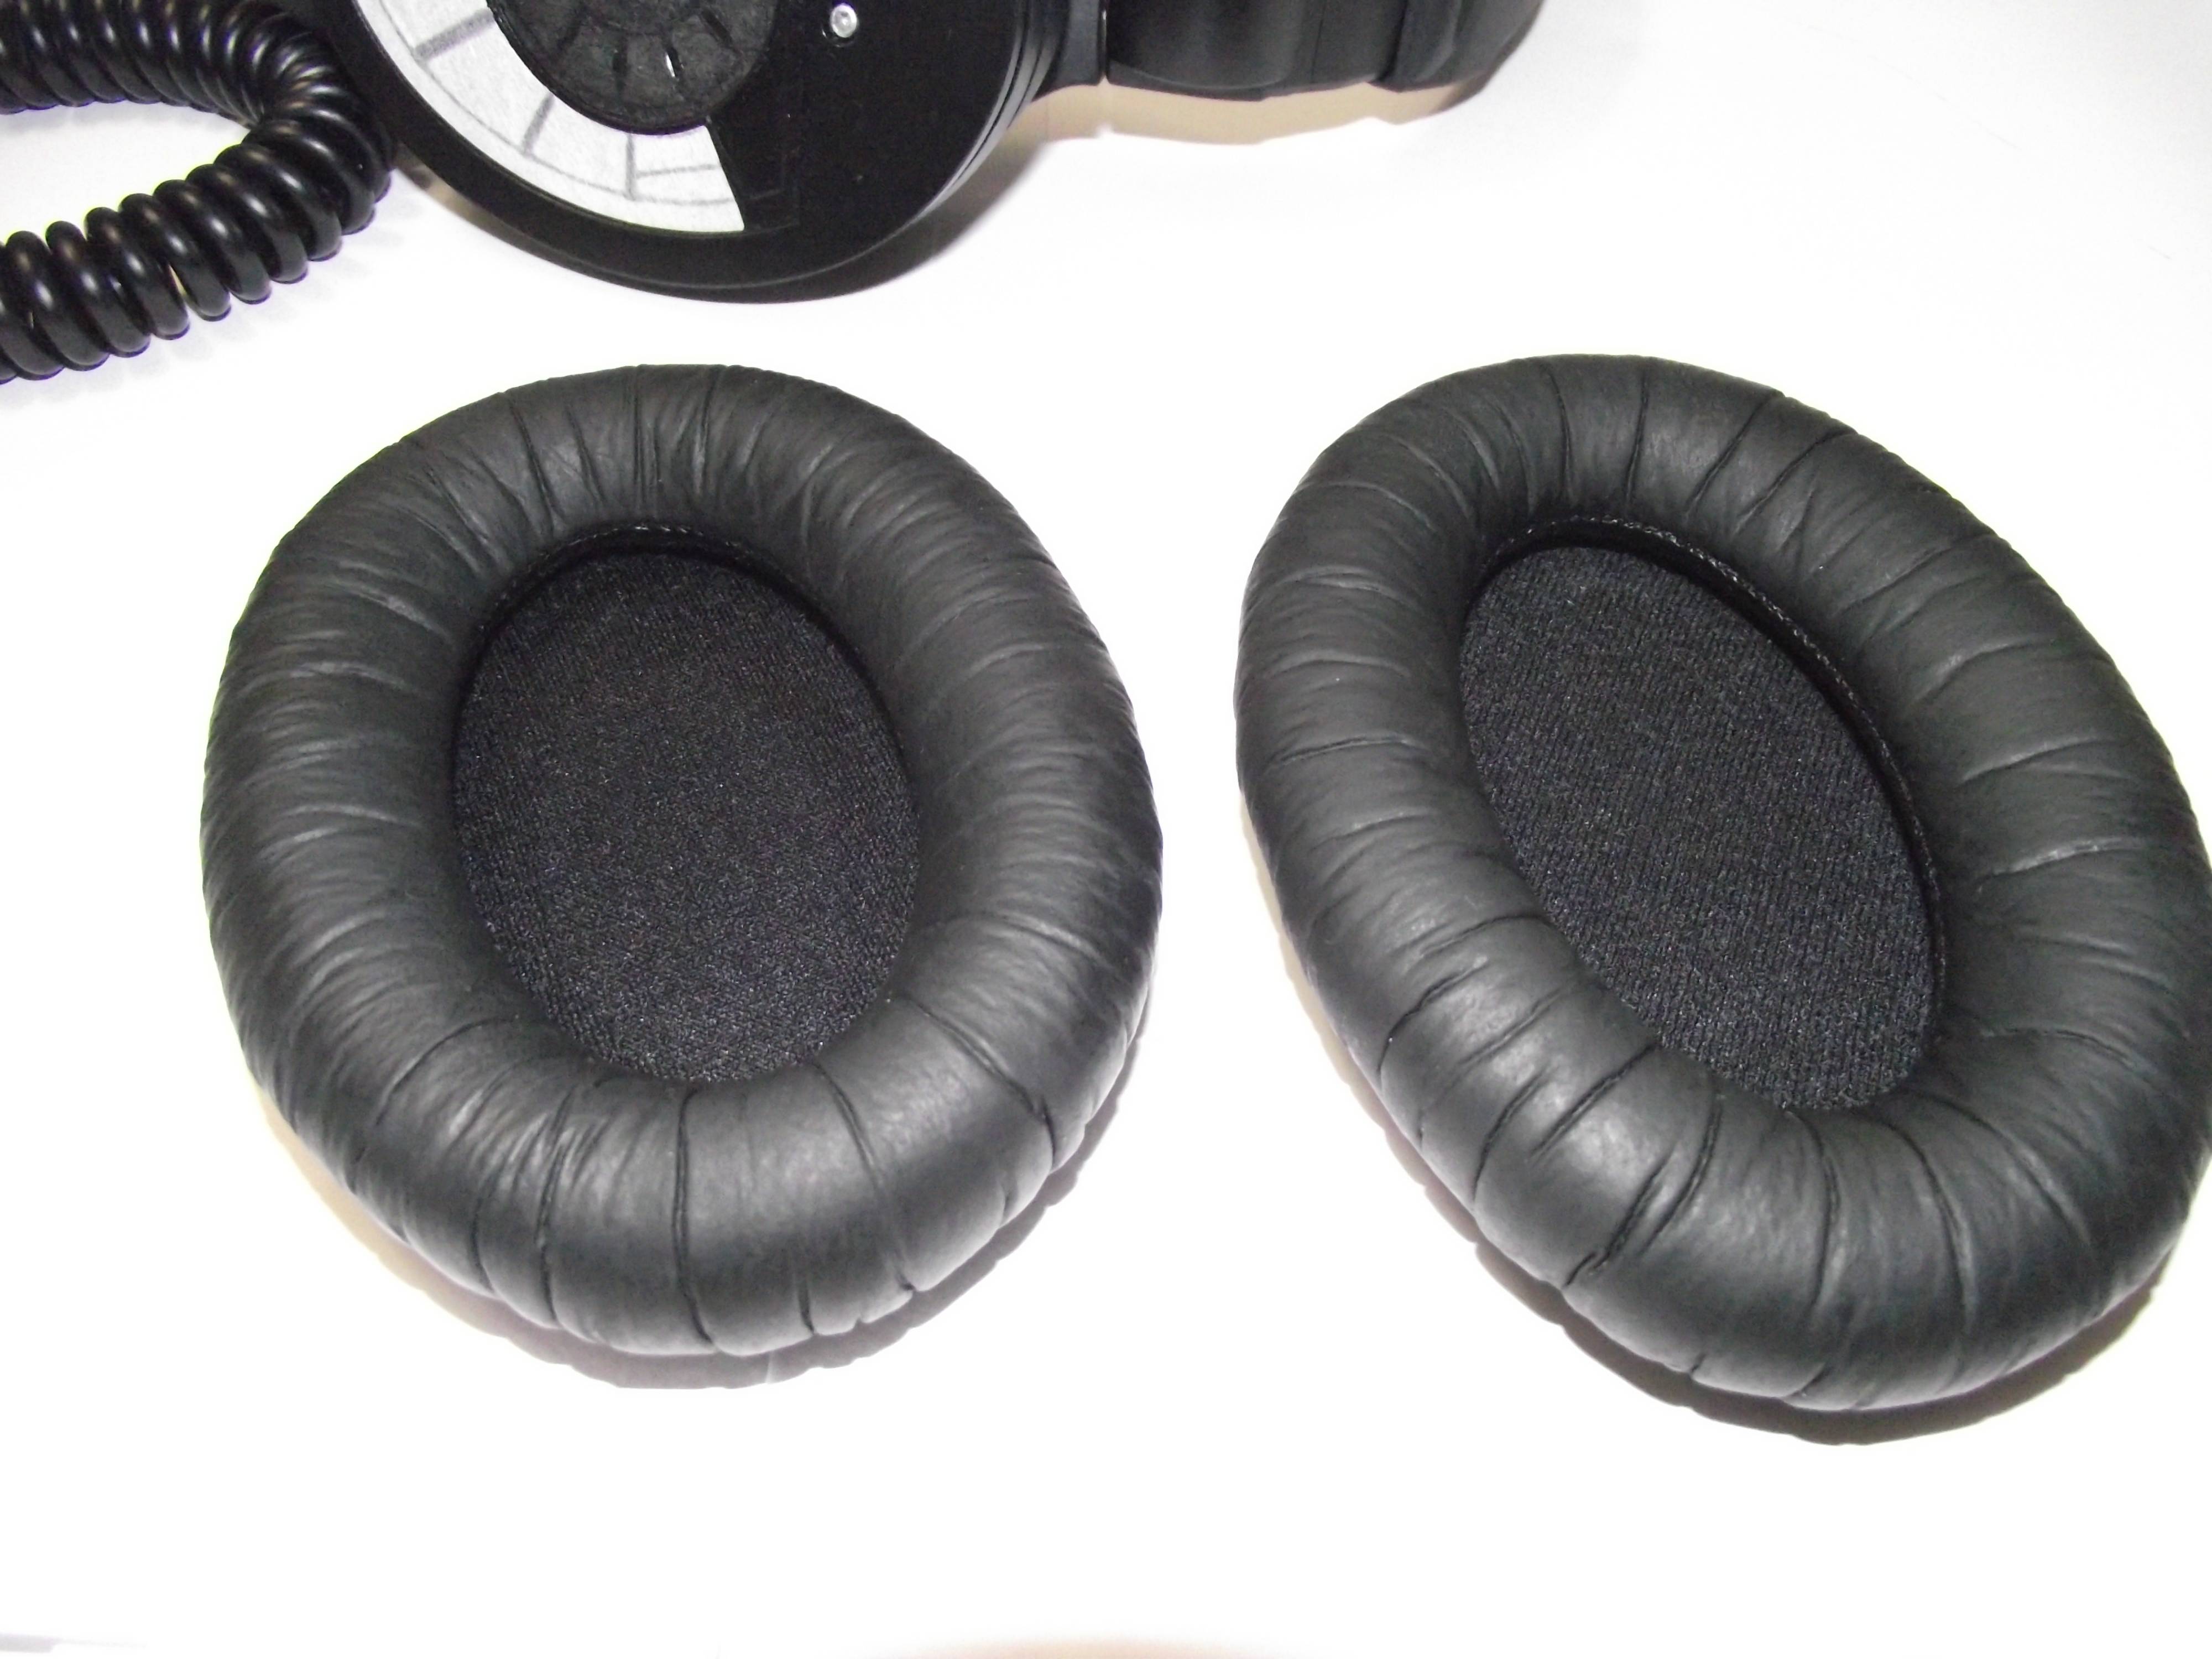
Now nearly stink-free!